Wednesday, November 29, 2006

Kitchen Gadgets I could Live Without But Prefer Not To - #2

I'm off to the Sacramento Valley tomorrow for a long weekend. Since I've nothing to offer you in the food department, I'll leave you with another installation of kitchen gadgets I could live without but, damn, they make my work easier so why would I want to?

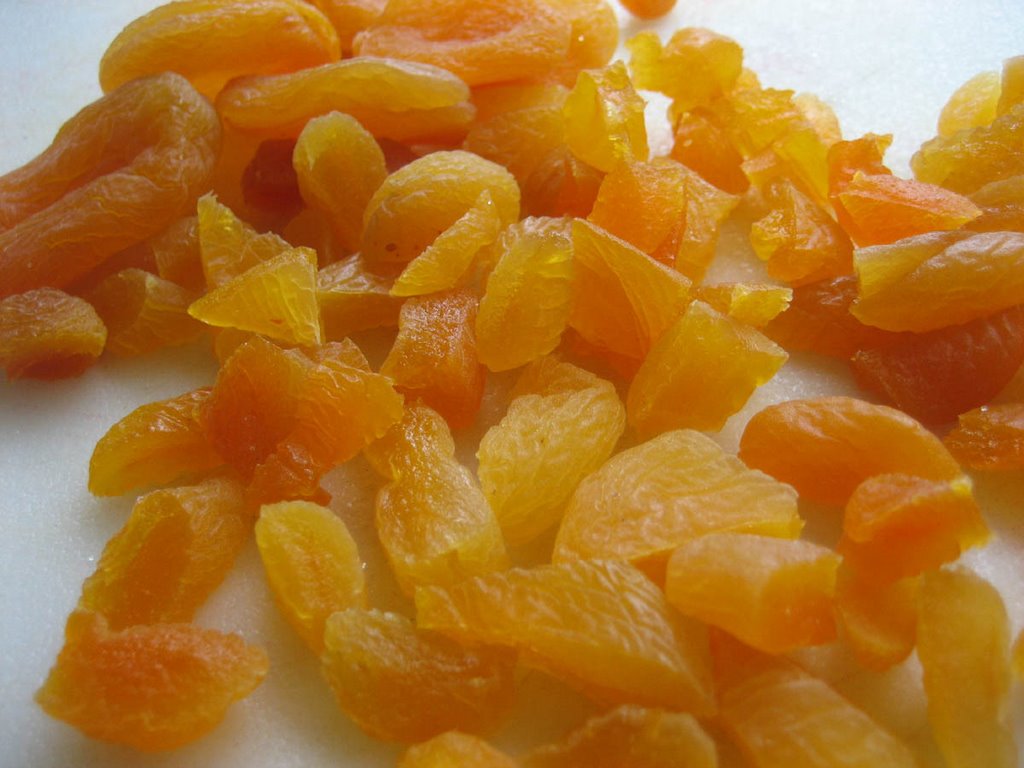
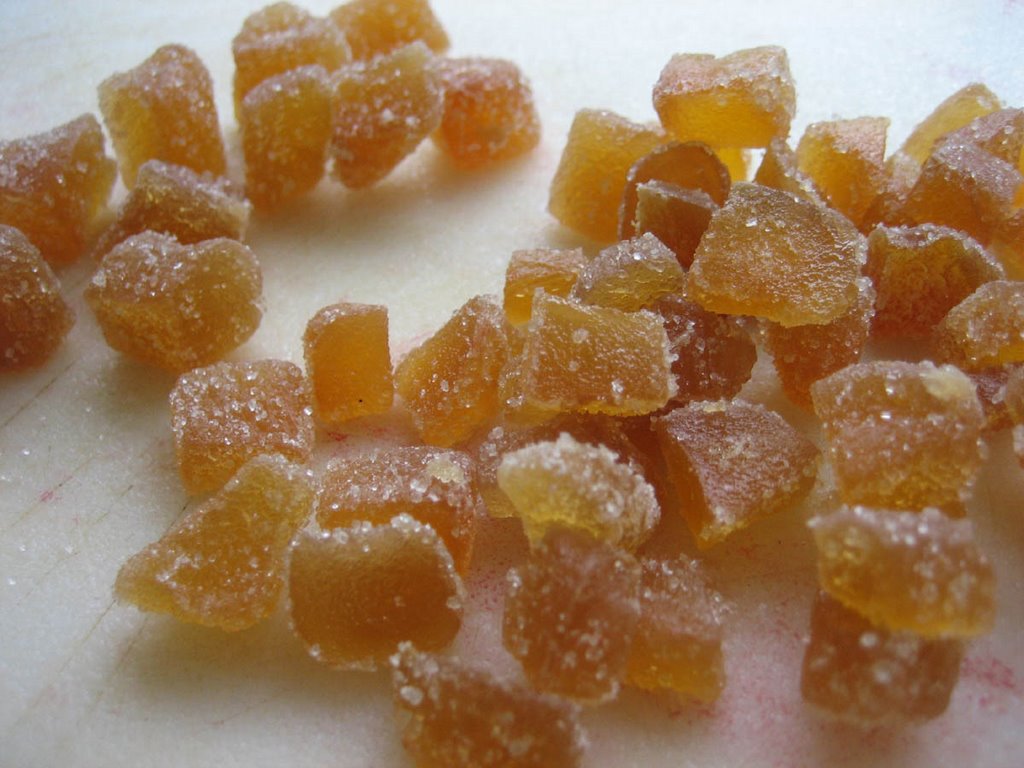
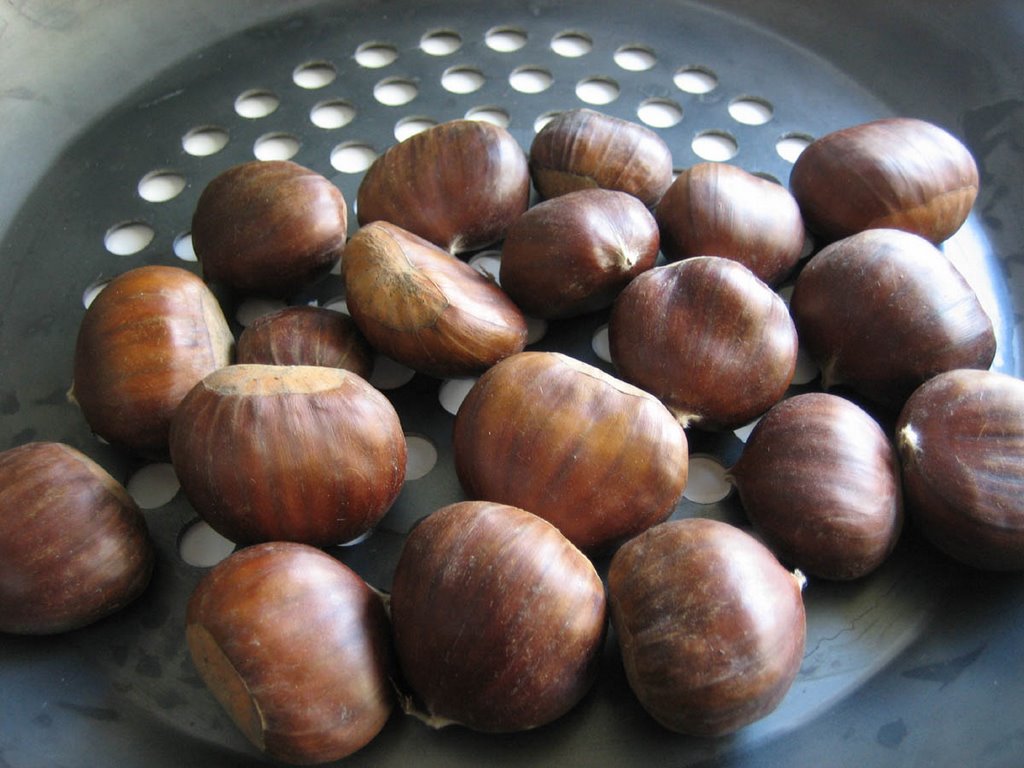
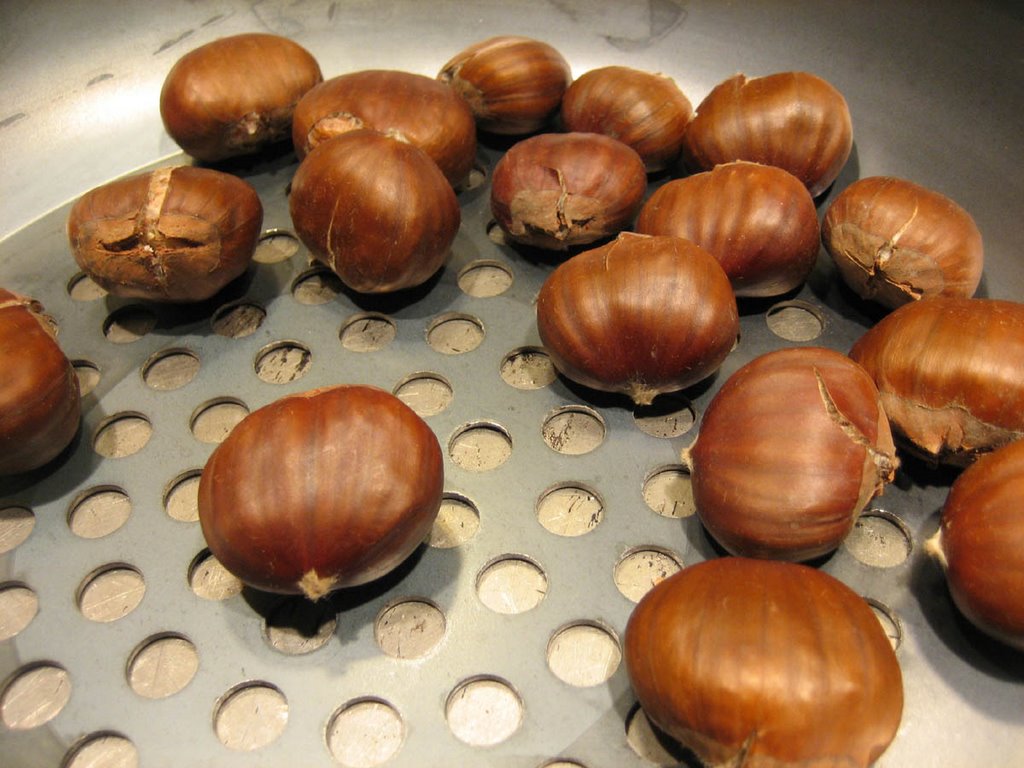
This small pair of scissors lives in the drawer with my paring knives. It doesn't touch anything that can mar the smooth, sharp edges. It snips things like Turkish apricots, candied ginger, herbs, the bottoms of chestnuts, pie dough, and parchment with aplomb. I do not use it to cut meat, having another pair for that task.

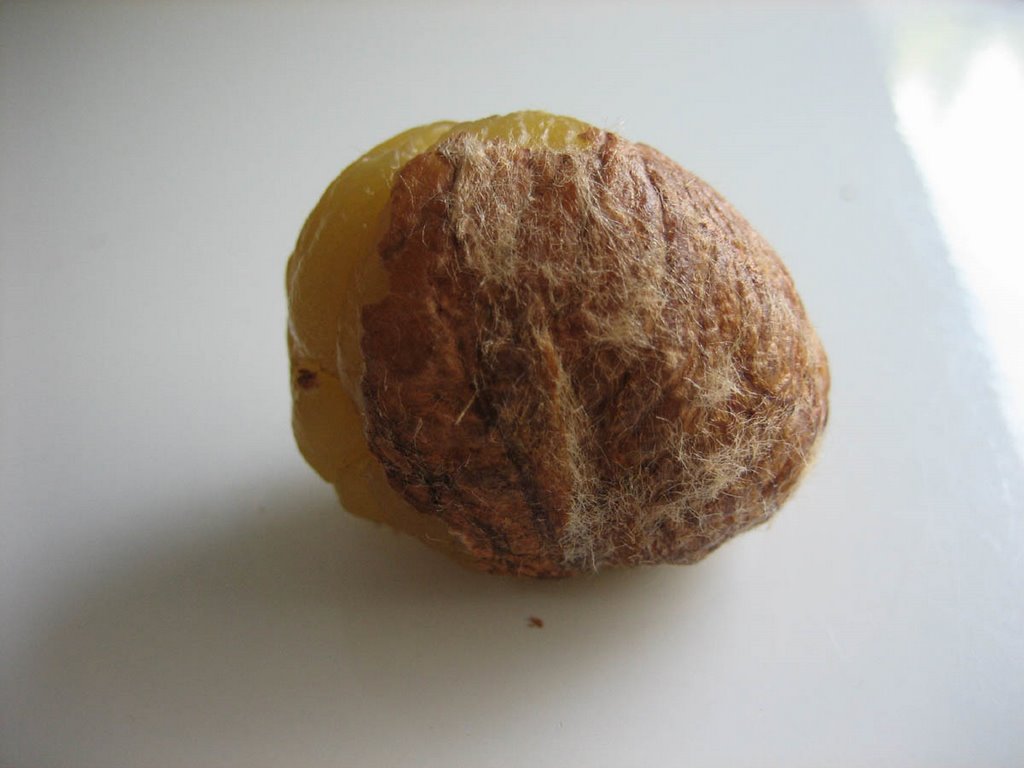
I coddle this tiny gem; washing it immediately after each use and then lovingly drying it with a clean dishtowel before gently putting it away in its compartment. In turn, it cradles my fingers in plush, softly molded, rubberized handles, fits my hand perfectly and works practically without effort on my part. Its sharp little points easily pierced these chestnut shells, making short work of an otherwise arduous task.

Sound silly? You'll just have to get a pair for yourself. You'll see.

I wish I could tell you the brand name for these scissors but there is not a mark on them and I've long since tossed the wrapping they came in. I got them at the Nugget Market in Davis though, and am going there this weekend so I'll try to find out more about them and let you know. That is if, like me, you've decided you'd prefer to not live without them.

Monday, November 27, 2006

Roasted Vegetables In Rich Brown Turkey Broth

Ahhh! Just what is needed after the indulgences of Thanksgiving. Oven roasted, slightly caramelized, cauliflower, broccoli, garlic and carrots in a de-fatted, rich brown broth made from the Thanksgiving turkey carcass. In the past, I've made more substantial turkey soups using barley or potatoes, onions and other high carb starchy veggies. But this year my only slightly older body cried out for lighter, lower carb fare.

Our rather small 14-pound turkey was rotisseried over our gas grill this year by the Mastergriller himself. Something he hadn't tried before. It turned out surprisingly well. After rubbing the outside of the bird all over with olive oil, he sprinkled on NapaStyle Toasted Spice Rub and kosher salt, patting them well into the skin. He stuffed the cavity with halves of lemons, sprigs of fresh rosemary and fresh sage leaves. The trussed and spitted bird was placed in the grill at 500 degrees for just a few minutes, then the temp was lowered to 350, the rotisserie turning all the while, for 2 1/2 hours. This turned out to be about 1/2 hour too long, but still the meat was delicious, perfumed with the toasted spices, herbs and lemon.

Later the herb-y carcass was put into a stock pot along with deeply browned pieces of skin, the wings and drumsticks, the herbs from the cavity, a chopped sweet onion, some celery, carrots, allspice berries, whole black peppercorns and 2 gallons of water, all cooked down to a delicious, complex broth. Allowed to cool overnight in the fridge, the fat that had congealed on the surface was easily removed leaving a luscious, thick brown liquid that needed nothing more than a bit of salt to make the flavors shine.

Then, in a large roasting pan, florettes of broccoli and cauliflower, peeled garlic cloves and baby carrots were drizzled with olive oil, dried thyme, kosher salt and freshly ground Tellicherry pepper and roasted in a 375 degree oven until soft and browned, bringing out the sweet, toasty flavors of the veggies and the soft nuttiness of the garlic.

I kept the broth separate from the vegetables, combining them just before sitting down to eat by bringing the broth to a simmer and adding the roasted veggies and diced pieces of leftover turkey, leaving them in the pot just long enough to become hot. I could eat this forever.

Sunday, November 26, 2006

A Walk Around Trinidad Head

What? No Food? No recipes? What's going on here? I'm full, people. I think if I see another piece of turkey, another yam, another grain of stuffing I'll go mad.

So while the soup is burbling away on the stove (of course I'm cooking - gotcha though, didn't I?) I thought I'd show you the views from our post-Thanksgiving walk around Trinidad Head, a small, rocky island of great renown in our "front yard". And if I seem a bit smug about calling this stretch of the beautiful northern California coastline my front yard, I am. Click here for an interesting read on the history and European discovery of both Trinidad and Humboldt Bays.

Coming up the trail on the north side of the Head, you look across the

Looking due west, the rocks are sea lion and pelagic bird refuges.

We're on the south side of the Head now, looking down Clam Beach and on to Humboldt Bay, Table Bluff and, although I couldn't catch it with my camera, Cape Mendocino way off in the southern distance.

I wish they would underground the poles and phone lines. They mar an otherwise beautiful view. In the shadows beyond our group, you can just make out the cross that was erected by the Spanish explorers who "discovered" Trinidad in 1775.

Descending the Head on the east side, beautiful Trinidad village comes into view.
That's it for now folks. I hope I've given you enough informational links to keep you busy until the soup is ready.

Friday, November 24, 2006

Pumpkins And Persimmons


My sister, Cynthia, brought me Australian Blue pumpkins that she grew in her Chico garden, and giant hachiya persimmons from her neighbor's tree. Puddings, cookies, flans, pies, stews and soups cannot be far off.

Thanksgiving Table

My sis and I are in the kitchen cooking, while Mark set the table.

Just before sitting down, most thankfully, to dinner.

Teenager's carb-loaded plate.

A few recipes will follow.

Wednesday, November 22, 2006

Cranberry Apricot Ginger Chutney

I came across the foundation for this condiment many years ago, wrote the recipe on a post card, folded it in half and stuck it in the yellow-orange plastic recipe box that I've had since I was in my 20s. Over the years I've changed the measurements and ingredients quite a bit from the original and in doing so have made it mine. I wouldn't for the life of me know to whom to attribute it anyway.
I like this chutney for its sharp tangy-sweetness and slight heat from the cayenne. It makes a wonderful addition to "day after" turkey sandwiches.
Fresh cranberries

Organic crystallized ginger cubes, chopped

Cranberry Apricot Ginger Chutney
(Print Recipe)
Ingredients:
3 cups fresh cranberries, some coarsely chopped (chopping is not necessary though)
1/4 cup Splenda Brown Sugar Blend or 1/2 cup regular light brown sugar
1/2 cup chopped crystallized ginger
1/4 cup golden raisins, left whole
20 Turkish dried apricots, snipped into pieces with kitchen scissors
1 1/2 teaspoon cinnamon
1/4 teaspoon ground ginger
1/8 teaspoon allspice
1/8 teaspoon cayenne pepper, or 1/4 teaspoon if you like it hotter but be careful, too much can ruin the taste
3 tablespoons cranberry juice, such as one sweetened with apple juice, not sugar
tiny pinch kosher salt
1/3 cup toasted, roughly chopped pecans


Preparation:
In a medium saucepan, combine all the ingredients except for the pecans, and place over medium heat.
Stirring often, cook the mixture until the brown sugar has melted, the berries begin to pop and the ingredients begin to meld together and become juicy.
Remove from the heat and stir in the pecans.
Allow to cool in the saucepan then remove to a lidded storage container and place in the fridge to chill.
Remove from the fridge about 1/2 hour before serving to allow it to come to room temperature.

Cook's Notes:
Low carb warning! If you are counting carbs this chutney will not appear on any low carb food list. Even with the use of the Splenda Brown Sugar Blend, it's loaded with fruit sugars.

Tuesday, November 21, 2006

Lime Jello Salad . . .

... or Mouldy Moldy Salad, as we kids used to call it to tease our mother. My mother served this Jello salad at Thanksgiving and Christmas for as long as I can clearly remember those holidays. She must have started sometime in the 50s, as the WearEver aluminum ring mold that's shown here is what she always used and it comes from the late 50s. In my family, not having this molded gelatin concoction at the Thansgiving table would border on the unforgiveable.

On the handwritten 3x5 recipe card, it says that the recipe came from Jeanne Bryant, a friend of my mother's from our church potluck dinners that we attended on Sunday nights in the Fellowship Hall of the Davis Community Church (what memories I'm having!). From the first time my mother put this on our dinner table, she was not allowed not to make it every holiday season. We children would jump up and down in her kitchen chanting "mouldy moldy salad! mouldy moldy salad!", at which my mother would pretend to be annoyed. The salad always appeared on her Thanksgiving table; of such are loving memories and traditions made. My mother is gone now and although it's been a number of years, I'm particularly missing her as I write this.

I inherited my mother's mouldy moldy salad ring mold and every Thanksgiving I bring it down from the top of my kitchen cupboard, wash and dry it and set it out to receive this time-honored, if a little old fashioned, treat.

Before I assembled the recipe today, I thought of low carbing it by using diet Jello and reducing the fat content by using low or no-fat ingredients. Not only could I just then feel my mother cringe at such blasphemous thoughts, it occurred to me that some things are sacrosanct and just shouldn't be messed with. When the salad is un-molded for Thanksgiving dinner tomorrow, I'll take a photo and put it on this post. Note: 11/2008, it took 2 years, but I finally remembered to take a photo.

Lime Jello Salad (or Moldy Salad)
Recipe courtesy of Skip Hills via Jeanne Bryant
Ingredients:
1 large package lime Jello brand gelatin
2 cups boiling water
1 #2 can* crushed pineapple in its own juice
1 cup canned milk, such as Carnation
1 cup mayonnaise
1 cup cottage cheese
1/2 cup walnuts, chopped finely
Preparation:
In a large glass or ceramic bowl, dissolve the Jello in the boiling water, stirring until all the gelatin has melted and the liquid is clear. Allow to cool to below lukewarm.
Stir in the rest of the ingredients, gently using a wire whisk. Having a few lumps of mayo here and there is part of this salad's charm.
Pour into a 12-cup mold of your choice and chill until the gelatin is completely set.**
To un-mold, fill your kitchen sink with about 3 inches of very hot water.
Quickly dip the mold into the hot water, half-way up the sides, for just a few seconds, taking care not to splash water onto the gelatin.
Take the plate or platter you wish to present your molded salad on and place it over the top of the mold.
Holding the mold and the plate firmly in your grasp, flip the whole thing over and give it a quick up and down shake.
The gelatin should gently drop onto the serving plate. If it doesn't, repeat the process with the hot water dip. It's important to not leave the mold in the hot water for more than a few seconds as it will melt the gelatin at the edges and compromise your presentation.

Cook's Notes:
* This is what the recipe says, a number 2 can. Since I don't know what size that is, I've been using a 20-ounce can and it has worked just fine.
** This gelatin mixture will set up much faster than regular jello because less liquid is used. I put it in the fridge just over an hour ago and it's already set. It will hold, unmolded in the fridge for several days.

Monday, November 20, 2006

Wild Mushroom Ragout And Creamy Cheesy Polenta

I've been making variations of this recipe for over 20 years and I never fail to change something about it everytime I do. I've used cheddar and jack cheeses, all white button mushrooms, large portobellos, different kinds of polenta. I've made it vegetarian and not vegetarian. It lends itself to adaptation. The recipe that follows is the way I prepared it for dinner guests the other night. They had to look twice to make sure they weren't eating meat.

A note to low carbers: For those of you who count carbs, you should know that polenta is not a low carb food. You can enjoy the ragout with a small spoonful of polenta, or skip the polenta entirely and use Dreamfield's Pasta. 'Twould be dreamy, I'm sure.

Wild Mushroom Ragu With Creamy, Cheesy Polenta
Click here to print recipe
Ingredients:
For the polenta
2 cups dry polenta (I used a locally made product from Fanucchi-Salizzoni Food Company)
10 cups water (or stock, but I used water for this)
2 teaspoons salt, or to taste
freshly cracked black pepper
1/4 cup unsalted butter
1 cup parmesan, grated coarsely

For the Ragout
1-2 pounds assorted mushrooms, I used crimini, shiitake and oyster, cleaned and sliced
3 tablespoons unsalted butter
4 ro 5 sprigs fresh thyme
kosher salt and freshly ground black pepper to taste
1 cup good, dry red wine (I used the Cab we were going to serve with dinner)
1 cup good beef broth
1-2 tablespoons unsalted butter

Preparation:
Polenta
In a large stock pot, bring the water to a rolling boil.
Whisking, add the polenta to the water in a steady stream. Continue whisking until the polenta thickens.
Turn down the heat so the polenta stays at a simmer. Stir in the salt and pepper. Whisk occasionally so it doesn't burn on the bottom.
When the polenta has thickened, remove the pot from the heat and add the parmesan and the butter, stirring until they have both melted and the polenta is smooth.
Cover the pot with a clean, dry towel and top with a lid. Set aside in a warm place.

Ragout
In a large pot or very large skillet, melt the 3 tablespoons of butter over medium high heat.
Add the mushrooms to the pot and stir to completely coat with the butter.
Saute the mushrooms until they are golden brown, stirring occasionally, and very soft.
Add the thyme sprigs (you will remove the sprigs at the end of cooking, leaving the tiny leaves in the ragout) to the pot and season the mushrooms to taste with salt and pepper.
With the mushrooms still in the pot or pan, deglaze the bottom of the pan with the red wine, scraping up any browned bits of mushroom.
The mushrooms will have created their own juices during the saute process. Reduce this wine and mushroom liquid by half.
Add the beef broth and repeat the reducing process until the liquid is reduced by 1/2 again and has thickened, covering all the mushrooms with a juicy sauce.
Remove the pan from the heat and stir in the 1 or 2 tablespoons butter to create a velvety-smooth sauce.

To serve, spoon hot polenta onto a plate and ladle the mushroom ragout over the top.

Cook's Notes:
If this dish seems too butter-loaded for you, I've used both Smart Balance and Earth Balance spreads with good results.
11-21-06: I added the forgotten bag of polenta photo today. Sorry about the double post. This polenta mix contains sun-dried tomato, bell peppers and a chicken base.

Sunday, November 19, 2006

Low Carb Pumpkin Cheesecake

I love cheesecake but don't make it very often. You know, the fat, the sugar... arrrg! For a while, if I wanted a dessert like this, I would adapt it using low-fat dairy products, Splenda and even an egg substitute*. While I still use Splenda, on doing further research, I found out that low-fat items have more carbs in them. Yuk! I count carbs because it works for me. But I also have to watch the amount of fats I ingest bringing us back around to the ol' "I don't make it very often" saw.

'Tis the Season however, so this cheesecake graced my table last night to the delight of our guests. Using full fat ingredients, Splenda, and nuts as a crust instead of cookie crumbs or graham crackers, makes this dessert very low in carbs. Each serving (if you cut the cake into 12 equal pieces) has 6 grams of usable carbs and 6 grams of protein. See how I sneakily left out the fat grams? You don't want to know.

People, just because I use Splenda in place of sugar doesn't mean that I think everyone should. If you like to use sugar, eschewing other types of sweeteners in your cooking and baking, far be it from me to criticize. Therefore in this recipe, which is adapted from Dana Carpender's 500 Low Carb Recipes, I'll give you both Splenda and sugar measurements which you can use however you please. Either way, this cheesecake is a winner.

Low Carb Pumpkin Cheesecake
Adapted from 500 Low Carb Recipes

Ingredients:
1 cup toasted pecans, chopped
2 - 8 ounce packages cream cheese brought to almost room temperature
3/4 cup Splenda Granular OR 3/4 cup regular sugar OR 1/2 cup Splenda-Sugar Blend
2 teaspoons good vanilla (check bottle for no added sugar or corn syrup)
1 1/2 cups canned pumpkin (not the pie mix stuff), preferrably organic
1/2 cup sour cream
4 eggs
1 1/2 teaspoons cinnamon
1 teaspoon ground ginger
1/2 teaspoon nutmeg (freshly grated is best)
1/4 teaspoon ground cloves
1/4 teaspoon salt

Preparation:
Set your oven to 300 degrees with the oven rack set in the middle.
Butter the bottom and sides of a 9-inch springform pan. Set aside.
Beat the cream cheese, Splenda or sugar and vanilla in the large bowl of an electric mixer until the mixture is smooth.
With the mixer on medium speed, add the pumpkin and sour cream and mix thoroughly.
Add the eggs one at a time, beating between each addition.
Add the spices and salt and mix to blend. Set cheesecake mixture aside.
Sprinkle the toasted pecans over the bottom of the springform pan, spreading them out to completely cover the bottom**. (See my notes at the bottom of this post).
Immediately pour the batter over the nuts then tap the pan gently on your kitchen counter to settle the batter.
Bake for 1 hour plus 10 minutes, or more, until a knife placed in the center of the cheesecake comes out clean.
Remove from the oven and place on a cake rack. Allow to cool for at least 20 minutes before removing the ring from the pan.
This cake must chill in the fridge for at least 2 hours before serving.

To serve, cut into 12 equal wedges and top with a dollop of Splenda-sweetened whipped cream or a dollop of creme fraiche***. Pour a small glass of port, such as Taylor Fladgate 20 yr. old tawny port. Enjoy!

Cook's Notes:
* I have made this cheesecake using egg substitute and it worked pretty well. But whole eggs add a richness that simply can't be beat. If you excercise portion control you'll be just fine.

** I have found, at least with my springform pan, that the combination of the butter on the bottom of the pan and the chopped pecans, toasted or not, sprinkled over to make the base for the cheesecake batter, causes the pecans to turn black. I have a suspicion that this is because of the nuts and butter being in direct contact with the metal pan. So, next time I make this recipe, I will butter the pan then put down a piece of parchment paper that's been cut to fit in the bottom of the pan, butter the parchment THEN sprinkle in the nuts. I didn't put these instructions in the recipe above because I forgot to do it this time:(

*** If you really want to doll up this cheesecake, I recommend spreading a layer of creme fraiche over the top of the entire cake before cutting it. Waaaaay decadent, but low carb. And we like that.

PS: Check out Kalyn's Sugar Free Pumpkin Cheesecake for a wonderful and different version of this seasonal treat. Kalyn is also making an on-going post of recipes that are lower in sugar and fat for the holidays. Check her list out here.

Friday, November 17, 2006

Mashed Yams With Garlic, Chestnuts & Sweet Vermouth

I love the deep orange yams that are prevalent in stores this time of year. Called garnet yams, they are less starchy and higher in fiber than potatoes. Having just roasted a batch of chestnuts, I'm experimenting with how to use them in dishes for the holidays. This one is definitely a keeper.

Mashed Yams with Garlic, Chestnuts & Sweet Vermouth
Christine's original recipe
Ingredients:
3 large garnet yams, peeled and cut into large chunks
1 tablespoon butter or Earth Balance buttery spread
4 cloves garlic, minced
7-8 chestnuts, roasted, peeled and chopped
1/2 cup sweet vermouth
2 tablespoons pure maple syrup
Butter (optional)
sea salt and freshly ground black pepper to taste

Preparation:
Place yams in a pot of boiling, salted water and cook until very tender. Drain, return to pot and hold off heat.
Meanwhile, in a heavy skillet over medium low heat, saute the garlic and chestnuts in the butter until the garlic is softly cooked.
Add the sweet vermouth and continue to cook until the liquid has reduced by half.
Place the pot of yams over very low heat and mash with a wooden spoon until almost smooth. Don't beat the yams, just gently smash them.
Pour the garlic, chestnut, vermouth mixture over the yams and fold in to fully incorporate.
Add the maple syrup and maybe a small amount of butter or Earth Balance.
Season to taste with salt and pepper.

Thursday, November 16, 2006

Roasted American Chestnuts

UPDATE: For a wonderful treatise on chestnuts, by an American expat living in France, please click here.
At the Farmers Market last Saturday a Willow Creek farmer had boxes of freshly harvested American chestnuts on display next to a gas grill in which two cast iron skillets of chestnuts were roasting, giving off such an aroma that dozens of people were standing around, transfixed, waiting to have a taste. I asked him how many trees he had and he replied that he had six. Six trees and all those chestnuts. And he said there were more on the trees waiting to be harvested. This coming Saturday is the last Farmers Market day of the season for the Arcata Plaza. You will find me waiting in line at the "chestnut guy's" stand.

To my knowledge, I'd never seen a chestnut tree until we went to Europe last year. In the Perigord Noir region of France, young chestnut trees spread their branches over lush green grass. In Domme, the parking lot was lined with them, their fall colors of rust, orange and yellow a marked contrast against the blue Autumn sky. I have three of those Domme chestnuts in a dish on my kitchen ledge. I had put them in a jacket pocket and forgot about them. They quietly sailed through customs.

When we went to New England this fall, I saw my first American chestnut tree in a revolutionary war cemetary in Newburyport, Mass. There's a poignancy about these once majestic trees; maybe it's because of their struggle to survive both disease and human harvest in this country. A strong movement is afoot in the eastern US to revive the American Chestnut to its former range and glory. You can read more about that movement here.

I've tried roasting chestnuts just one time previous to this and the results were disappointing. Then, I didn't know how to tell when a roasting chestnut was "done". Now I know that you roast them for at least 30 minutes in a 350 oven and, as Mr. Chestnut Guy said, "don't burn them." They can also be roasted in a covered grill, or boiled in water. One thing you must do before roasting is to make a criss-cross cut in the bottom of each chestnut. This keeps them from exploding which I guess could be surprising, messy and a bit dangerous, depending on your cooking method.

I found that "using a sharp knife", as Mark Bittman in his book How to Cook Everything instructs for making the X in the bottom of the chestnut, didn't work for me and seemed fraught with the danger of me slicing into a finger. My little gray kitchen scissors with their very sharp points, however, worked like a charm.

To roast the chestnuts you can use a cast iron skillet, a chestnut pan (as pictured) or a piece of foil punched with holes. I'm sure there are many other ways to go about this; an old-fashioned popcorn popper on a wood stove comes to mind.) So, I pre-heated my oven to 350, snipped those Xs into the bottoms of the chestnuts, covered the pan with foil, punched holes in the foil with a skewer then placed the pan in the oven. After 20 minutes, I opened the foil lid and pulled a chestnut out to check for doneness. It was still a bit raw-tasting, although I don't really know what a raw chestnut tastes like, so I recovered the pan, gave it a shake and put it back in the oven for another 10 minutes. And that seemed to be the perfect timing -- 30 minutes. The shells had peeled back somewhat from the X cuts and were slightly loose around the nut. I pulled the pan out of the oven, took the foil off and let the nuts cool until I could handle them.

Just peeling the shell off of a nut isn't enough. Inside is a papery brown skin that not only covers the entire nut, it's also embedded in the deep fissures. Removing this skin was time consuming. I found that the easiest way to do it was to hold a small sharp knife at a 90-degree angle to the nut and scrape. Use the point of the knife to release the skin from the fissures. Clean fingernails also come in handy.

Here they are in all their sweet, naked glory. They look like small brains, don't they? Chestnuts have a rather dry, grainy texture and a slightly sweet, starchy taste. I like them eaten out of hand but wouldn't do too much of that as they are definitely not a low carb food.
In 1/2 cup of roasted chestnuts there are 37.9 grams of carbohydrate and 5.5 grams of fiber for a net carb count of 32.4 grams. Still, I plan to use them in some special dishes this holiday season and post them here.
It's time for Weekend Herb Blogging again, hosted this week by Nandita of Saffron Trail. Begun over a year ago by my friend Kalyn at Kalyn's Kitchen, you can learn about this weekly blogging event by clicking here. If you want to join in the fun, send your link in an e-mail to saffrontrail AT gmail DOT com.

Wednesday, November 15, 2006

Roasted Beets & Balsamic-Sauteed Figs On Arugula With Toasted Walnuts

A recent addition to my growing cookbook collection, The Girl & The Fig by Sondra Bernstein, is packed with mouth-watering recipes, most of which are or have been served up in her Sonoma restaurant of the same name. Although I've had this book since early September, I confess that until now I hadn't tried any of the recipes, mostly because many of them involve the use of sauces and other condiments that you would need to make ahead of time to have on hand before beginning the recipe you desire. I'm rarely that organized.

In perusing my cookbooks for Thanksgiving dinner inspiration, I began leafing through this book again and came across a salad recipe that uses roasted beets and Black Mission figs. The recipe was simple and straightforward, no pre-made sauces required, so I tried it. In fact it was a bit too simple so of course I changed it, morphing it into what I think is a delicious amuse bouche* that I will present to our Thanksgiving guests as they sit down to our table.

Roasted Beets & Balsamic Sauteed Figs on Arugula with Toasted Walnuts
Inspired by The Girl & The Fig Cookbook by Sondra Bernstein

Ingredients:
1-2 red beets or any color beets of your choosing
1 basket Black Mission figs (at least 12 or more figs)
1 tablespoon butter
1 teaspoon brown sugar
2 tablespoons aged balsamic vinegar
Fresh arugula leaves, preferrably organic
1-2 toasted walnuts**, minced

Preparation:
Wash the beets and cut the leaf stalks to with 1/4-inch of the tops of the beet. Trim the root ends.
Wrap the beets individually in foil, place on a baking sheet and roast in a 375 oven for 1 hour or until the beets can easily be pierced with a fork.
When done, remove beets from the oven, open the foil packets and allow them to cool to room temperature.
When cooled, peel the beets completely and cut into very small dice, about 1/4 inch. Set aside.


Wash and dry the figs, remove the stems and cut in half stem to end.
Melt butter and brown sugar in a heavy cast iron skillet over medium low heat.
When the butter is melted, add the balsamic vinegar and turn the heat to low.
Add the figs to the skillet, cut side down and gently saute until golden brown. Shake the skillet from time to time so the figs don't stick to the bottom. Watch the heat so neither the figs nor the sauce burns.
When the figs are golden on the cut side, flip them over, shaking the pan to cover the figs with the sugar-vinegar sauce and saute for about 1 minute more.
Immediately remove from the heat and cool in the pan. When cool enough to handle, cut the figs into small dice, about 1/4 inch. Reserve the sauce.

To assemble:
Combine the diced beets, figs and pan sauce and mix gently.
Cut at least 12 arugula leaves so that you have about 2 square inches of leaf, discarding the stem ends or reserving them for another use.
Place a scant tablespoon of the beet-fig mixture on each arugula leaf, sprinkle with a few toasted, minced walnuts* and arrange each one on a tiny plate for each of your guests to enjoy.
Don't overcrowd the arugula as the amuse* is meant to be eaten by wrapping the leaf around the beet mixture and popping it into your very amused mouth.

* Small bite, or cook's offering, to "amuse the mouth".
** Walnuts can cause an allergic reaction in some people. Toasted pecans may be used instead. Be sure to mince them.

Monday, November 13, 2006

Cream Of Mushroom Soup With Celery Root, Port & Thyme

A few days ago, on a gloriously beautiful Saturday, I bought some organic cremini mushrooms at the Farmers Market thinking they'd be nice sauteed with a chicken breast or something along those lines. Now it's stormy and rainy up here on the North Coast and when I think of what I might make for dinner these days, nothing but warming comfort food will satisfy. Soup! Cream of mushroom soup. The kind I used to make when my kids were little. The recipe I've always used comes from the 1963 edition of The New Good Housekeeping Cookbook . This cookbook belonged to my mother and she gave it to me years ago. As I turned to the well-worn page, I saw with a more critical eye that the recipe, the one that's not out of a can, needed some serious updating. I started by substituting a celery root, or celeriac for the one tablespoon of celery seeds...

Cream of Mushroom Soup with Celery Root (Celeriac), Port & Thyme
Ingredients:
2 tablespoons unsalted butter
1 medium celeriac or celery root, washed, peeled & coarsely chopped (about 2 cups)
1/2 of a large Mayan or other sweet yellow onion, peeled & coarsely chopped (about 2/3 cup)
1 teaspoon good dried thyme
1/4 cup ruby Port
1 1/4 pounds cremini mushrooms (you could do a mix of wild and domestic if you wish), cleaned & sliced (hold a few caps aside for the garnish)
2 cups good chicken stock

For white sauce:
1 tablespoon unsalted butter

3 tablespoons flour
1 cup heavy cream
1 cup 1/2 & 1/2 (or you could 2 cups milk instead of the cream and 1/2 & 1/2)*
Sea salt and freshly ground black pepper to taste

Preparation:
In a heavy large skillet, melt the butter over medium low heat.
Add the celeriac and the onions and saute, slowly, until softened.
Add the sliced mushrooms and the thyme and saute a few minutes more until the mushrooms soften.
Add the ruby Port and stir.
Increase the heat to medium high, add the chicken stock and bring to a simmer. Simmer for about 20 minutes. Do not allow to boil. You don't want to evaporate too much liquid.
Meanwhile, melt the remaining 1 tablespoon butter in a large-ish soup pot over medium heat.
Add the flour, stirring constantly with a wooden spoon, incorporating all the flour into the melted butter.
This is called a roux.
Cook, taking care to not burn the roux, for 2 minutes more. This will remove any flour-y taste from the roux.
Using a whisk, pour the cream and 1/2 & 1/2 into the roux (or the milk), stirring constantly, thoroughly incorporating the roux into the liquid.
Keeping the heat on medium, stir the white sauce (or bechamel), as it has now become, until it has thickened. Adjust the heat so it does not burn on the bottom. Set aside.

When the mushrooms are cooked, remove the skillet from the heat and allow to cool for 5 minutes.
Place 2 cups of mushroom mixture with stock into a food processor and pulse until the contents are finely ground. Add this to the thickened white sauce and stir. This helps to create a nicely thickened soup.
Add the remaining mushroom mixture and liquid to the soup pot, stirring well.
Using an immersion blender, blend the soup until it is smooth. Or you can leave it chunkier if you wish.
If you don't have an immersion blender, you can put this soup into a food processor, no more than 2 cups at a time, and process to your liking.
Taste and adjust seasonings, adding sea salt and freshly ground black or white pepper if necessary.

Thinly slice the reserved mushroom caps and saute them in a small amount of butter in a skillet until golden brown.
Ladle the soup into warm bowls, top with a small spoonful of creme fraiche, a few of the sauteed mushroom slices and a sprig of fresh thyme.

*Cook's Notes:
Although I don't make a white sauce very often because of the high glycemic properties of white flour, it is usually made with milk. I used cream and 1/2 & 1/2 in this recipe because I had opened cartons of both in the fridge and combined they measured a perfect 2 cups. As you might imagine, it makes the soup really creamy and rich.
The photos in this post are placed randomly, not in a sequential, instructional order.

Friday, November 10, 2006

Pear, Walnut & Gorgonzola Panini

I don't often write about restaurants or other eating establishments I've been to, mostly because that's not what this blog is about and, secondly, because I'm not very good at it. Today, however, I'm making an exception because this panini and its maker deserve recognition.
A more accurate title for this post would be Melissa's "Out on a Limb" Panini. This beautiful and tasty sandwich was made especially for us at our local village coffee house, The Beachcomber Cafe; the village being Trinidad, population 354, located on the far north coast of California, where the redwoods meet the Pacific Ocean.
ith a gulp, "I'm going out on a limb!", she agreed and made us one of the best tasting paninis I've had this side of the Atlantic.


When Clay and I went into town to vote last Tuesday, we decided to stop at the Beachcomber to see what was being offered for lunch. Co-owner Melissa Zarp, her lovely face just visible to clientele from her food prep station in the back of the small kitchen, told us she was working on a special panini that wasn't yet on the menu. After hearing the list of ingredients she was thinking of sandwiching between slices of our favorite local artisan focaccia, we both volunteered on the spot to be her guinea pigs. Saying, w
First came the focaccia. Made fresh daily by local artisan bread company, Brio, it's an herb-y, yeasty, soft flat bread that Melissa cut into sandwich-sized pieces then sliced in half horizontally. Gorgonzola, bosc pear slices, chopped walnuts, finely minced red onion, a bit of mozzarella cheese and beet greens made up the filling in this sandwich, which was then toasted in a panini press. The result was heavenly. Melissa added turkey to mine which I thought was outstanding. The only thing I might suggest would be to use arugula instead of beet greens. To my mind, gorgonzola, pears and walnuts cry out for arugula. Still, this panini is a winner - beet greens and all!
Soup is made fresh daily and a wide selection of paninis are always on the menu. Hopefully, Melissa's "Out on a Limb" creation will soon follow.
Beachcomber Cafe co-owner Melissa Zarp, left, with staff person Sarah
The Beachcomber Cafe is an all-organic coffee house, located at 363 Trinity Street, across from the Trinidad School. The wide selection of organic coffees and teas, as well as the always smiling faces of the staff, make this a favorite gathering place for locals. The shelves of the glass display case, filled with delicious, locally made scones, muffins, cookies and cakes, are often bare by closing time, prompting customers to come in early to get their favorite picks.