Sunday, December 25, 2011

Merry Christmas

Although 2011 has been a year of minimal recipes and posts, many of you dear readers have stuck with me despite my non-productivity, for which I am sincerely grateful.  I hope to return to the delights of culinary activity here at the turn of the new year.  Meantime, I hope the holidays are bringing you comfort and joy and that you are looking forward to a bright new year in 2012.


PS - Don't know what happened to my header graphic; do know I've got to fix it.


Copyright © 2005-2011, Christine Cooks. All rights reserved

Sunday, October 2, 2011

Recipe for Spatchcocked Pan-Roasted Chicken - Redux


[Ed. note: Way back in 2008, I sent this post to my friend Paz at The Cooking Adventures of Chef Paz and neglected to put it on my own blog. I've decided to remedy that. This update will not have some of the same wording as the original post, but the method and recipe are the same.]
When I posted my Sunday Night Whole Roasted Chicken recipe a while back, Paz fairly sang its praises from the rooftops of New York and re-posted it on her blog, creating quite a bit of traffic my way. That's just the way she is, thoughtful and generous. And because Paz was so excited about my roasted chicken, I thought it would be fun to show her another method that I think she will find entertaining and make her giggle: Spatchcocking.
Now before your minds head to the gutter, spatchcocking (and, please do visit that link for some very funny, veddy British definitions) is simply a method by which a chicken or other fowl is opened and spread flat, enabling it to cook faster and more evenly. To achieve this, you remove the backbone of the bird, lay it out flat, breast side up, and crack the breast bone to flatten it out.

That's it. Rub it all over with olive oil then sprinkle with your favorite herbs, kosher salt and freshly ground black pepper. Put it in a cast iron skillet with a glug or two of wine (red or white, it's your choice) and roast it to perfection. Easy, simple and delicious. If you like giblets, tuck them in and around the bird so they roast together. Oh, and don't forget to baste your bird with those tasty pan juices that will magically appear at the bottom of the skillet.
To spatchcock a chicken:
Put a whole chicken, breast side down, on a cutting board.
Using poultry shears or other strong kitchen shears, begin cutting up one side of the backbone beginning at the tail end. You may have to use a bit of pressure to cut through some of the bones, especially when you get to the bones that connect the wings to the body.
When one side is fully cut, do the same thing on the other side of the backbone, starting again from the tail end.
When the backbone is completely severed from the chicken, set it aside and inspect the chicken where you made the cuts. Remove any small bones laying about that could come loose in the cooking process and get stuck in a guest's teeth or, worse, in his/her throat.
Small bone inspection done, turn your chicken over and spread it out on the cutting board as shown in the photo.
Using your hand, push hard on the breast bone until it cracks or gives to the point that the chicken lies very flat on the board.


There. You're done. You've just spatchcocked a chicken. Now, cook it...

Christine's Spatchcocked Pan-Roasted Chicken
print recipe
Serves 4-6 chicken-loving people or 6-8 daintier eaters
Ingredients:

1 (4-5 pound) broiler or fryer chicken preferrably with giblets, preferrably free-range
Good olive oil
2 tablespoons (or more) dried herbs - I used Made in Napa Valley's Meritage Rub, which I highly recommend
Kosher salt
Freshly ground black pepper
olive oil spray for the pan
1/4 cup (a few glugs) of your favorite red or white wine

Preparation:
Rub the bird all over with good olive oil. Do the same with the giblets and the backbone if you are using them (see Cook's Notes.)
Sprinkle the herb rub, salt and pepper all over both sides of the bird, pressing into the skin to help them adhere.
Lightly spray a large cast iron skillet (I used a 12-inch one, old Wagner Ware, without which I would be one unhappy cook) with the olive oil.
Place the chicken breast side up in the skillet, arranging the legs and wings so it all fits snugly. The underside (inside) of the chicken should be flat in the skillet.
Tuck the giblets around and under the wings and neck area and lay the backbone under the legs as shown in the photo.
Pour the wine over the bird, cover the skillet with foil and place in a 375-degree oven for 45 minutes.
At the 45-minute mark, remove the foil from the skillet and baste your bird, giblets and all, with the pan juices.
Close the oven and roast for 15 more minutes, basting once again during that time.
Stick an instant-read temperature guage in the meatiest part of the thigh; a nicely done chicken should register 160 degrees farenheit and the juices from the joints should run clear.
Remove the skillet from the oven and baste the chicken one more time before transferring it to a cutting board where you will let it rest for 10 minutes. Remove the giblets to a plate.
Pour the pan drippings into a fat separator and decant into a warm serving bowl or pitcher.

To cut into serving pieces, using kitchen or poultry shears, divide the bird into two halves, each having a half breast, a wing and a leg-thigh. Separate the entire leg-thigh piece and finally cut the breast pieces into two equal halves, cross-wise, leaving the wing attached to one of the pieces. This will give you three pieces from each side, which will nicely feed six hungry people. For daintier eaters, separate the thigh from the leg, thus being able to share your dish with 8 guests.


Cook's Notes:
I love giblets and I love the tasty morsels of meat on the backbone of a chicken, especially the tiny tenderloins. If you can find them, see if you don't agree with me.
The corn photo? Sometimes a food photo is so delectable, it must be shared.


Copyright © 2005-2011, Christine Cooks. All rights reserved


Friday, July 15, 2011

Recipe for Vanilla Frozen Yogurt with Raspberry Swirl


I coulda made this with fresh organic raspberries.

I coulda driven the 12 miles to get them - 24 miles round trip.

Coulda, but I didn't.

Instead I had a Trader Joe's moment:  organic raspberry spread and raspberry wine; both in the fridge, both cold.

It took just 5 minutes to put this together plus 20 minutes to freeze.

It could be in your dessert bowls tonight . . .

Vanilla Frozen Yogurt with Raspberry Swirl
Christine's original recipe
Ingredients:
4 cups plain, organic whole fat yogurt (low fat is fine)
2 teaspoons pure vanilla extract
1/3 to 1/2 cup sugar (or 8 to 12 packets Splenda)
4-ounces raspberry fruit spread
2 tablespoons raspberry wine


Preparation:
Combine the yogurt, vanilla and sugar in a large mixing bowl, stirring until the sugar is dissolved. Keep very cold until ready to freeze.
Combine the raspberry wine and raspberry fruit spread in a small measuring cup. Cover and keep cold.
Freeze the yogurt mixture in your ice cream maker according to the manufacturer's instructions.
When the yogurt is frozen, place one-third of it in a lidded container that can go into your freezer, spoon 1/2 of the raspberry mixture over that, then spoon one-third more of the yogurt over the raspberry layer, and repeat with the remaining raspberry mixture ending with the last third of the yogurt on top.
Cut down through the yogurt a few times with a knife. Smooth the top.
Place a piece of plastic wrap directly on top of the yogurt to keep ice crystals from forming then snap on the lid and freeze for several hours until ready to serve.  Can be frozen overnight but if that's the case, bring it out and set it on the counter 1/2 hour before serving so it can soften.

I like my frozen yogurt on the tart side. If you like yours sweeter, add up to 2/3 cup sugar.
I think that using whole milk yogurt works best to achieve creaminess, but low-fat and non-fat will work also although they will freeze to a brick.
As can be seen on other frozen yogurt posts of mine, I usually drain the whey from the yogurt before preparing the recipe.  I decided to not do this here to see how it would turn out. It turned out just fine.  Maybe not as creamy, but fine nonetheless.
The Trader Joe's link in this post is not a promotion and I do not receive renumeration for it; it is there so you can see what the product looks like.  Sorry I couldn't find a photo for the raspberry wine, but TG's carries it with their label at about $8 a bottle.


Copyright © 2005-2011, Christine Cooks. All rights reserved

Thursday, July 14, 2011

Garden Fresh Frittata with Zucchini, Chard, Kale and Basil

. . . plus eggs from my backyard chickens and fresh farmers market garlic from Claudia's Herbs.

Yesterday I picked the first two zucchini from our garden.  Now, that may be ho-hum to the rest of the northern hemisphere but to me, in my very coastal-cool-weather garden, it's something to crow about.

Chard and kale I've got growing out my ears.  Basil is slowly making its way to picking size.

The tomatoes?  Hmpf. Ask me in September.

This tasty frittata comes together quickly. The longest wait time is when it's in the oven, as it has to cook slowly to stay moist.

Eggs from my chickens, produce from my garden - how happy can one cook get?

Garden Fresh Frittata with Zucchini, Chard, Kale and Basil
Christine's original recipe
Ingredients:
2 medium-small zucchini (green or yellow), sliced thin
4 cloves fresh garlic (see cook's notes), peeled, finely chopped
3-4 cups coarsely chopped chard and kale, stalks removed
2 tablespoons finely chopped fresh basil
10 medium to large eggs (see cook's notes)
1 tablespoon water
sea salt and freshly ground black pepper to taste
butter and olive oil for the pan
Preparation:
Heat the oven to 325-degrees.
Using a 12-inch skillet over medium heat, sauté the zucchini in a small amount of butter and olive oil - about 1 teaspoon each - until beginning to soften.  Add the chopped garlic, salt and pepper to taste, and sauté, stirring, until just tender. Do not allow to burn. Remove from the pan and set aside.
Put the skillet back over the heat and toss in the chard and kale, stirring to sauté until wilted. Remove from the skillet and set aside - the greens should be dry; if they are not, drain them through a strainer.
Put about 1 teaspoon each of butter and olive oil in the skillet and place back over the heat on medium-low.
Beat the eggs with the water until fully broken up and creamy, add salt and pepper to your taste.
Pour the eggs into the skillet (if the eggs bubble and sputter, turn the heat down a bit) then add the zucchini and spread out evenly. Next, add the greens and spread evenly.
Sprinkle the basil over the top and push into the egg mixture a bit.
Put the skillet in the oven and cook for about 20 minutes or until a knife inserted into the center comes out clean.  Do not overcook or the frittata will be dry.
Remove from the oven, let cool for a few minutes. Serve and enjoy.

Fresh garlic is still moist both outside and in. The skins peel easily and the garlic clove is very white. I hope you're lucky enough to have some growing or can get some from your local farmers market.

My hens' eggs range from small to jumbo. When I use them for a dish such as this, I mix the sizes so it all comes out to about "large" - so use large eggs for this.

I don't use much salt these days, if at all, which is why I don't give measurements so please salt away, or not, as you wish.  I will encourage you to use natural sea salt (the gray kind that is somewhat moist) as that seems to be the most healthy.  I use Telicherry peppercorns in my pepper mill.

Photos of my vegetable garden may be seen on my garden blog, Raven Ridge Gardens.

Copyright © 2005-2011, Christine Cooks. All rights reserved

Thursday, March 17, 2011

Basics: Recipe for Crimini Mushroom Stock with Celeriac and Leeks

Brown mushroom stock does not a beautiful photo make, so you will not see one in this post.

Photos of the ingredients that went into making said stock? Yesiree.

Making mushroom stock takes very little effort and time and is probably as simple as stock gets.  But the results are far from ordinary.  Roasting deepens the flavors and brings out natural sweetness.
One could add carrots and garlic to the roasting pan, and I might in a future recipe, but this one I kept simple and clean.

Speaking of which:  Clean your mushrooms. This small brush is very handy for the job,
but a quick once-over with a paper towel will also do the trick.

 
Coarsely slice them; one-half inch is not too large.

Peel and chop the celeriac, otherwise known as celery root.
I used a sharp knife to peel this critter but a wide-blade vegetable peeler might work as well.

I save the light green parts of leeks for stocks like this. If you have them, use them now.

Add a chopped onion, a little sea salt, a little freshly cracked pepper, a little porcini powder and ...
roast them all together to a golden, caramely brown.

Hold on, you're not finished yet.  Scrape the roasted vegetables into a stockpot, cover with water, bring to just under a boil, lower the heat and simmer the stock for 1 hour, longer if you want it more concentrated.

After adjusting the seasonings to your own taste, strain the stock through several layers of cheesecloth into a large glass measuring cup or bowl.  Let it cool then store it in the fridge in air-tight containers or freeze in ice cube trays then pop them out into ziptop bags and put back in the freezer.

I use these whenever I want to add some depth to a vegetarian dish, such as risottos, soups (cream of mushroom, anyone?) and stews.

Oh, one more thing:  the ingredients measurements are approximate; the only error one could make would be on the side of paucity.

Christine's Basic Roasted Crimini Mushroom Stock with Celeriac and Leeks
Ingredients:
2-pounds crimini mushrooms, cleaned, coarsely sliced
1 large celeriac, peeled and coarsely chopped
3 1-inch thick leeks, white and light green parts, washed, cut into 2-inch pieces
1 medium yellow onion, peeled and coarsely chopped
1 teaspoon porcini powder (mine is local, made by Hasta be Pasta)
sea salt and freshly ground black pepper to taste
1/3 cup dry white wine or dry vermouth
olive oil for the roasting pan
Preparation:
Heat oven to 375-degrees.
Drizzle about 2 teaspoons olive oil into a large roasting pan then add the prepared mushrooms, chopped celeriac, leeks and onions.
Sprinkle the porcini powder over the vegetables along with some sea salt and generous grindings of black pepper, then, using clean hands, toss everything together so all pieces are evenly coated.
Cover the pan loosely with foil, place in the oven and roast for 15 minutes.
Lift the foil from the pan and check to see if there are mushroom juices running around the vegetables. If so, remove the foil entirely and continue roasting, shaking pan occasionally, until the contents are golden brown and the juices have evaporated.  If the mushrooms have not released their juices, cover the pan with foil and continue roasting for a few more minutes or until they do so then continue with the above instructions.
When the vegetables are done, remove them from the oven, check and adjust seasonings, then scrape them into a large stockpot and immediately deglaze the roasting pan with 1/3 cup white wine, or dry vermouth, scraping up any browned bits that may be sticking to the bottom. Pour this good stuff into the stockpot along with 5 cups of fresh, non-chlorinated water.
Bring the liquids to a low boil, then lower the heat, semi-cover the pot with a large lid, and allow to simmer for 45 minutes to 1 hour - longer if you want more concentrated flavors.
When the stock has the flavor you desire, remove from the heat and allow to cool until you can safely strain the stock from the vegetables. And, please, save those veggies! They can be incorporated into risottos, omelettes, even my potato galette.
To store, cool completely then strain through several layers of cheesecloth into airtight containers, or freeze in ice cube trays as I have suggested above.

A Special Note from Christine Cooks:
I already had this recipe waiting in the wings (and there are a few more in draft stage), but I must tell you that merrily writing food posts is not high on my list at the moment.
My heart is heavy over the plight of the people in Japan and I have made donations to several trusted sites. If you would like to join me in making a donation to help the Japanese people in their time of need, please consider giving whatever you can afford by either clicking on the red strip at the top of this page - which will take you to the Portland-based Mercy Corps donation page -
or by making a donation through the Red Cross web site, earmarking it for the Japan Disaster Relief.  No donation is too small; a donation of $10 will make a big difference.  Please join me. Thank you.


Copyright © 2005-2011, Christine Cooks. All rights reserved

Monday, March 14, 2011

Recipe for Sugar Free Meyer Lemon, Fresh Blueberry Swirl Frozen Yogurt Creamsicles


Let's get this whole sugar free business out of the way right now.

Yes, I did not add any sugar.

Yes, you can substitute sugar for the Splenda if you wish, and I have even given the sugar equivalent in the recipe below.

No, these are not totally, absolutely, positively sugar free.

Fruit has natural sugars in the form of fructose.

Dairy has natural sugars in the form of lactose.

Natural sugars existing in whole foods - fruits, vegetables, dairy - are a good thing. They come in their own natural packaging, often with lots of fiber.

Industry-packaged foods often mostly have added sugars, the worst being high-fructose corn syrup, and don't let them tell you otherwise.  They lie.

Still, I had a hard time adding the term sugar free to the title of this recipe, cuz it just ain't so.  There's fruit sugar and dairy sugar in abundance.  But no added sugar.  And, yeah, there's Splenda with its teeny-tiny amounts of glucose and maltodextrin, which translate to sugars.  I'm not perfect.

Whew.  Glad I got that off my chest.  Let's move on.

These are my little ode to Spring.  I had so much fun making - and, obviously - eating them.  Notice I have not called them fat free. You will see why as you read on.


What began as a formulation for Meyer lemon frozen yogurt creamsicles, which I'd been thinking about for quite some time while waiting for my frozen pop mold to arrive from Amazon (thank you Jeff & Amy!), acquired a blueberry swirl when organic blueberries from Chile began to show up in our local markets.  Carbon footprint be damned, I could not resist.

These frozen treats are packed with tartness from both the Meyer lemon juice and the yogurt, with just enough Splenda (or sugar) for balance.  The addition of the fruit swirl provides its own sweet surprise.

Before you start, please remember to drain the yogurt of its whey before proceeding (a photo of that process is here). And be sure to read my notes below for a way to use that whey.

Using a pestle to push the blueberry purée through a fine mesh sieve worked better than anything I've ever tried. It really got all the liquid out of the fruit pulp.  A word of caution: empty the sieve of any remaining pulp right away or you may later find yourself scrubbing that little screen really hard.
 
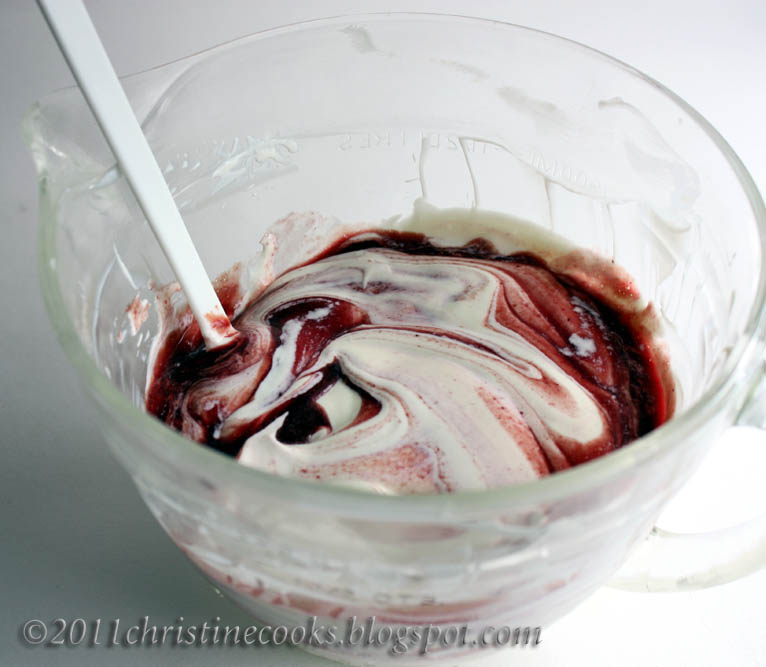
Fold the fruit purée into the yogurt mixture just a few times to make the swirl. Too much combining and you've lost the swirl effect.

Spoon or pour the yogurt mixture into the molds, using a skewer to remove trapped air.  When the molds are filled, tap the aparatus on a counter top a few times to settle and compact the mixture then put the sticks into the center of each mold, about halfway in.  Put the whole thing in the freezer, on a flat surface, and freeze for at least 8 hours or overnight, which I think is best.

You will have to excercise some patience.

Sugar Free Meyer Lemon, Fresh Blueberry Swirl Frozen Yogurt Creamsicles
Christine's original recipe
Ingredients:
4 cups (32-ounce container) plain yogurt (I used full fat), drained
3 tablespoons Meyer lemon juice, strained
1 cup cream or half 'n' half (see Cook's Notes)
1/2 teaspoon Tahitian vanilla
8 packets Splenda or 1/3 cup sugar (more to taste)
3/4 cup fresh blueberries (yields 1/4 cup blueberry purée)

Preparation:
The day before preparing the pops, drain the liquid, or whey, from the yogurt. (See Cook's Notes for uses for the whey.)  To do this, drape a damp piece of cheesecloth over a sieve that has been set over a large glass container, such as an 8-cup measure.
Spoon or pour the yogurt into the cheese cloth then set the whole thing in the fridge and allow it to drain overnight.
Put the drained yogurt, or yogurt cheese as it is called, into the rinsed 8-cup glass measure or a large bowl and stir in the lemon juice until fully blended.
Stir in the cream and vanilla then the Splenda, or sugar.  If using sugar, stir the mixture until it begins to lose its grainy feel.
You should now have about 5 cups of yogurt mixture; put this in the fridge and continue with prepping the blueberries.
Place the blueberries in a food processor and buzz until they are well puréed; they will not be a liquid at this point.
Scrape the purée from the processor bowl into a very fine mesh sieve placed over a small glass measuring cup.  Then, using a small pestle, stir, stir, stir until all the liquid falls into the measuring cup leaving very dry  pulp in the sieve. I started out using the back of a spoon for this process but soon found I was wasting my time, hence the pestle which did the job quickly with maximum extraction of liquid.
Drizzle the liquid blueberry purée over the yogurt mixture and give it a quick stir with a rubber spatula. Don't overmix as you want the blueberry to be a just a swirl, not a complete color changer.
Spoon this mixture into the molds of a frozen popsicle container, removing air pockets with a smooth bamboo skewer or one of the popsicle sticks that come with the mold.  (It's important to do this because trapped air will cause the creamsicles to form ice crystals within and will result in not being a creamy smooth frozen treat.)
When the molds are filled. Tap them on a counter top to compact the yogurt mixture then place the pop sticks in the center of each mold and freeze until very firm - overnight is best if you can stand the wait.
To un-mold the pops, fill a large container or sink with hot water. Put the molds in the water to within an inch of the top for no more than 5 seconds, then remove from the water.  You may have to squeeze each individual mold with your hands to help the frozen yogurt within separate from the mold. You may also need to re-dip into the hot water several times to get the pops to un-mold.  Placing your fingers on the pop stick, close to the frozen yogurt, pull up gently until the pop releases from the mold.

Go ahead, take a bite.  I'll wait.

To store the creamsicles (as if), wrap each one in its own piece of plastic wrap and layer them in a ziptop freezer bag and put them back in the freezer.  Pull one out when you get a yen for a lip-smackin', tart-sweet, frozen fruity treat.

As is abundantly clear from the recipe, this is not a low-fat frozen treat. However, having made this, I think I can safely say that you could successfully lower the fat content by substituting low-fat yogurt and low-fat milk for some of the cream or half 'n' half without compromising the structure of these so aptly-named creamsicles.

8 packets Splenda equals 1/3 cup sugar.  12 packets Splenda equals 1/2 cup sugar.

Yogurt whey may be used as a substitute for buttermilk in baking with great success.  I just made a batch of gluten-free buckwheat pancakes this morning and used the leftover yogurt whey instead of buttermilk.  It worked splendidly and I plan to post a recipe soon.
Happy cooking!


Copyright © 2005-2011, Christine Cooks. All rights reserved

Saturday, March 12, 2011

Recipe For Tamale Pie Loaf Becomes Mexican Polenta


I don't often cook from cans.

But.

This recipe, adapted from my mother's tamale pie loaf - much of the ingredients from cans - had been calling to me since I tried making it several years ago, and failed.

My mother's recipe calls for cornmeal cooked in milk, the ratios of which made me wince: 1 part cornmeal to 1 1/2 parts milk. She said the resulting mush would be stiff (and inedible - my words) and she was right. So maybe it was the recipe . . .

Undaunted, and lacking cornmeal, I used polenta and made my ratios 1:3 which worked well.  The cooked polenta should be rather stiff because you're going to be putting a lot of wet ingredients into it to make the finished dish, but it should not be stiff as a hair brush nor have the texture of that white paste we used to eat use in elementary school.

My addition of eggs lightens this to almost soufflé level.  And, if I were making this in late summer with plenty of fresh corn and peppers on hand, I would roast the corn, char the peppers and use them instead of the canned varieties. And quite possibly I would use fresh diced tomatoes.

But it's still winter, so in my mother's tradition I've used many cans.  And let me tell you, this rendition of tamale pie, which I have dubbed Mexican Polenta, is light and flavorful and was a hit with the potluck goers for whom it was intended.

Search through your cupboards, people, you're gonna need some cans.


Christine's Mexican Polenta
Adapted from her mother's recipe for tamale pie loaf
Ingredients:
2 cups polenta
6 cups water
1 teaspoon kosher or sea salt
2 tablespoons plus 2 teaspoons unsalted butter, divided
1 medium onion, peeled and chopped fine
4-5 cloves garlic, peeled, smashed and chopped fine
4 whole canned chilies, chopped into small dice (or 1 7-ounce can diced green chilies)
1 can whole kernel corn
1 14.5-ounce can diced tomatoes, fire-roasted is best
1 tablespoon Grandma's Chili Powder (it's what my mother always used)
1 whole chipotle in adobo sauce, minced
4 eggs, well beaten
1 generous cup grated cheddar or Jack or a combo of both
1/2 teaspoon Cholula hot sauce
kosher or sea salt and freshly ground black pepper to taste
Preparation:
Heat oven to 350-degrees
Bring the water and 1 teaspoon salt to a boil.
Whisking constantly, stir in the polenta and whisk until combined.
Lower the heat to a simmer and cook the polenta, stirring with a wooden spoon, until it leaves the sides of the pot and starts to stick to the bottom.
Remove from the heat and stir in 2 tablespoons of butter until melted and incorporated, stirring up any polenta that has stuck to the pot.  Set aside.
Melt the remaining 2 teaspoons butter in a cast iron or other heavy skillet over medium heat and sauté the onions and garlic until they are soft and slightly golden brown.
Add the diced chilies, adobo chile, and the chili powder and stir for another 30 seconds or so.
Add the tomatoes, corn and hot sauce and stir well to scrape up any browned bits from the bottom of the skillet.
Remove the skillet from the heat and pour the sauté into the waiting polenta. Mix well.
Adjust seasonings to taste.
Allow mixture to cool for about 10 minutes, then stir in beaten eggs, mixing thoroughly, then stir in cheese.
Put mixture into a well oiled 9 x 13 inch baking pan, spreading out to the edges, and bake in the oven for approximately 45 minutes or until top is golden brown and springs back when you poke it with your finger.

To transport to a potluck party, cover the baking dish with foil and place in a cardboard box slightly larger than the dish.  When you arrive at your desitnation, cut the polenta into serving-sized squares.

Olé!


Copyright © 2005-2011, Christine Cooks. All rights reserved

Wednesday, March 9, 2011

Recipe For Crock Pot Braised Pork Ribs With Whole Garlic Cloves and Fresh Rosemary

I don't use my crockpot often enough, and more's the pity.

Truth is, I don't usually think about how I'm going to cook something until I'm in the kitchen around 6 PM deciding what's for dinner.  I'll bet I'm not alone in this.

There were these gorgeous pork ribs in my freezer that had come from Yolo County pig farmer extraordinnaire, John Bledsoe, and I had taken them out to thaw thinking I had all the time in the world to braise them into a tasty meal.

Well, the minute I stepped into my office, saw the quite large stack of paperwork on the desk, and realized that I would be working all day and probably into the night, I turned around, went back to the kitchen and pulled out the crock pot.

In a few minutes I had onions, carrots, celery and leeks prepped, 21 cloves of garlic peeled, and the zest of one quite large Meyer lemon waiting on a plate.

Aren't those ribs beautiful?

The rest was easy; here's what you do:  Layer the ingredients as shown in the photos, sprinkle the lemon zest over all the vegetables, ribs on top with generous sprinklings of kosher salt and freshly cracked pepper, and finish it off with fresh sprigs of rosemary.

Pour in some rich stock, red wine, plonk the lid on, program the crock pot to high for 4 hours then low for 6 hours then warm to hold.  And walk away.

When you return to your kitchen, after dark, eyes bleary and neck achey from crunching numbers all day, the aromas that greet you will lift your spirits and the meal that has pretty much prepared itself will pamper your palate, warm your tummy and remind you that taking the crock pot out of the cupboard once in a while can be such a good thing.


Christine's Recipe for Crock Pot Braised Pork Ribs with Whole Garlic Cloves and Fresh Rosemary
(print recipe)
Ingredients:
1 medium onion, peeled and coarsely chopped
1 leek, white and light green parts only, cleaned and cut crosswise into 1/2-inch thick pieces
3 ribs celery, cut crosswise into 1/2-inch thick pieces
4 carrots, pared, cut crosswise into 1/2-inch thick pieces
21 cloves garlic, peeled, left whole
Zest of one large Meyer lemon or regular lemon
3 sprigs fresh rosemary
2 pounds meaty pork ribs on the bone
1 cup rich stock (I used my rich and robust chicken stock)
1/2 to 2/3 cup Merlot or Merlot-Cabernet blend
Kosher salt and freshly cracked black peppercorns
Preparation:
Beginning with the onions, layer the vegetables in the crock pot, ending with the garlic cloves.
Top the vegetables with the lemon zest then lay the ribs over, nestling them snugly into the pot.
Sprinkle the ribs with kosher salt and pepper then lay the rosemary sprigs over them.
Pour the stock down the edges of the crock pot then do the same with the red wine.
Put the lid on the pot then set the programming to High for 4 hours, Low for 4-6 hours, Hold or Warm until you're ready to eat.
The meat will be fall-off-the-bone tender, the vegetables not mushy. I always find that amazing.
Remove the rosemary sprigs before serving.

Enjoy!


Copyright © 2005-2011, Christine Cooks. All rights reserved

Tuesday, March 1, 2011

Meyer Lemons: Recipes Redux


When Bill  (or life, as the saying goes) gives you Meyer lemons, make . . .    insert any number of lemon-enhanced dishes behind those elipses.

My friend Bill did indeed give me a bag of Meyer lemons while I was in the Sacramento Valley visiting family and friends last week, picked from his backyard trees that morning.  Bill has been gifting me with these beauties for a number of years now and the thrill of receiving them never lessens.

You see them up there; the photo taken mere moments ago in my rather winter-dark kitchen.  Meyer lemons are to winter like sunshine is to summer:  Golden nuggets of sunshine, brightening and perfuming the house; giving their soft tangerine-lemon essence to food; pushing away the still-cold, gray vestiges of winter.

Tonight I'll put juice and zest into a savoy cabbage sauté like this one.

Tomorrow I may make a sorbet kind of like this one but without so much booze.

Today I will not be giving you a new recipe, but rather photos and links to recipes past to encourage you to employ Meyer lemons into your cooking repertoire.  (I know that some of my old posts leave a lot to be desired, both in content and photography. Go ahead and laugh. I do. Someday I may fix them. Or not.)

Recently, several readers - quite independent of each other - told me that they use my recipes as inspiration for creating their own.  I love that.

Meyer lemon recipes to inspire you - from my kitchen to yours:


Plus Another Meyer Lemon Curd from a long time ago


Meyer lemons enhance my Homemade Refried Beans

Winter Squash Soup with Meyer lemons and so many other good things

Need a winter pick-me-up?  Make this Chicken Broth for the Flu, with Meyer lemons of course

Try this rather boozy take on a Lemon Drop cocktail: Meyer Lemon Drop Sorbet
Meyer Lemon Mascarpone Tart with Fresh Raspberries - yum!
 
 And for good measure, how 'bout a Meyer Lemon Blueberry Ginger Tea Cake?

As long as I'm baking, here's an old post that really needs improving but the scones and curd are great

Dessert's not your thing?

Why not try a Meyer lemon-drenched Whole Roasted Chicken that can be fixed on a week night.
Or would you prefer a light and lovely Citrus Relish with your fish?  Thought so.

 
 And if the above recipes don't use up your stash of Meyer lemons,
juicing and freezing extends their life long into spring and summer, making yours truly one very happy cook.


Cheers!


Copyright © 2005-2011, Christine Cooks. All rights reserved