Thursday, December 29, 2005

'Tis the Season for Crab Cakes

Finally, after much price haggling plus deferments by Fish and Game, opening day for commercial crab fishing begins today. Pots will be placed in our Pacific waters so we may savor the bounty for which our local fisherfolk risk life and limb - fresh Dungeness crab! That is, of course, if the weather cooperates. Which it's not doing. Nooooo. One storm after another has been hitting us since Tuesday with another one coming on shore right now. This one is supposed to pack high, gusty winds (up to 80 mph), hurling our higher-than-normal high tides way up the beaches, flooding our already swollen rivers to the breaking point, and wreaking general havoc. And in order for our guys to be able to bring the catch in, they must be able to get the pots out. No mean feat in 17 to 25-foot waves along with a churning, frothy, angry ocean. Our prayers go out with them for a save journey and a prosperous catch.

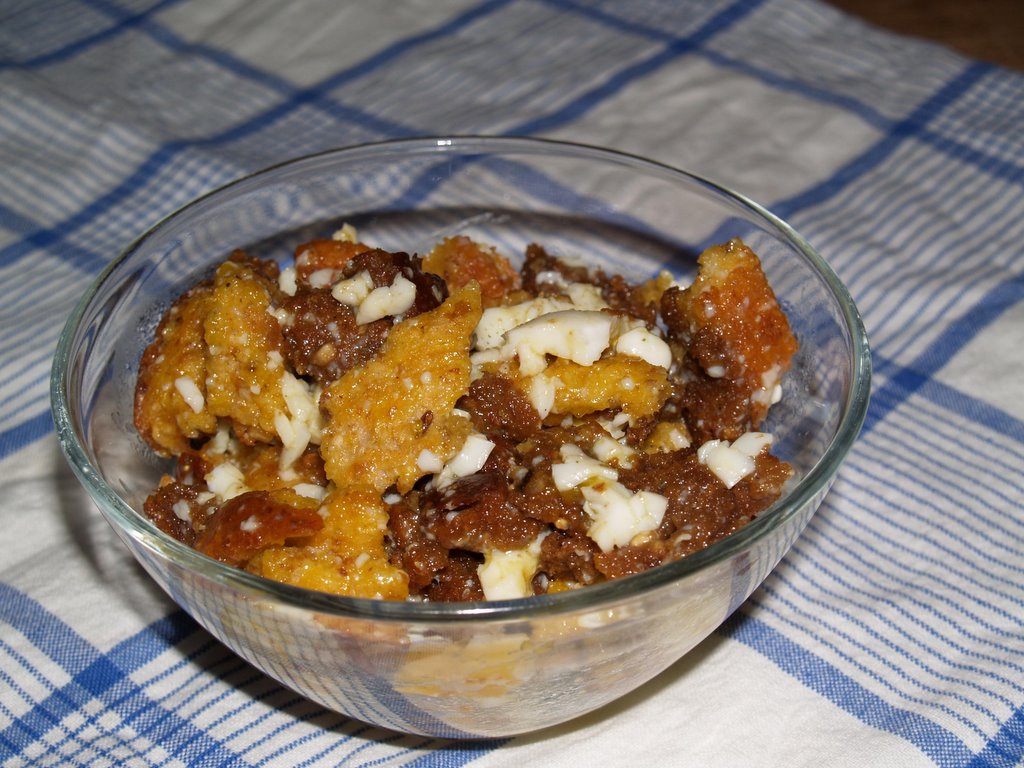
So how, you might ask, do I happen to have fresh local crab for crab cakes? A few weeks ago we had sunny and unseasonably warm weather. Sport crab fishing being allowed, some industrious friends dropped a couple of pots in the harbor. On retrieving the pots and finding they had too much crab for themselves, they offered to share. Could I say no? Didn't even think of it. Took my kettle and went right over. There they were; big, fat, lively crabs set aside just for me. Oooooh, the richness of it all! I still have goose bumps. Clay and I took them home, fired up the kettle and soon were shelling and picking our treasure, packing it in freezer bags for Christmas Eve crab cakes. Well, we did eat one of them then and there as it came out of the boiling kettle. Standing at the kitchen sink. With a bottle of Champagne. It's a tradition at our house. Champagne chills in the fridge at all times. You never know...

I devised a recipe for crab cakes a number of years ago, using ingredients that had been written down and left in a restaurant where I worked for a brief moment in time. The list did not include instructions so I was left to figure the recipe out on my own. And I did. And the restaurant clients loved them! (I did not love cooking in a restaurant, however, and after 6 months went sobbing back to my own home kitchen where I've happily been since, which is another story.) I brought that recipe home with me, have changed it around a bit, adding this and that to suite my fancy.

Christine's Crab Cakes
1 tablespoon peanut oil
1 jalapeno pepper, charred, peeled, seeded and minced
1 small white onion, peeled and cut into small dice
1 cup heavy cream

1 red bell pepper, charred, peeled, seeded and diced small
2 teaspoons chopped fresh chives
leaves from 2 sprigs of fresh thyme, minced
1/2 tsp salt (optional)
1/2 cup, or more as necessary, ground toasted slivered almonds
1 to 1 1/2 lbs. cooked, picked crab meat (from about 2 crabs)

1 extra large egg, beaten lightly
1/2 cup, or more as necessary, toasted, seasoned bread crumbs

1 tablespoon peanut oil or more if needed
1 tablespoon butter, or more if needed

Place the peppers over a gas burner and char until skin is black and blistered. Place peppers in a paper bag, fold top down and allow to steam for 10 minutes. Using your fingers and a small knife, peel the skin from the peppers then remove the seeds and veins. Use latex gloves to peel the jalapeno.

Place oil in a skillet over medium heat. Add onions and saute gently until tender but not browned. Add diced jalapeno and cream. Bring to boil and maintain slow boil until cream is reduced by one half. Remove from heat and set aside to cool.

In a large bowl, add picked crab, diced red pepper, chives, thyme, salt (if using), ground almonds and cream reduction. Mix lightly but thoroughly with your hands.

Place the toasted bread crumbs (I use Brio seasoned croutons, spun a few times in the food processor) on a plate. Have the beaten egg in a bowl next to the plate. Scoop a scant 1/2 cup of crab mixture into your hands and shape into a patty about 2 1/2 inches across. Brush the crab cake on both side with the egg. Gently dredge it in the bread crumbs, coating both sides. Set on a sheet of waxed paper. Repeat with the remaining crab mixture. At this point you can cover the cakes and refrigerate them up to two days before cooking.

Place the peanut oil and butter in a skillet over medium high heat. Place up to 4 cakes in skillet, not crowding them, and cook until both sides are nicely browned and cooked through. Keep warm in a low oven. Repeat process until all the cakes are cooked.

You may notice that the cakes in the photo above have corn in them. Beginning with the basic recipe, you can add any number of things to your crab cakes. In this case, I added lightly roasted corn kernels. Keep in mind that the more you put in, the harder it is to keep the cake from falling apart. A small annoyance that does not detract from the divine taste in the least.

Top the crab cakes with a remoulade, tarter sauce, or this luscious roasted red pepper sauce, adapted from a recipe in Bobby Flay's "Bold American Food".

Roasted Red Pepper Sauce
Char, peel and seed 2 large red bell peppers and place in a blender. Add 1/4 of a red onion, chopped, 1/2 of a canned chipotle pepper in adobo, 3 tablespoons lime juice and blend until smooth. With the blender running, add 3/4 cup of olive oil in a slow stream until the sauce is emulsified. Season to taste with salt and freshly ground pepper.

Cook's Notes:
These crab cakes are very rich. Two per person with a salad will make a very filling meal.

Monday, December 26, 2005

Josh Likes Rutabagas, Plus Recipes From Christmas Dinner

As we sat down to Christmas dinner last night, son Josh started picking a certain vegetable out of the melange of roasted root veggies that accompanied our racks of lamb. He said they tasted somewhat like Brussels Sprouts, a vegetable for which he's recently acquired a taste. At first I couldn't determine which one he referred to out of the diced mix of parsnips, rutabagas, celery root, carrots and yams, along with tiny, whole pearl onions. Ruling out the orange veggies first, a process of elimination determined that his favorite was the lowly, under-appreciated rutabaga.

You'd think that I'd have known, cook that I am. But I just don't cook with rutabagas. I think I put one in a soup once. Nor do I often use celery root or parsnips. I've had bad luck with parsnips - something about a hard, pithy core - and have avoided them. More's the pity, I discovered last night. The veggies almost upstaged the lamb, which is saying a mouthful (ahem) as the lamb was superb. (Lamb recipe follows)

Well, dare I say that I got the idea for my roasted root veggies from my former food writing teacher, the delightful David Leite. His multiple award-winning web site, Leite's Culinaria, is well worth visiting, often. The recipe, Roasted Caramelized Root Vegetables, adapted from Maria Helm Sinskey's The Vineyard Kitchen (HarperCollins, 2003), is one I will not write down in this post out of respect for copyright propriety (Davis, you may use your red pen!). David will appreciate this, as I researched and wrote an article on copyright law while taking his class. During that and subsequent research, I found that copyright law, as it pertains to recipes, is murky at best, and at the very least is downright confusing. Since this is not a post about copyright, but about the fabulous root vegetable dish, Christmas dinner and Josh's love of the rutabaga, I will not, at this time, continue my digression.

What I will tell you is that I used all the ingredients called for in Ms. Sinskey's recipe, doubled them, used dried thyme as I did not have fresh, kosher salt and fresh-ground telicherry pepper, covered the pan with foil for the first 30 minutes then removed the foil for the last 45 minutes. Mine took a bit longer to roast and didn't caramelize as much because of the greater volume of veggies. They were, however, mouthwateringly delicious and firmly cemented Josh's love of the slightly sprout-flavored rutabaga. I am proud to say that he has developed quite a diverse palate of late. I'm sure, as a younger person, he would have preferred the briar patch to even the thought of eating a Brussels sprout, let alone a rutabaga. And as for the dish, while I prefer using fresh herbs over dried any day of the week, the dried thyme worked just fine here, helped along by the dotting of butter over the top prior to roasting. Use Smart Balance if you must, but don't skip that last step.

WARNING: the following paragraph(s) may contain material unsuitable for non-meat eaters! Read on at your own risk.

Now for the lamb. I've written before about where we get our lamb - one per year from our dear neighbors across the road. Organically raised, grass fed; we watch them being born, cavort in the field and then give thanks to them for the healthful richness they give us as they grace our dinner table. This may make some folks squeemish. Lamb cuteness is not lost on me. However, I do feel that if one is going to eat meat, the closer you can be to the process, the whole process, is better and healthier (for the body and the mind) than picking up shrink-wrapped chops sitting on a foam core tray in the supermarket. Even going to a local butcher shop is better. (Someday I will write about the two turkeys we raised one year, aptly named Thanks and Giving respectively.) Even though I'm an unapologetic carnivore, I do get a bit apprehensive writing about our lambs, knowing that some in my family, who are either vegetarian or vegan, may read this post. I can only do so much, then I must be who I am.

Alrighty then. I wish I'd had Clay photograph the finish racks, but great French wine was flowing and in the process sometimes those little details get forgotten. Pre-heat your oven to 400 degrees. Rub two 8-rib racks of lamb all over with a small amount of olive oil. Using your home made Ras el hanout , sprinkle the racks liberally with the seasoning, pressing it into the entire surface of each rack, even the rib bones. Follow the same procedure with some kosher salt. Heat a cast iron pan, large enough to hold both racks (the rib ends can overlap slightly), over high heat. When hot, place one rack fat side down in pan and sear until lightly browned, rendering some of the fat into the pan. Turn rack with tongs, browning all sides. Set on a plate. Repeat the process with the other rack. When both racks have been seared, return the first one to the pan with the other, both fat side up, rib ends overlapping slightly if necessary, and immediately put in the hot oven. Roast 20-25 minutes for medium-rare (instant-read thermometer should register 145-150 degrees when poked into the meaty loin).

Remove the racks from the pan and set on a platter to rest while you make the pan sauce. De-glaze the pan with about 1/3 cup of good merlot. Whisk the boiling wine in the pan, scraping up any browned bits from the bottom and sides. Turn the heat down just a bit and add 1/3 cup Pomegranite au Merlot sauce, available from The Golden Whisk or a good specialty food store, and stir to blend. Remove from heat and quickly whisk in 3 tablespoons cold butter, one tablespoon at a time. The sauce will thicken slightly. Keep warm in the pan while you cut the racks for serving.

Cut each rack in half, 4 ribs per person, and then cut each rib part way down to the loin meat. Place a small pool of the pan sauce on a warmed plate then arranged racks loin down, with ribs up in the air. Accompany each plate with the roasted root vegetables and pass the pitcher of remaining sauce. Follow with a salad of baby greens topped with roasted red beets diced medium, coarsely chopped toasted walnuts, crumbled Point Reyes Original Blue, and, of course, Christine's black raspberry vinaigrette.


Wednesday, December 21, 2005

Yummy Pear Cranberry Ginger Upsidedown Cake


Friends Rebecca and Tony were here on the north coast this weekend visiting relatives and got themselves invited to dinner Sunday night. I'd already stockpiled the ingredients for this recipe, knowing I was going to bake it sometime over the holidays. So when Clay told me that our friends were coming for dinner, on a dark and rather stormy night to boot, I knew this would be a comforting finale to our meal.

This is a dessert that has it all: ease of preparation; beautiful presentation that is perfect for the holidays; an unpretentious, homey demeanor; and, it's delicious. The original recipe comes from the January 1990 Bon Appetit magazine. I have tweaked it over the years, the latest iteration being low fat/low sugar. I'll give you the full fat/full sugar ingredients first with my changes following in parentheses.

Pear Cranberry Ginger Upsidedown Cake

1/2 stick unsalted butter (1/4 cup Smart Balance butter substitute for baking, not the "Lite" stuff)
1/2 cup firmly packed brown sugar (1/3 cup Splenda Brown Sugar Blend)
6 canned pear halves, carefully rinsed and drained, keep whole
1 1/2 cups cranberries, coarsely chopped (if frozen, do not thaw)

1 1/2 cups cake flour
1 teaspoon ground cardamom
3/4 teaspoon baking powder
1/4 teaspoon baking soda
1/4 teaspoon salt (do not use salt if using the Smart Balance)

9 tablespoons unsalted butter, room temperature (9 tablespoons Smart Balance)
3/4 cup sugar (1/4 cup plus 1/8 cup Splenda Sugar Blend, or 3/4 cup Splenda)
2 large eggs (if you want to use an egg substitute here, use 1 large egg and egg substitute equal to 1 egg, approx. 1/4 cup. I think the real eggs give the cake a better texture than the substitute will.)
1/2 cup non-fat sour cream (I have also used non-fat plain yogurt, but make sure it's firm)
2 tablespoons crystallized ginger, chopped

Melt the 1/2 stick butter in a 10-inch cast iron skillet. Add the brown sugar and stir until it dissolves. It will still be grainy, so don't overdo it thinking it will turn to a clear liquid, it won't. Remove from the heat and arrange the pears in the skillet, round side down with tips pointing to the center in a spoke fashion. Use any small pieces of pear to make a center hub. Sprinkle the cranberries around and between the pears. Set aside.

Whisk the flour, cardamom, baking powder and soda, and salt in a bowl to blend. In an electric mixer, cream the butter until smooth. Add the sugar and beat until light and fluffy. If you are using Smart Balance, this does not do the "light and fluffy" thing that butter does, but comes close. Beat in the eggs, then the sour cream and ginger. Mix in the dry ingredients.

Spread the batter carefully over the pears and cranberries, covering the fruits completely. Lightly tap the bottom of the skillet on a hard surface to settle the batter at bit. Not too much, though. Bake in a 350-degree oven until a tester comes out clean, about 45 minutes. Watch that the sides and bottom do not burn. Cool in the pan 10 minutes and then invert onto a platter. Serve warm or at room temperature. Go ahead, gild the lily with a dollop of lightly sweetened whipped cream. It's the holidays after all!


Tuesday, December 20, 2005

Herb Mushroom Stuffed Brie en Croute


We have some wonderful neighbors on our road who love to give parties. Great parties. Wonderful parties. Summertime, wintertime and sometimes in between. Not being able to choose any one party over another as my most favorite, I'll just say that one of their BEST is an annual Christmas ornament exchange party, the latest of which took place a few days ago.

Many, many people pack into their house bringing not only a wrapped ornament, but a savory or sweet offering to share as well. Always a festive occasion, this year was no exception; the food was wonderful, the ornaments top notch, the folks merry and cheerful as greetings were made, hugs were exchanged and friends "caught up" with one another. Our neighbors are good friends with warm hearts and a generous spirit of sharing and we love them.

Here then is my offering to this year's party. It comes from Sunset's 1989 Recipe Annual and is one that I haven't tweaked at all. No reason to. It's so good just the way it is. Well, there is one change I've made. I always use a larger round of brie than the recipe calls for (an 8 oz. round is specified). This year I used a 2.2 lb. wheel and tripled the ingredients but still used just the one sheet of puff pastry.

Warm Stuffed Brie in Golden Puff Pastry

Pastry Package
1 sheet frozen puff pastry, thawed
1 round (8 to 16 oz.) cold, firm brie
1 egg, beaten

Mushroom Filling (instructions below)
1 tablespoon butter
1/2 cup sweet onion, like Mayan, chopped fine
1-2 garlic cloves, minced
1/2 pound mushrooms, brushed clean and chopped fine
3 tablespoons port
1/4 teaspoon each of the following dry herb leaves:
rosemary
thyme
marjoram

Assembly
For pastry package, roll thawed pastry out on a lightly floured board to 1/8 inch thickness. Trim to an 11-inch diameter round. Save scraps.

Cut the brie in half horizontally and place one piece, rind down in the middle of the pastry round. Place 1/2 of the mushroom filling on top of this and spread out to the edges. Place the second half of the brie on top of the bottom half, rind side up. Top with the remaining mushroom filling.

Brush the pastry rim with beaten egg. Lay the rim over the brie to completely enclose it, making pleats in the pastry to ensure a tidy package around the brie and brushing with the egg to seal. Trim the pastry where necessary and pinch the trimmed edges together, using beaten egg to seal. Again, save the scraps. Turn the brie package over so the sealed edges are on the bottom.

Roll the pastry scraps to about 1/8-inch thick and cut into holiday shapes. I used star and christmas tree cutters, but have done free-form holly leaves and berries on occasion. Brush the top and sides of the packet with the beaten egg. Place the cut out pieces decoratively on the top and sides of the brie. Brush the pieces with the beaten egg.

Place the the packet on a piece of foil on a cookie sheet and then place in the freezer, uncovered, for about 1/2 hour or until it feels firm. If you are making this ahead of time, you can then wrap the entire package and store in the freezer for up to 2 weeks.

Bake the packet, on the foil and the cookie sheet, in a 425 degree oven for about 35 minutes or until golden brown and a bit of the cheese and mushroom filling begins to ooze out. Transfer from the foil to a platter and allow to cool 10 to 15 minutes.

To serve, let people cut their own wedges from the packet. Provide plates and small forks for your guests, but also have your favorite crackers along side to aid in scooping up the melted brie.

Mushroom Filling Preparation
To make the mushroom filling, melt the butter over medium heat in a 10-inch skillet, add the onion and the garlic and cook until limp. Add the mushroooms, port and herbs and cook, stirring occasionally, until the liquid has evaporated. Remove from heat and set aside to allow to cool.

Thursday, December 8, 2005

Pork & Butternut Squash Stew

Winter is not settling down for a long nap here on the north coast. It's cold, rainy, foggy and definitely winter-y. What better comfort on such a day than to walk into the house and be greeted by the smells of a stew simmering away on the stove? Well, maybe curling up with a good book, a hot cup of tea, and a blanket tucked around you while those heady aromas waft around your head, huh? Better than visions of sugar plums.

This recipe doesn't have exact measurements, though I'll try to approximate. I just started with the pork and the butternut squash and went from there, adding this and that until I felt it was done.

2 pounds boneless pork loin or 2 pounds boneless pork loin chops, about 1 inch thick, cut into 1 inch cubes
1 large, sweet onion, chopped into 1/2 inch dice
7 cloves garlic, peeled and chopped fine
1 medium to large butternut squash, peeled, seeded and cut into 1 inch cubes
2 apples, peeled, cored and cut into 1/2 inch dice
2 cans of your favorite white beans, drained
2 cups or so of chicken stock or a combination of liquids (in addition to the chicken stock, I used some Six Rivers Brewery Autumn Ale that was left over and topped it off with some apple cider)
2 bay leaves
4 fresh sage leaves, roughly chopped
ground cloves (especially if you use apple cider as part of your liquid)
salt and pepper to taste

In a skillet over med-high heat, brown the meat all over in batches in a little olive oil. As each batch is browned, transfer it to a stew pot (I used a crock pot this time as I was going to leave the house as soon as the stew was assembled and wanted it to cook unattended).
Adding a little more olive oil and lowering the heat to medium, cook the onions until tender and golden. Add to the stew pot. Cook the garlic 2-3 minutes, taking care not to burn it and add it to the pot.
Deglaze the skillet with a bit of liquid, scraping up the browned bits from the bottom. Pour all of it into the pot.
To the pot add:
cubed squash
diced apple
1/4 to 1/2 tsp ground cloves
coarsly chopped sage leaves
bay leaves
the white beans

Mix all this together gently, adding enough liquid that will allow the meat to braise and all the ingredients to fall together into a stew. Add salt and pepper to taste, bring to a boil then reduce heat to a simmer. Cover pot and simmer for about 2 hours or until pork is fall apart tender.


Wednesday, December 7, 2005

Meyer Lemon Curd

My sister brought Meyer lemons from her tree when she and hubby Mark came over for Thanksgiving this year. They have since been sitting prettily in a white bowl waiting for me to be inspired. This morning, there it was - a hankering for lemon curd.

I feel pressed to preface the publishing of this recipe with telling you about my predeliction for desserts. I love them. Not candy, mind you. But cakes, pies, cookies, puddings, creams, ganache, cheesecakes, curds, the list goes on. The rub here is that I don't do well with sugar, to say nothing of fat. Well, who does? Maybe marathon runners. Or those especially tedious people who can take just one bite and be satisfied.

When low-carbing became the "in" diet, I'd finally found a way to control my intake of sugar, lower my intake of fat, and severely curtail my consumption of "bad carbs", which, in a nutshell amounts to anything white, while still satisfying my craving for tasty desserts. It works for me. Now the low carb craze has gone the way of so many diets (most likely due to tremendous amounts of money thrown into advertising campaigns to denounce it) and it has become passe to even use the phrase.

So, I won't. I'll just tell you that I try to cut down on sugar, fat, flour, dairy and processed foods (especially those nasty trans-fats) in my diet. It's not rocket science; too much of any of those things is not good for you.

Herewith is my version of lemon curd. Made with the Meyers my sister brought me. Thank you Cynthia!

Low Sugar, Low(er) Fat Meyer Lemon Curd
5 tablespoons of butter (I said "lower" fat, not "no" fat)
zest of 2 Meyer lemons
juice of same lemons (mine yielded 1/2 cup of juice)
1 cup egg substitute
1/2 cup Splenda/Sugar Blend

In a medium saucepan, melt butter over very low heat until all solids are gone. Immediately remove from heat. Turn burner to simmer. Off the heat, whisk in the egg substitute, blending quickly and thoroughly. Add the Splenda/sugar blend and whisk until combined. Slowly add the lemon juice and zest, whisking to fully incorporate.

Return pan to burner and over lowest possible heat cook, whisking constantly until the consistency of soft pudding, about 10 minutes. Now listen up. When I say whisking constantly, I mean it. You cannot take your eyes off this nor stop your whisking for even one nano-second. Your mixture will curdle or worse, burn. This is, of course, because you are cooking the curd right on the heat source, not in the double boiler that most recipes will tell you to use. I don't happen to have a double boiler (Santa, are you reading this?), and so use the direct heat source method, which is why I have to be so very attentive.

When the curd is done, remove the pan from the heat, give the curd a final stir and let it cool a bit in the pan. Pour it into your favorite tartlet shells, spread it between layers of your favorite cake recipe, use it to butter your toast, or give it away in pretty jars as gifts. Just keep it refrigerated. It will keep about 3 weeks in the fridge if you can control yourself. The above recipe makes a scant 2 cups of curd.

Don't mind sugar and more fat? Use 3 eggs instead of the egg substitute and a scant cup of sugar instead of the Splenda blend. For me, I'm going to try using Smart Balance butter substitute in my next batch.

Saturday, December 3, 2005

Eggies and Toast - EoMEoTE #13


This is my contribution to the End of the Month Egg on Toast Extravaganza #13, hosted by Cook Sister.

My three boys are grown up now, but ever since each of them has been able to hold a spoon, the most comforting comfort food that they remember has been what they dubbed "Eggies and Toast". Simple, basic, homely, comforting. It's what they would ask for if sick, upset, sad or just hungry. This is my first offering to EoMEoTE and I'm happy to share this humble dish exactly the way I've made it for the past thirty years. No embellishments. To this day, they love it.

Butter well 2 slices of hot toast and tear up into a bowl. Crack 2 soft-cooked eggs with a spoon around the middle, break in half and, using the spoon, scoop the insides onto the pieces of toast. Sprinkle all over with Spike seasoning and mix together until the toast pieces are coated with egg yolk. Serve immediately while reciting my rather horrible rendition of a rhyme called "A Seasonable Song" from The Real Mother Goose:

Eggies and Toast piping hot.
What I've got
You have not.
Hot, hot Eggies and Toast;
M-m-m so good, hot, hot, hot!


Friday, December 2, 2005

A Thanksgiving Offering


These were part of the Thanksgiving spread at our house this year. We so enjoyed the company of family and friends who came to share this most precious of holidays with us. We are thankful for all of you!


Roasted Red & Yellow Beets in Sherry Vinaigrette with Blue Cheese & Toasted Walnuts
Roast equal amounts of scrubbed baby red and yellow beets in a 375 degree oven, wrapped in separate foil packages (red, yellow), until tender when pierced with a knife, about 45 minutes.
Open foil packages and allow to cool to room temp.
When cool, peel the skins off with a sharp knife and cut off the tops and tail ends.
Place decoratively in a dish with 1-inch high sides.
Drizzle with your favorite vinaigrette (my recipe is below) and crumble Pt. Reyes Blue Cheese over the top, followed by coarsely chopped toasted walnuts.

Sherry Vinaigrette

  • 2 tablespoons Jerez Sherry vinegar
  • pinch of Kosher salt
  • 1/2 tsp sugar
  • 1 heaping tablespoon good Dijon mustard
  • 4 tablespoons extra virgin olive oil
Place first 4 ingredients in a glass container and whisk until blended.
Slowly pour olive oil into container, whisking constantly, until emulsified and well blended.
Store at room temperature.

Thursday, December 1, 2005

Quince-Raisin Tarte Tatin


A few days before Thanksgiving, while walking down the produce section of our local Murphy's Market, I spied a dozen golden yellow, medium sized quince nestled in a basket of white netting . Instantly, visions of ruby slices cooked down to a tender, mouth-watering dish of citrusy-melony sweetness almost made me dizzy. I bought a bunch of them, their lovely scent filling my shopping basket with a gentle perfume.

At home, while poring through my legion of cookbooks, I happened upon Georgeann Brennan's Potager. This is a lovely book that I return to again and again for rustic but elegant French-inspired dishes. Here, then, is an adaptation of her recipe of Quince Tarte Tatin, which was served the evening before Thanksgiving to early arrivals.

Fruit Preparation (start this the day before serving)
  • 6 medium quinces
  • 2 cups Merlot
  • 1/4 cup sugar/Splenda blend
  • 1 vanilla bean
  • 3/4 cup golden raisins
Peel and core the quinces and cut into 1/4 inch slices. In a bowl, mix sugar, wine, vanilla bean, raisins and quinces. Cover and let stand at room temperature 12 hours or overnight.
Butter Pastry Dough - adapted from Bon Appetit, November 2003
  • 1 1/4 cups unbleached flour
  • 1/2 tablespoon sugar or Splenda
  • a pinch to 1/4 teaspoon salt
  • 1/2 cup (1 stick) very cold unsalted butter, cut into pieces
  • 3 tablespoons, or more, ice water
Blend flour, sugar and salt in food processor. Add butter and pulse just until coarse meal forms. Add ice water by tablespoons, pulsing just until moist clumps form. Add water by the 1/2 tablespoon if dough is dry. Gather into a ball, press into a disk, wrap in plastic wrap and refridgerate for 1 hour or up to 3 days. Let soften slightly before rolling out. This recipe makes 1 nine-inch crust. Double the recipe for a double pie crust.
Putting it all together
Butter a glass pie dish, 9 to 10 inches in diameter, with 1 tablespoon of butter. Sprinkle 1/4 cup sugar over the bottom of the buttered dish.
With a slotted spoon, remove the quince and raisins from the merlot soaking liquid. Leaving the vanilla bean behind, place 1/2 of the quince-raisin mixture in the pie dish, covering the bottom of the dish. Sprinkle with 1/8 cup of sugar and then add the rest of the quince-raisin mixture and sprinkle with another 1/8 cup of sugar. (By the way, I used Splenda-Sugar blend in my tarte, following the suggested measurement ratios, and it tasted wonderful.) Cut 1 tablespoon butter into small pieces and dot the top of the fruit mixture with it.
Roll the pastry out on a floured cloth to about 1/8 inch thickness. Wrap the pastry around your rolling pin and place it atop the pie dish. Trim the edge of the pastry, fold the edges under and tuck inside the pie dish. Pinch the dough to adhere to the sides of the dish then prick all over with a fork.
Bake in a pre-heated 375 degree oven in the center of the middle rack for 45 minutes to 1 hour. When the tarte is done, the crust will be a golden brown and a thick, ruby colored syrup will have formed in the bottom of the dish. Better yet, some of the syrup will leak out of the top of the crust. A sure sign of doneness.
Remove the tarte from the oven, gently loosen the crust with a knife, place a platter over the tarte dish and, holding the tarte dish and the platter together, immediately invert the tarte onto the platter.
Bonus Sauce
Don't toss out the merlot-sugar-vanilla bean soaking liquid. Instead, remove the vanilla bean, place the liquid in a saucepan and bring to a boil, reducing it by 1/2. This may take 1/2 hour or more. Be careful not to let the liquid burn. When it has reduced and thickened somewhat, add 1/4 cup heavy cream, stirring madly all the while. Be careful here, adding the cream can make the liquid in the pan boil up. Keep stirring until the cream is incorporated and the sauce coats the back of a spoon. Remove from heat, allow to cool and serve drizzled over the tarte.