Monday, September 25, 2006

WHB: Celebrating A Year Of Herbal Fun

Happy First Anniversary!


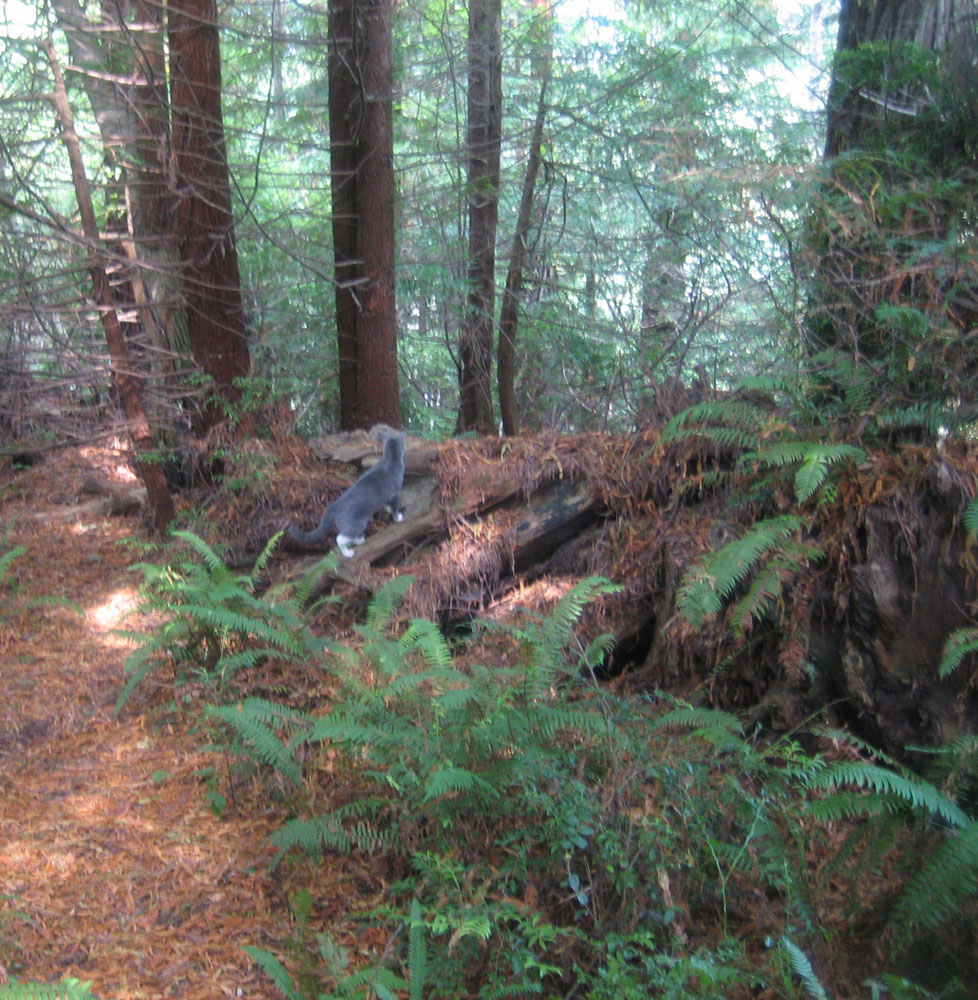
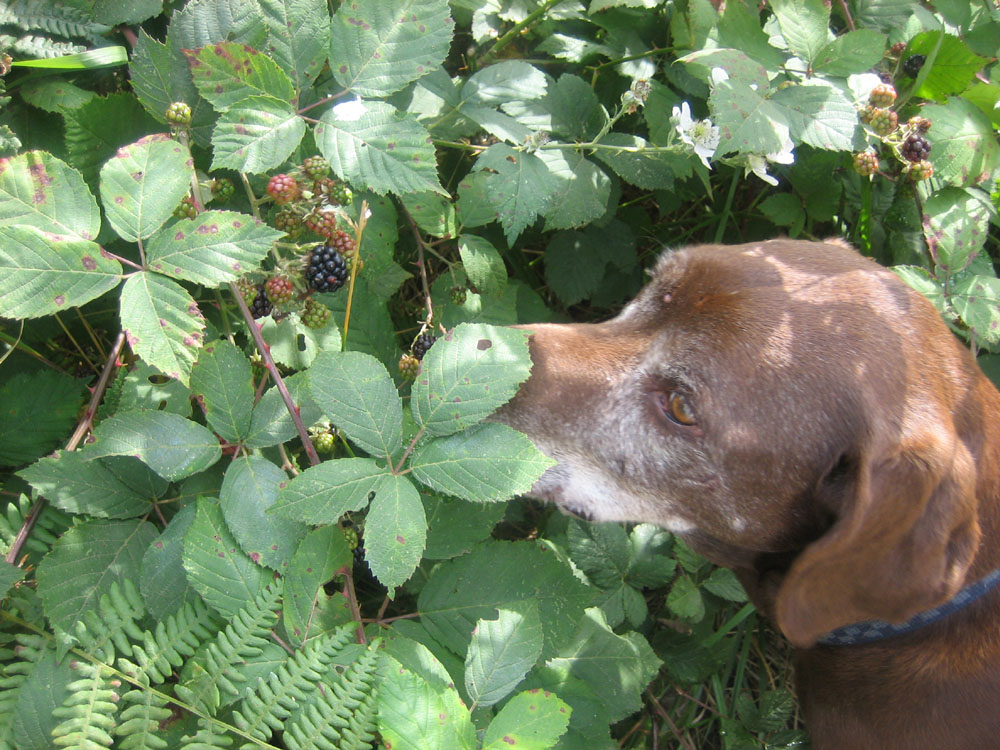
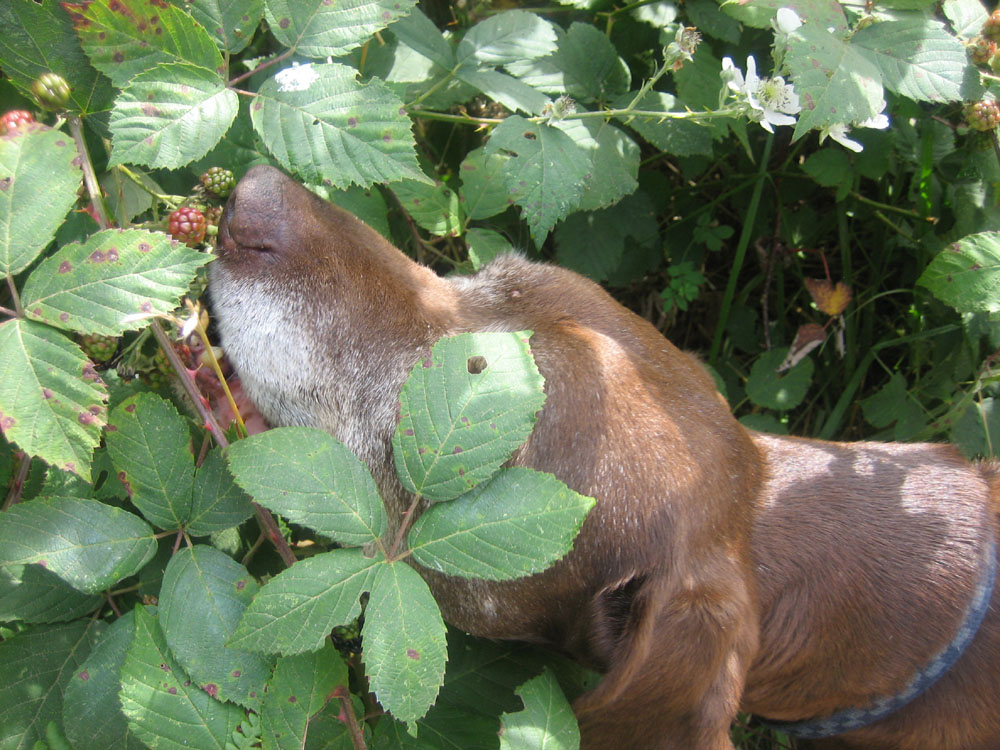
A year ago this week Kalyn of Kalyn's Kitchen, one of my very favorite food bloggers, started an event that surprised her with its popularity when she joked to Cate of Sweetnicks that she didn't have a dog or a cat, but maybe she could share a photo of her plants. Well, the idea caught on; food bloggers joined in and it has been going strong and growing stronger with each passing week.

Kalyn has decided to celebrate the first anniversary of WHB, being held Sept. 25 - Oct. 1, by asking bloggers to post about their very favorite herb. Read here to find out how to join in the fun.
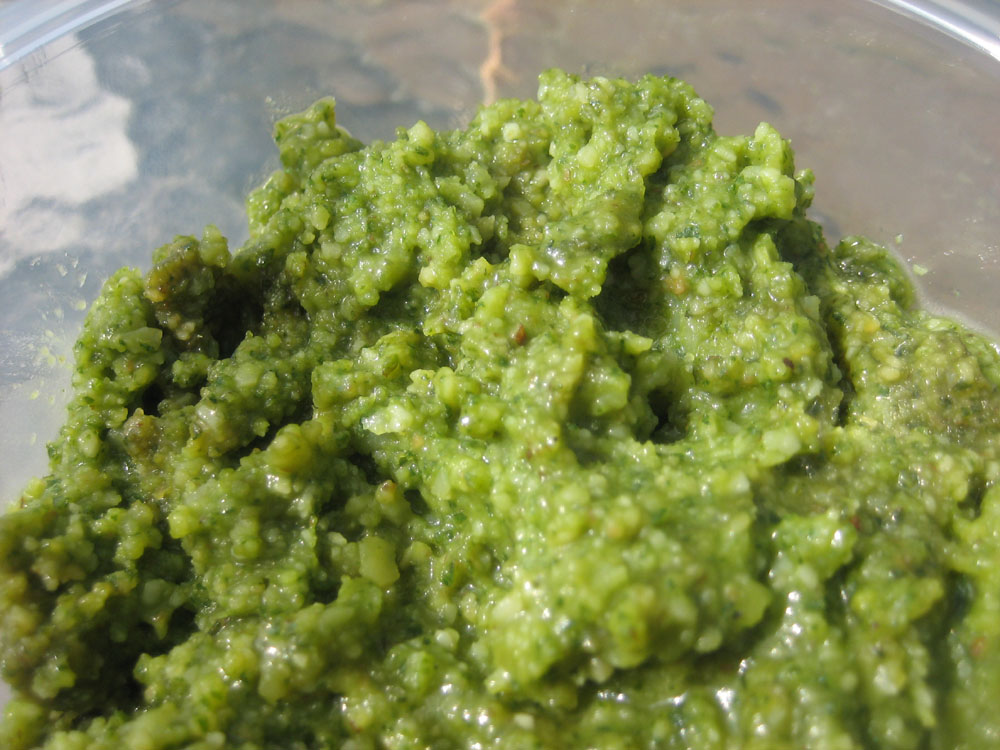
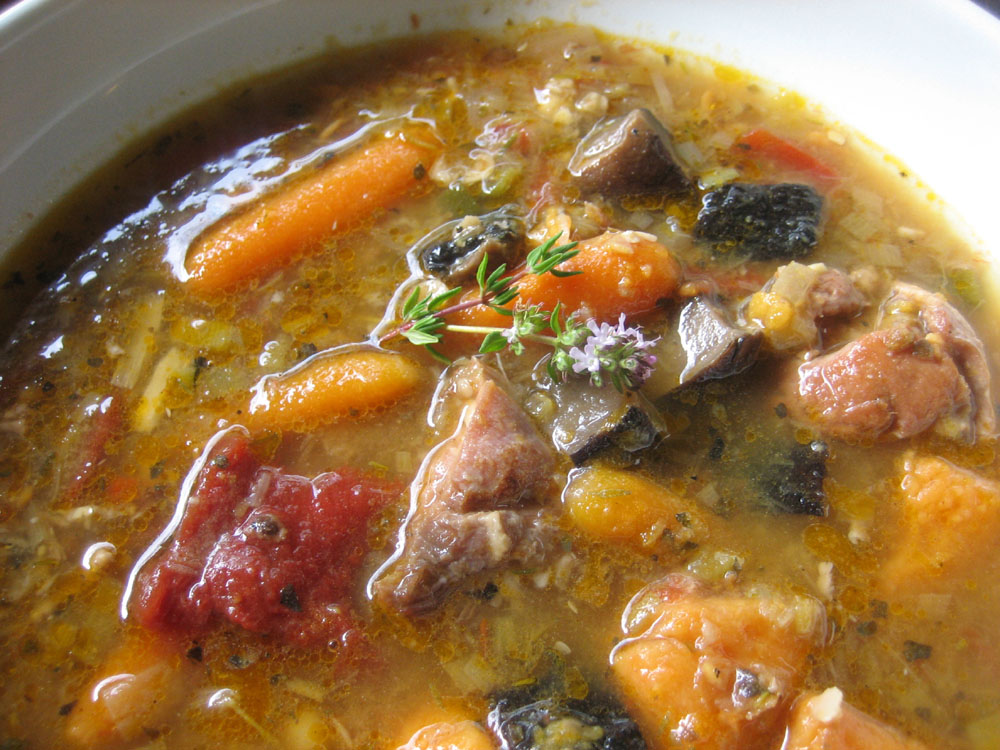
Common as it is, basil is my most favorite herb in the herbal kingdom. It's versatile, can be used in savory as well as sweet dishes, comes in a variety of flavors and colors, can be frozen, pounded, shredded, liquified, dried and extracted. The seeds can be soaked to a silky, gelatinous texture and spooned over fruit, custard or sorbet for a truly food porn sensation. And then there's pesto.

Always bemoaning the fact that I can't grow the luxuriously huge basil plants that I grew accustomed to when I lived in a hotter climate, I happily encountered some beautiful bunches, organically grown, at our local co-op and immediately set about to make pesto. First it was featured with fettucine and grilled chicken thighs for a potluck party we gave last weekend (the photo of which I forgot to take, which I always do when I'm cooking for a group of 20 and trying to make my house and yard presentable at the same time) and then it was spooned atop leftover thighs the next day just to remind us how good it was the first time. The last of it was paired with chevre and spread over whole grain crackers as an appetizer. Now that's versatility.

Basil Pesto
Adapted from so many recipes over such a long period of time that I've forgotten where I first saw it.

Ingredients:
4 cups fresh basil leaves, packed
4 cloves garlic, peeled
2/3 cups pine nuts, toasted
1/3 cup walnuts, toasted
1 cup coarsely grated parmesan cheese
1/2 cup coarsely grated asiago cheese
1 to 1 1/2 cups extra virgin olive oil
kosher salt and freshly ground black pepper

Preparation:
Now you can make your pesto the hard way, pounding it by hand in a mortar and pestle, but pesto is why God made food processors.
First, put the basil and the garlic in the food processor and process, using the pulse button, until the leaves are finely chopped.
Add the nuts and pulse again until the they are finely chopped.
Add the cheese and repeat the process above until the cheese is combined with the basil mixture.
With the processor running, pour the olive oil in a slow, steady stream through the feed tube until the mixture forms a smooth paste. Use more or less oil, depending on your personal preference.
Remove from the processor bowl and season to taste with the salt and pepper.

If you want to save some pesto for the gray days of winter, spray the cups of plastic ice cube trays with a small amount of cooking spray and then fill them with the pesto, pressing down to eliminate air pockets. Freeze until solid then pop out and place in zip top freezer bags for freezer burn free storage.

As I send this post out, I'll be on a train heading across the country from California to the east coast. Most of the posts you will read for the next few weeks will be about my trip, but this event is special and I couldn't leave without joining in the celebration. Kalyn, my friend, take a bow.

Friday, September 22, 2006

Back Soon!

Mr. CC and I are taking a trip. Going back east to visit dear friends and see the fall colors. Going to drive up the New England coast to Maine, Bar Harbor, Acadia National Park. Going by train from California to upstate New York! Across this beautiful country in autumn. Through the Rockies. Across the great plains and around some of the great lakes. Going to be gone for 3 1/2 glorious weeks! Going to travel in a private sleeper room with a newspaper and coffee brought to us each morning, with breakfast, lunch and dinner served to us each day (I hope it'll be good food). Neither of us has done this before and we're soooo excited!

I'll try to post often, really I will, but usually when I go places I'm so busy looking and experiencing and just plain enjoying myself that sometimes I forget. I don't forget you, I just forget to blog. So if my posts are sporadic, please forgive me and understand that I'm having the time of my life. And if anyone has a restaurant or two to recommend on the east coast north of Mass, please let me know.

I'll be back!

Thursday, September 21, 2006

Low Carb Scramble

The preparation of food gets simpler and simpler as the countdown to leaving on an extended trip gets closer and closer to zero... blast-off. I'm at three... two... right now, struggling to take care of all business on the home front while trying to figure out the accoutrements one might need to cross the country by train and see the fall colors of New England in proper style. Doncha know. More on that tomorrow.

This one is a low carber's delight. Feel free to substitute meat, cheese and veggies to your liking. Heck, you can even use whole eggs if you want.

Low Carb Scramble
Christine's Original Recipe

Ingredients:
1/2 red bell pepper, diced small
4-5 leaves kale, mid-rib removed, coarsely chopped
1/4 cup turkey lunch meat or roasted turkey breast or roasted chicken, diced small
1/4 cup asiago cheese, diced small
3/4 cup egg substitute, such as Lucerne's Best of the Egg, which is lower in sodium than others
Or, if you prefer, 3 whole eggs, beaten to blend
2 teaspoons Smart Balance
1/2 teaspoon Vegit or Spike or Garlic Lover's Garlic

Preparation:
Melt the Smart Balance over medium-low heat in a heavy bottom skillet.
Add the peppers and saute until beginning to soften.
Add the kale and continue to saute until the peppers have softened and the kale is cooked and still bright green.
Pour in the egg substitute and stir gently.
Add the meat and cheese, continue to stir gently as the eggs cook. Keep the heat low so they don't cook too fast.
When the eggs are softly scrambled and the cheese has melted, use the seasoning of your choice to finish the flavors and divide onto two plates. Or, if you're really hungry, don't tell anyone you've made this and eat it all yourself. Of course I didn't do that!

Wednesday, September 20, 2006

Quince

There's this quince bush growing in our yard. I planted it more than 12 years ago and, over that period, moved it three times until I finally found the right spot for it about 5 years ago. It's now about 8 feet tall and wide. When I purchased the plant I thought it was a "flowering" quince, genus Chaenomeles, which does not bear fruit. Mis-labeled in the nursery, much to my delight this is the real thing, a true quince, genus Cydonia. They are related to apples and pears and often are used as root stock for pear trees.

In the late winter my somewhat ugly duckling of a quince bush puts out apple blossom-like pinkish-white flowers - rather sporadically. What it lacks in prolific bloom display it makes up for with large, deliciously scented fruits. Sometimes I get a lot of fruit, sometimes only 5 or 6. It seems to me that its blooming and fruiting habits depend on the weather. If we get a particularly cold winter, the quince will put out more fruit, which will be ready to pick the following Autumn to winter. Right now, there are 5 quince fruits on the bush - two large, 3 small. I also found one on the ground which you see pictured below, sitting next to me perfuming the air as I type. (The 3-legged "chanchito" beside the quince lives there. It's my computer fairy. Woe to anyone who moves it.)

The scent of a quince is hard for me to describe. There's vanilla, honey and something slightly peachy-melony about it. It's ethereal, like the scent of violets; one minute it's there and the next it's gone.

I fell in love with quince a number of years ago when I lived in the Sacramento Valley. A neighbor had a quince bush and gave me a few fruits every fall. Loving the smell of them but not knowing how to cook them, I pored through cookbooks only to find recipes for quince jelly for which I never had enough fruits. I figured out that I could peel, core and slice them, place the slices in a saucepan with some water and sugar and cook them until soft. The transformation was nothing short of miraculous as the hard, sharply astringent yellow-white pieces melted into pink, soft, sweet, almost jellybean-like goodness that was heavenly to eat by itself or spoon over vanilla ice cream, which is the only thing I could figure out to do with them at the time. Since then I've found other ways to use them: In quince-raisin tarte tatin; stewing them with apples for applesauce; adding them to savory winter stews or squash soups redolent with allspice and herbs.

This year, because we're leaving on a lengthy trip in 3 days, which I'll tell you about in another post, I'll have to wait a month more before trying another recipe. I hope my quinces stay on the bush during the time I'm gone.

This is my offering for Weekend Herb Blogging, a weekly event started by Kalyn at Kalyn's Kitchen. Each week, food bloggers can join in by posting about an herb, plant, garden vegetable or fruit of their choice. Kalyn will be posting a round-up of participants this Sunday. Be sure to take a peek at what food bloggers from around the world are writing about the plant world. If you'd like to join in, click here to find out how.
Update: Because so many who left comments have either never seen or never tasted quince, here is a link where you can not only see it in its most popular form, membrillo, you can order it too. The on-line store is called La Tienda dot Com and features food products from Spain. Be sure to order or pick up some manchego cheese while you're at it. Membrillo and manchego are delicious together.

Tuesday, September 19, 2006

Kitchen Gadgets I Could Live Without But Prefer Not To

In the Victorian times of my great grandmother and great aunt, households who could afford it had silver or silver plated cooking and dinner utensils that included such single-tasking items as a bone marrow extractor, pickle fork and pierced relish spoon, all done up in the fancy silver flowers and scrollwork of the times.

Today, although the materials are a more affordable stainless steel or even wood, single-tasking implements abound in kitchen stores and catalogues. Take these, for example: The long one with the larger bowl is an olive spoon, made to reach to the bottom of an olive jar without tipping the jar upside down and losing the precious juices.

The shorter, smaller one is a caper spoon, able to fit into the narrow opening of a caper jar. It's almost a perfect teaspoon measure, so if I take a heaping spoonful from the caper jar, letting the brine drain back into the jar, I can multi-task by extracting and measuring at the same time. Actually, when I think about it, both spoons are multi-taskers. I use the larger one for extracting caper berries as well as cocktail olives and the smaller one not only for capers, but for getting my green peppercorns out of their jar while leaving the brine behind. Until, of course, I get to the bottom half of the jar. Then I'll have to use the farther-reaching one.

Can I live without these gadgets? Of course I can. But then I'd have to press my spoon against the inside of the jar to drain off all the liquid before lifting out the contents. Or, worse yet, strain a whole jar of capers into a bowl, take what capers I need, then pour the brine back into the jar. I've actually done that (insert squiggly Cathy-face here). *Sigh* I'd rather have my spoons.

Monday, September 18, 2006

Chicken Liver Pate On Garlic Toasts

I got the idea for this recipe some time ago from Sam at Becks and Posh who made some chicken liver crostini to take to an Oscar party. I think I went out the very next day and bought myself some chicken livers. Then I put them in the freezer. Then a few months went by. Then, on culinary overload from all the food being brought to Beach Night, someone suggested that for the next one we bring only appetizers. Great idea, everyone agreed. So last Monday I took the chicken livers out of the freezer and the next day prepared this pate and garlic toasts. I pretty much followed Sam's recipe for the pate, so all the credit should go to her. I even used my newly acquired immersion blender, per her suggestion, for the first time and it worked very well.

If you read my last post, you will know that I've been very busy and haven't had the time to put anything on my cooking blog. (Oh, but that doesn't stop me from taking the occasional photo as you will see if you visit my garden blog!) This morning, as I was preparing for this post, I cruised around to my favorite food bloggers to see what had been going on while I was away and found that Jann at The Traveling Food Lady, just made a chicken liver pate that looks great and I'll bet tastes just as good as it looks. Knowing that quite often we foodies will come up with the same idea at the same time, I feel that I'm in good company.

Chicken Liver Pate with Garlic Toasts
Adapted from Sam of Becks and Posh

Ingredients:
4 tablespoons unsalted butter - divided
4 tablespoons olive oil - divided
1 large sweet onion such as Walla Walla, chopped fine
6-8 medium sized fresh sage leaves
1 pound chicken livers, all fat and sinew removed
1/2 cup dry white wine
1 4-ounce jar capers, drained, rinsed and minced
1-2 tablespoons fresh flat-leaf parsley, coarsely chopped
kosher salt and freshly ground black pepper to taste
1 long sourdough baguette, preferrably seeded
olive oil for the bread
1 large clove garlic, peeled and cut in half

Preparation:
Heat 2 tablespoons each olive oil and butter in a heavy skillet over low heat. When the oils have melted, toss in the sage and chopped onions and saute very slowly until the onions are translucent and the sage is very soft, about 10 minutes. Adjust the heat so the onions don't burn.
With a slotted spoon, remove the onion saute from the pan and set aside. Adjust the heat to medium and add the remaining olive oil and butter to the pan. When it has melted, add the chicken livers and saute until they are browned all over but still pink in the centers, about 10 minutes.
Return the onions and sage to the pan, adding the white wine and continue to cook for 2 minutes more.
Remove the pan from the heat and blend the mixture in a food processor until just roughly mixed. The pate should be coarse. Use an immersion blender if you have one - they're fun.
Transfer mixture to a bowl and stir in the minced capers and chopped parsley.
Place the bowl, covered, in the fridge to cool and firm up a bit. When ready to serve, let stand at room temperature for about 15 minutes.

While the pate is cooling, slice the baguette thinly on a hard diagonal, making the slices as long as possible. Pour some olive oil into a bowl and, using a pastry brush, lightly brush both sides of each baguette slice.
Put the slices on a large baking sheet and place in a 400 degree oven for about 15 minutes or until they turn golden brown, turning the slices over halfway through the cooking time. Watch to see that they don't burn.
When the slices are nicely toasted, remove from the oven and allow to cool for 5 minutes.
While they are still warm, rub the cut side of the garlic clove over one side of each slice. You don't have to put a lot of garlic on it, just rub lightly once or twice to get the garlic essence onto the toasts.
At this point, you can cool the toasts completely and store them in an airtight container until ready for serving.
These were very easy to transport to the beach. The toasts were put into a large square plastic container with a snap-on lid and the pate had already been spooned into a round plastic container with a snap-on lid. Taking them to the beach was a snap!(sorry) Spread pate on a piece of garlic toast to serve.

And now, I've got something I just have to share with David L, who posted Out Of Reach And Out Of Sight in August. (To truly appreciate the tenor of his post, please read all of the comments.)

I had already cut the fat and sinew from my chicken livers and had set them aside on a counter near the stove while I prepped the rest of my ingredients. At one time I glanced over and saw that the livers had been steadily sliding to the side of the cutting board upon which they had been resting and were dangerously closed to sliding onto the counter. I picked up the cutting board and shook the quivering, glistening livers back to center and set them down on a different counter. Sometime after returning to my work, a small, red, gelatinous mass caught my eye. A piece of chicken liver had, indeed, escaped the cutting board and now was slowly but surely slipping down into the crack between counter and stove.

I watched it for a second to see just how quickly it was moving. Did I have time to take a photo before it completely slipped away? Just barely.
I know I'm really dating myself here, but does anyone remember the original horror flick The Blob? With a very young Steve McQueen in his first starring role? I saw it as a kid when it first came out in theaters. It was hokey and scary at the same time. Well this chicken liver, slowly slipping, disappearing into that dark nether-region that exists betwixt stove and counter, brought that movie to mind. The Blob was a brownish red quivering alien mass that rolled its way over everything, growing bigger and bigger as it ate whatever happened to be in its path. After snapping the photo I quickly retrieved the offending blob with a chop stick. Can't have something as creepy as raw chicken liver living down there, now can we?
Then, yes David, I did pull the stove out a few inches and gave both stove and counter a good scrubbing. I do have my limits.

Friday, September 15, 2006

Up To My A@# In Alligators

Hi Folks. It's only been three days since my last post and I feel like I'm out in left field. All of my favorite food bloggers are merrily, merrily posting away, daily!, while I've been looking longingly at my cooking photos and at my computer then firmly squaring my shoulders and saying NO! Because sometimes, as Nancy used to say (does she still say it?), you've just gotta say no. I would, and can and have, merrily spend countless hours writing up a post or reading others' posts. And I mean hours. And that doesn't account for the cooking that I do.

Consequently, everyone once in a while the rest of my life, and work, suffers. So now I'm doing penance and actually catching up with paperwork, bookkeeping, housework, shopping, and preparing for this potluck party we're giving tomorrow. I'll have to try to catch up with blogging on Sunday. 'Til then, there are some cool photos on my garden blog. Take a look!

Tuesday, September 12, 2006

September Soup

Ah September! In case I've not said it enough, September is my favorite month. With October and November following closely on its heels. Soon it will be time to bring in the deck chairs, tarp the firewood, put the grill under cover, think about the Thanksgiving dinner menu. For now, the days are still warm enough and long enough but there's the smell of wood smoke in the air and a crisp coolness to the nights that portend extra layers of clothing and candles casting a warm glow on the dining room table.

One can hear the sea lions out on the ocean rocks this time of year, a sure sign that autumn is coming. V-patterns of geese can be seen on their southward flight; the sound of their honking always makes me look up to watch them gracefully move across the sky until they're out of sight. These days an extra quilt is needed for sleeping warmly and the hydronic heater has been set to take the chill off the house for a few hours each morning and evening.

This is the time of year when I begin to crave the longer, slower process of preparing warming soups; filling the house with the smells of end-of-summer produce and beginning-of-autumn root vegetables. It's also when I begin to think of braised meats, red wines, kale, chard, polenta, just to name a few. Those will all come later.

Now is the time, as the days begin to shorten and the sunlight turns golden, when I feel compelled to make a big pot of soup to share with friends and family; one that I've made every September for years using produce that announces the changing of the season. The ingredients may change a bit each year, according to my whimsy, but family and friends only grow more dear.

Ingredients (this time):
2 large leeks, white and pale green parts only, cleaned, sliced in half lengthwise and finely sliced crosswise
1 large sweet onion, peeled and coarsely chopped
2 heads garlic, oven roasted
1 large jalapeno pepper, charred, peeled, seeded and minced
2 red bell peppers, charred, peeled, seeded and coarsely chopped
2/3 cup French green lentils, washed thoroughly and picked through for rocks and things
2 large portobello mushrooms, gills removed, rubbed with olive oil and roasted in a 400 degree oven for 15 minutes then cut into chunks
2 garnet yams, peeled and cut into large chunks just before adding to the soup
1 lb. bag organic baby carrots
6 sprigs thyme
2 bay leaves
7 of Kalyn's slow-roasted tomatoes (you've really got to make these before the tomato season's over!) or 2 tablespoons good tomato paste (optional)
6-12 boneless, skinless chicken thighs
1 cup dry red wine (use one that's good enough to accompany the soup in a glass!)
4 ears fresh corn, shucked, kernels cut from cobs, cobs "milked" by running the back edge of a knife up the cob
12 cups chicken or vegetable stock, preferrably home made. Use low sodium,low fat if purchased.
Olive oil and unsalted butter for cooking

Preparation:
Have all of the ingredients prepped, as stated, before beginning to prepare the soup.
Place a small amount of olive oil and an equal amount of butter in a cast iron skillet and heat to medium.
Add the leeks and the onions and saute slowly until they're softly caramelized, about 20 minutes. Adjust the heat so they don't burn.
Peel the roasted garlic cloves from their skins and add to the onion mixture. Stir a bit to break up the garlic then dump the whole thing in a large soup pot.
Place the soup pot over medium high heat and add the chicken or vegetable stock.
Add the peppers, portobellos, carrots, yams, lentils, slow-roasted tomatoes or tomato paste, thyme sprigs and bay leaves (you will fish these out later) and give a stir. The thyme leaves will fall off their stems as the soup cooks. Adjust heat to bring the pot to a simmer.
In the skillet used for the onions, add more olive oil and butter and adjust the heat to med-high.
Add the chicken thighs, not crowding the pan, and sear until golden brown on both sides, sprinkling each side generously with salt and freshly ground black pepper. You may have to do this in batches. Removed well-seared chicken to a plate.
When all the chicken is done, deglaze the pan with the cup of red wine, loosening all the browned bits. Pour all of it into the soup pot.
When the lentils, carrots and yams are just tender, cut the chicken into chunks and add to the pot with the juices that have collected on the plate.
Add the corn kernels and corn milk. Stir. Taste. Adjust seasonings if necessary. Simmer until the chicken meat is cooked through. Before serving, remove the thyme stems and the bay leaves.

Serve in large, shallow bowls with plenty of your favorite artisan bread.
And, of course, the rest of the wine.

Monday, September 11, 2006

September 11th

In remembrance of those who lost their lives
in the tragic events of 5 years past.
And with the hope that a more peaceful world
will prevail in the years to come.

Sunday, September 10, 2006

Bacon And Eggs. . .


...and mayonnaise and mustard and cornichon and two tiny but delicious Eureka Mist tomatoes from the garden.

The bacon bits came from leftover Neiman Ranch Applewood Smoked Un-cured Bacon. I cut the thick slices of bacon into 1/2-inch pieces and cooked them in a cast iron skillet until the fat was rendered and the bits were perfectly done to a crispy brown goodness. (Most of the bits were saved in a container in the fridge for a later use and the rendered fat was stored in a glass jar for I-don't-know-what-yet-but-I'm-sure-I'll-figure-it-out.)

Two hard boiled eggs were peeled and chopped into a bowl, followed by a tablespoon of mayonnaise, a heaping teaspoon of Maille mustard and 3 finely chopped cornichon. This was stirred together, placed on a small plate, sprinkled with bacon bits and surrounded by wedges of freshly picked tomato. That's it. It was wonderful. It's all gone. Sunday brunch.

Friday, September 8, 2006

A Bounty Of Blackberries


This is the time of year when I feel very rich, botanically speaking. In a word: Blackberries. We have two kinds of blackberries growing on our property, the Himalayan Blackberry, a giant of a plant that has large, nasty thorns and can put out canes up to 20 feet long, and our native blackberry, which has smaller canes, thorns, growing habit and fruit. I must rather smugly add here that we actually have eight kinds of edible berries on our 2.5 acres and we only planted one of them, our blueberries. All the rest are either indigenous to our area, black and red huckleberries, salal, thimbleberry, and salmonberry, or are the blackberries that have naturalized here. Because the Himalayan blackberry is considered a noxious weed in California, we have to be vigilant in containing its growth to a prescribed area.

These crisp, leading-up-to-autumn mornings will find Clay out in the yard picking a bowl of blackberries. They're fat, juicy and tartly sweet, a perfect topping to our steel-cut oats breakfast. Now is also the time to pick whatever is ripe everyday to save this luscious goodness for winter. Our berries are completely pesticide and any other -cide free, as is all of our property, so the only thing they sometimes have on them is a bit of dust.


Since I freeze the berries for the winter, I don't want to add water to them by washing them, so after picking several quarts, I place them on a large baking sheet and "dust" them by using the cool setting of a hair dryer. This blows off the dust and other bits of garden schmutz that may be clinging to them.

To make the berries ready for bagging and freezing, I carefully spread them out over the baking sheet so they're in a single layer and place them in the freezer for about 1/2 hour or so, until each berry is semi-frozen and won't stick to its neighbors. Then they go into large zip-top freezer bags and back into the freezer, waiting for the perfect moment in the darkest days of winter to brighten an evening meal where I might make a clafoutis or a cobbler for dessert, or top a quickly sauteed chicken or duck breast with blackberry pan sauce. Yum!


This is my berry picking companion, Huckleberry. She's 15 years old, loves blackberries and has learned to pick them off without getting stuck by thorns. Jack loves berries too but, being vertically challenged, is limited to the ones growing close to the ground.
This is my submission to Weekend Herb Blogging, a weekly event begun by the ever busy and industrious Kalyn of Kalyn's Kitchen. Each week, food bloggers can join in by posting about an herb, plant, garden vegetable, fruit, etc. One of my very favorite food bloggers, Kalyn will 'round-up' the weekly submissions on Sunday evening. Be sure to take a peek at what food bloggers from around the world are saying about their favorite herb or plant. If you'd like to join in, click here to see how.

Thursday, September 7, 2006

Eggplant Parmesan With Kalyn's Incredible Marinara Sauce

The photo for this dish is rather unappealing to me, but the dish itself was so darn tasty and the sauce so incredibly good that I've thrown caution to the wind and will show it to you anyway.

Promising our group of Beach Night revelers that I would make something to "warm the tummy" and, as usual, starting to cook late in the day, I stole ingredients from what were meant to become eggplant timbales (which I'll just have to make and post another time) and came up with what I guess you could call eggplant parmesan. A ricotta cheese filling between layers of roasted eggplant slices and Kalyn's incredible Sausage and Basil Marinara Sauce, topped with cheese, baked for an hour in the oven, and it was done and ready to pack to the beach.

If you haven't made Kalyn's sauce yet, you really owe it to yourself to do so. I made a full recipe a few days ago and ended up with 7 containers to freeze for the winter. And I'm not done - this weekend I'm going to make another batch before the tomatoes in our local Co-op are all gone. This sauce is thick and rich and herb-y and tomato-y. Just think of all that good lycopene you'll be getting to carry you through the cold winter and on into next summer while waiting for the tomatoes to ripen!

The season is changing rapidly here; the days are shorter and the nights cooler, so a hot dish just from the oven hit the spot for our rather cool gathering on the beach.

Eggplant Parmesan a la Beach Night
Ingredients:4 medium globe eggplants
2 cups ricotta cheese
2 eggs
3/4 cup grated parmesan
1/4 cup toasted pine nuts
2 teaspoons dried basil, crumbled
1/4 teaspoon ground nutmeg
1/4 teaspoon kosher salt
freshly ground black pepper
2 cups marinara sauce (I used Kalyn's Sausage and Basil Sauce)
1/2 cup grated parmesan cheese
1/2 cup grated asiago cheese
olive oil for the pan

Preparation:
Preheat oven to 450 degrees.
Cut the stem end and base end off of each eggplant. Slice the eggplants lengthwise into 1/4-inch thick slices and place on an oiled cookie sheet.
Roast in the oven for 12-15 minutes, turning the slices over halfway through the cooking time.
Remove from oven and set aside.
Set the oven to 350.
In a bowl, beat the eggs lightly then add the ricotta, 3/4 cup parmesan, pine nuts, basil, nutmeg, salt and black pepper, mixing thoroughly.
Place a thin layer of sauce on the bottom of an oblong 9x12" glass baking dish.
Place a layer of eggplant slices on top of the sauce, fitting the slices snugly.
Spoon 1/2 of the ricotta mixture over the eggplant, spreading it out with the back of the spoon.
Put 1/3 of the sauce over the ricotta mixture and top with another layer of eggplant.
Put the rest of the ricotta mixture over the eggplant and another 1/3 of the sauce.
Place the last of the eggplant slices on top followed by the last of the sauce.
Sprinkle the 1/2 cups of parmesan and asiago cheeses over the very top, cover with foil and bake in the oven for 45 minutes.
Remove the foil and bake another 15 minutes to give the cheese a browned, chewy texture.
Remove from the oven and let rest for another 15 minutes.

To pack this up for the beach, I put a large sheet of heavy duty foil on the counter and set the baking dish in the center. Bring up the sides of the foil to enclose the dish. Top with another piece of foil if necessary. Place in a cardboard box that has hand holes in the sides for easy carrying.

Good night!

Monday, September 4, 2006

Michelle's Poulet aux Noix

Once in a while I see a recipe on someone's food blog that really knocks me out. And once in a while I'll just have to share it with you. Like this one that I made the other night for my family.
Michelle, of Je Mange la Ville, posted a recipe for Poulet aux Noix, or Chicken with Walnuts, and when I saw it on her blog I had to make it for myself. The photo above is a rather yellow-brown color because the dish is, well, a bit yellow-brown. But in a good way. It is soooo very delicious that nobody at my table complained. (Lots of complimentary moans and groans, and not one color complaint!)
I followed this recipe exactly as Michelle wrote it except I had skinless, boneless thighs and breasts on hand so I used those and I left the garlic cloves in their skins. At first I didn't think they would cook in the amount of time allotted, but they did and were so wonderful. The whole dish sparkled with a lemony-white wine flavor that suited the chichen to a "T" and the walnuts cooked to a caramel-y goodness, maintaining their own texture and flavor while melding with the flavors of the sauce. I also made the Haricot Verts in Walnut Oil and the Gratin Dauphinoise to round out this perfectly delicious French meal.
These recipes are all keepers and will go into my book of favorites. Do visit Michelle's site for this and other great recipes.

Sunday, September 3, 2006

Making a Few Changes. Back Soon

I'm working on upgrades to my blog. Adding a long overdue blogroll, moving things around a bit and, hopefully, putting my post section back into alignment. Have you noticed how skewed it is? Yes, the tech-challenged cook is learning a thing or two and hopefully will have a few changes in place before the end of the loooong weekend. In the meantime, there is no end to the photos I shoot everyday and post on my garden blog, Raven Ridge Gardens. Ever seen a banana slug?

Saturday, September 2, 2006

What's For Lunch? Tomato Bacon Sandwich

Just to make Pete Wells shudder in horror, I'm going to give you the details about the tomato sandwich I had for lunch today. It was made with one of these gorgeous, organically grown Brandywine tomatoes thusly:

1 beautiful Brandywine tomato, sliced thickly
2 slices of really good whole wheat bread
2 teaspoons full fat mayonnaise (Aw, go ahead, use more!)
2 slices turkey bacon, cooked (turkey bacon cancels out the fat from the mayo. Maybe.)
A few sprinkles of Maldon Sea Salt
2 fresh basil leaves

Spread 1 teaspoon mayonnaise on each slice of bread.


Place two slices of tomato on one piece of the bread. Sprinkle with a touch of salt.
Place the 2 strips of bacon over the tomatoes.

Place another 2 tomatoe slices on top of the bacon. Sprinkle with another touch of salt.

Place a basil leaf on the top of each tomato slice.
Cover with the second slice of bread.
Eat. Slurp. Munch. Mmmmm!
Oops. Forgot to take a photo of that.

Actually, all this silliness is because I haven't prepared anything very blog worthy in the last few days. But I am preparing recipes from some of my favorite food bloggers. In the tomato department, I'm making a batch of Kalyn's Slow Roasted Tomatoes plus some of her incredible looking Sausage and Basil Marinara Sauce. Both of these will be "put by" for the winter. And as a special dinner for my sweetie and my son, I'm going to make the Poulet aux Noix from Michelle's Je Mange La Ville, about which I am very excited.
Stay tuned.