Showing posts with label chicken. Show all posts

Friday, March 1, 2019

Braised Chicken Thighs with Lemon, Garlic, and Olives


Update 3-1-19:  Well, I don't know where my head was when I wrote this post but clearly I let it fall through some crack or another. When I think about it, if I think about it, I have to admit my love of blogging has taken a left turn and my not return at all.  At any rate, it would be a waste of a good recipe if I didn't post this one, it's that good and that easy.  Read on for a glimpse into my psyche in 2016.

I had thought I was finished with this blog, posting here and there over the last few years with lots of time and space in between, then falling off to one or two posts a year in a feeble attempt to keep it going.

My life changed drastically over the fall of 2012 and the beginning of 2013 and the joy I took in creating recipes and cooking to post on this blog fell to zero.

Here it is, 3 years later (now 6), and the urge to share is returning to me.  I don't promise recipes every day, or even every week, in fact I don't make promises anymore at all.  But I still do cook, and Mr. CC keeps telling me to "write it down, Sweetie."

So now I begin again.  And where better than with a dish fit for Autumn: A simple, put-it-in-the-oven-and-walk-away recipe that befits the shorter days and crispy-cool nights that promise more warm and inviting dishes from the oven.

Braised Chicken Thighs with Lemon, Garlic, and Olives
Recipe by Christine
Serves 4 to 8 people
Ingredients:
8 skin on, bone in chicken thighs
2 teaspoons vegetable oil, such as canola
2 whole lemons (I use Meyers when I can get them)
12 cloves garlic
3/4 cup mixed olives with pits
1 tablespoon Penzey's Tuscan Sunset herb mix
1-2 cups low sodium chicken stock or a combo of stock and dry white wine
Kosher salt and fresh ground pepper to taste
Preparation:
Heat oven to 370-degrees F.
Drizzle oil in a Dutch oven or other oven-safe lidded casserole and wipe the bottom and sides with a paper towel (I used a Staub Cocotte, which I happen be lucky enough to own, but any cast iron Dutch oven works just as well).
Season chicken thighs with salt and pepper to your liking and arrange on the bottom of the pot.
Peel the garlic cloves and slice in halves or thirds, depending on the size of the cloves, and push between the chicken thighs.
Cut the lemons into quarters (or eighths, depending on size) lengthwise, then cut off the stem end and slice off the center of each wedge to release the seeds.  Remove the seeds and push the wedges between the chicken thighs.
Sprinkle the olives over the top of the chicken, then sprinkle the herb mix over all.
Pour 1 cup of the chicken stock over the chicken until it barely covers.
Cover with a lid and place in the oven on a centered rack, and braise for about 2 hours, removing the lid for the last 20 minutes.  Check after an hour or so and add more chicken stock if needed.
When the thighs are falling off the bone, take the pot out of the oven and let it rest for at least 15 minutes and up to 1/2 hour.

You can pair this dish with cooked rice, polenta, or simply good sour dough bread to sop up the juices.


Copyright 2005-2019, Christine Cooks. All rights reserved

Sunday, October 2, 2011

Recipe for Spatchcocked Pan-Roasted Chicken - Redux


[Ed. note: Way back in 2008, I sent this post to my friend Paz at The Cooking Adventures of Chef Paz and neglected to put it on my own blog. I've decided to remedy that. This update will not have some of the same wording as the original post, but the method and recipe are the same.]
When I posted my Sunday Night Whole Roasted Chicken recipe a while back, Paz fairly sang its praises from the rooftops of New York and re-posted it on her blog, creating quite a bit of traffic my way. That's just the way she is, thoughtful and generous. And because Paz was so excited about my roasted chicken, I thought it would be fun to show her another method that I think she will find entertaining and make her giggle: Spatchcocking.
Now before your minds head to the gutter, spatchcocking (and, please do visit that link for some very funny, veddy British definitions) is simply a method by which a chicken or other fowl is opened and spread flat, enabling it to cook faster and more evenly. To achieve this, you remove the backbone of the bird, lay it out flat, breast side up, and crack the breast bone to flatten it out.

That's it. Rub it all over with olive oil then sprinkle with your favorite herbs, kosher salt and freshly ground black pepper. Put it in a cast iron skillet with a glug or two of wine (red or white, it's your choice) and roast it to perfection. Easy, simple and delicious. If you like giblets, tuck them in and around the bird so they roast together. Oh, and don't forget to baste your bird with those tasty pan juices that will magically appear at the bottom of the skillet.
To spatchcock a chicken:
Put a whole chicken, breast side down, on a cutting board.
Using poultry shears or other strong kitchen shears, begin cutting up one side of the backbone beginning at the tail end. You may have to use a bit of pressure to cut through some of the bones, especially when you get to the bones that connect the wings to the body.
When one side is fully cut, do the same thing on the other side of the backbone, starting again from the tail end.
When the backbone is completely severed from the chicken, set it aside and inspect the chicken where you made the cuts. Remove any small bones laying about that could come loose in the cooking process and get stuck in a guest's teeth or, worse, in his/her throat.
Small bone inspection done, turn your chicken over and spread it out on the cutting board as shown in the photo.
Using your hand, push hard on the breast bone until it cracks or gives to the point that the chicken lies very flat on the board.


There. You're done. You've just spatchcocked a chicken. Now, cook it...

Christine's Spatchcocked Pan-Roasted Chicken
print recipe
Serves 4-6 chicken-loving people or 6-8 daintier eaters
Ingredients:

1 (4-5 pound) broiler or fryer chicken preferrably with giblets, preferrably free-range
Good olive oil
2 tablespoons (or more) dried herbs - I used Made in Napa Valley's Meritage Rub, which I highly recommend
Kosher salt
Freshly ground black pepper
olive oil spray for the pan
1/4 cup (a few glugs) of your favorite red or white wine

Preparation:
Rub the bird all over with good olive oil. Do the same with the giblets and the backbone if you are using them (see Cook's Notes.)
Sprinkle the herb rub, salt and pepper all over both sides of the bird, pressing into the skin to help them adhere.
Lightly spray a large cast iron skillet (I used a 12-inch one, old Wagner Ware, without which I would be one unhappy cook) with the olive oil.
Place the chicken breast side up in the skillet, arranging the legs and wings so it all fits snugly. The underside (inside) of the chicken should be flat in the skillet.
Tuck the giblets around and under the wings and neck area and lay the backbone under the legs as shown in the photo.
Pour the wine over the bird, cover the skillet with foil and place in a 375-degree oven for 45 minutes.
At the 45-minute mark, remove the foil from the skillet and baste your bird, giblets and all, with the pan juices.
Close the oven and roast for 15 more minutes, basting once again during that time.
Stick an instant-read temperature guage in the meatiest part of the thigh; a nicely done chicken should register 160 degrees farenheit and the juices from the joints should run clear.
Remove the skillet from the oven and baste the chicken one more time before transferring it to a cutting board where you will let it rest for 10 minutes. Remove the giblets to a plate.
Pour the pan drippings into a fat separator and decant into a warm serving bowl or pitcher.

To cut into serving pieces, using kitchen or poultry shears, divide the bird into two halves, each having a half breast, a wing and a leg-thigh. Separate the entire leg-thigh piece and finally cut the breast pieces into two equal halves, cross-wise, leaving the wing attached to one of the pieces. This will give you three pieces from each side, which will nicely feed six hungry people. For daintier eaters, separate the thigh from the leg, thus being able to share your dish with 8 guests.


Cook's Notes:
I love giblets and I love the tasty morsels of meat on the backbone of a chicken, especially the tiny tenderloins. If you can find them, see if you don't agree with me.
The corn photo? Sometimes a food photo is so delectable, it must be shared.


Copyright © 2005-2011, Christine Cooks. All rights reserved


Saturday, February 5, 2011

Basics: Roasted Rich and Robust Chicken Stock


One of the things that has been missing from this blog from the very start are posts dedicated to the basics:  stocks and broths, salad dressings, sweet and savory sauces, gravies, the "how tos".  Sure, some of those things are embedded within a post about soups or stews, crab cakes, dinner salads, and desserts, but very few are the stars of their own page. So one of my goals this year is to remedy that omission.

Herewith is my first Basics:  A hearty, rich and robust chicken stock made by roasting chicken bones along with aromatics to a rich, golden, caramelized goodness, pan deglazed, then onto the stovetop to cook into a stock.  After that the reduction begins.  What you have at the end of the process is a deeply flavored dark stock to enhance soups, stews, braises, risottos, rice and pastas, sauces, or whatever floats your culinary boat.

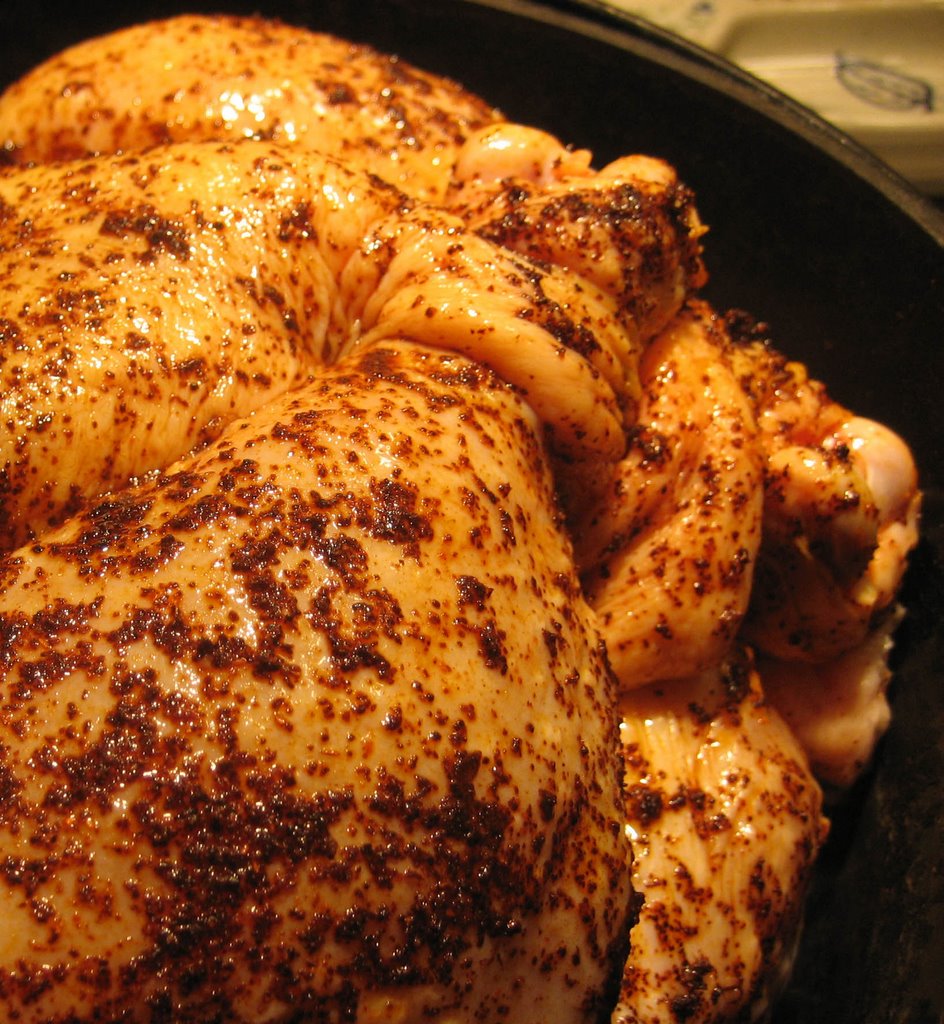
I began this stock with the carcass (skin and cartilage included) from a previously roasted 5-pound chicken, but you can use backs and wings purchased from your butcher and begin the roasting with this recipe - no need to pre-roast.  I do suggest that you always save and freeze the bones, wingtips, etc from any bird that you cook so you always have some on hand to make a stock. 

The aromatics (onion, carrot, celery, garlic, spices) all get roasted at the same time with the chicken bones.
A touch of salt, a drizzle of olive oil and into the oven it all goes at 375-degrees for about an hour.  I tented the pan with foil for the first 25 minutes then let it go naked for the remainder of roasting time.

Instead of deglazing the roasting pan with wine at the end of the cooking time (which is what I normally do), about two-thirds of the way through I removed the pan from the oven, quartered a very ripe Meyer lemon (thanks Bill!) and drizzled the juice over the pan contents, scraping up the browned bits from the bottom with a spatula, dropping the spent lemon parts into the pan, and continued roasting until it was all done to a golden perfection.

Bones, veggies, lemon pieces, spices, browned bits and all went into a large stockpot along with bruised fresh bay leaves, sprigs of fresh thyme, a small hot red Padrón pepper from a plant that is struggling mightily in my greenhouse, some sea salt and 12 cups of fresh, cool water (preferrably non-chlorinated).

After simmering for an hour, the yield was 11 cups of delicious stock.  And really, you could stop right there and start making soup, but I wanted my stock to be richer, more concentrated and de-fatted, so I strained it through 2 layers of cheesecloth and put it in the fridge overnight to cool, allowing the fat to congeal on the surface.  The next day it was easy to skim the fat from the surface of each container.

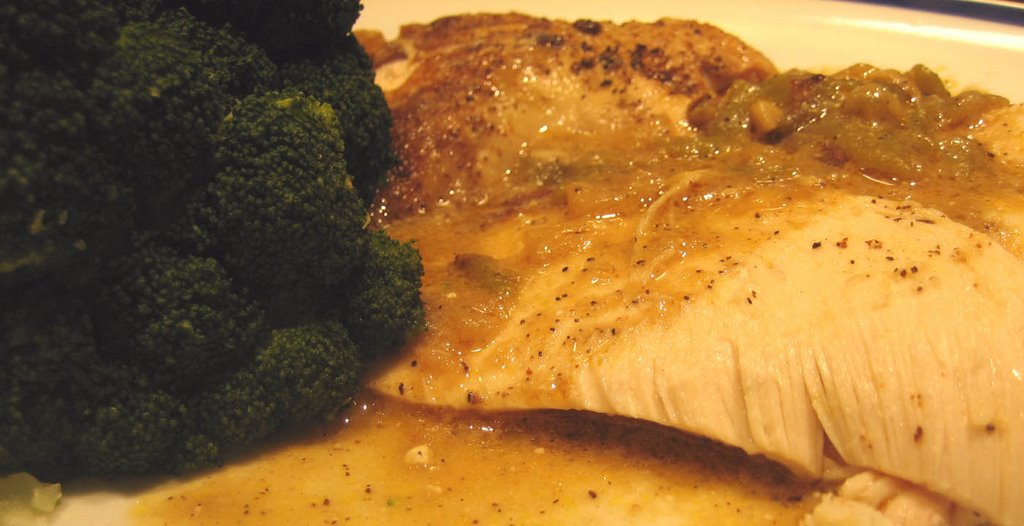
Again using 2 layers of cheesecloth and a fine mesh strainer, I strained the stock back into a stockpot, brought it to just under a boil, lowered the heat to a simmer and let it reduce down to 6 cups - about 40 minutes total.  The flavors were fantastic, the stock the deep, rich brown that you see in the top photo.  Four cups of it are freezing in ice cube trays as I type this, the remaining 2 cups are in the freezer to be used as a soup base later in the week.  I think you're gonna like this.


Christine's Roasted Rich and Robust Chicken Stock
Ingredients:
Carcass of one 5-pound or two 2 1/2-pound chickens, cut into pieces, preferrably previously roasted
1 large sweet yellow or cippolini onion, peeled and coarsely chopped
3 large carrots, peeled and coarsely chopped
4 stalks celery, coarsely chopped
10 or so cloves garlic, peeled and left whole
1/2 teaspoon each whole black peppercorns and whole allspice berries
1 Meyer lemon, washed, quartered, seeds removed
2 fresh bay leaves, bruised
4 long sprigs fresh thyme
1 small hot pepper, stem removed, jalapeno will do, I used Pimiento de Padrón, from my greenhouse
1 teaspoon fine kosher salt or sea salt
2 teaspoons olive oil, about
12 cups cool, fresh water
Preparation:
Preheat the oven to 375-degrees
Place the chicken parts, onions, carrots, celery, garlic cloves, peppercorns and allspice berries in a large roasting pan and drizzle with the olive oil.  Shake the pan to distribute the oil.
Tent the pan loosely with foil and put in the oven for 20-30 minutes.
Remove the foil and drizzle the pan contents with the juice of the Meyer lemon, dropping the lemon pieces into the pan.  Scrape the pan with a spatula to loosen the browned bits from the bottom and return pan to the oven for another 30 minutes or until the bones and vegetables are golden brown. Be sure to not let the garlic cloves burn. That would be a bad thing.
Scrape the contents of the roasting pan into a large stockpot and cover with 12 cups water.
Add the bay leaves, thyme sprigs, hot pepper and the salt and give it a stir.
Bring to just under a boil over medium-high heat.  If scum rises to the top, use a skimmer or fine mesh sieve to remove it then reduce the heat to a simmer and allow the stock to cook this way for 1 hour.  Check the heat periodically to maintain a simmer, not a boil.
Remove the stockpot from the heat and allow the stock to cool for 30 minutes.
Remove as much of the solids as you can with a slotted spoon then pour the stock through 2 layers of cheesecloth in a large sieve into glass containers.
Place the containers in the refrigerator for 8-10 hours or overnight so the fat can rise to the top and congeal.
Remove the stock from the fridge and skim any hard fat from the surface (your doggies and kitties will be waiting for this part; there's nothing like a little chicken fat to liven up a dish of kibble).
Using 2 layers of cheesecloth and a fine mesh strainer, strain the stock into a large stockpot over medium-high heat and bring to just under a boil.
Lower the heat to a simmer and reduce the stock to about 6 cups; about 30 minutes simmer time.
Allow the reduced stock to cool then strain it again, for the last time, through 2 layers of cheesecloth and a fine mesh strainer.  I know all that straining may seem like a lot, but I think you will be happier with a stock that doesn't end up with grit at the bottom.
When the stock has cooled, you can pour it into ice cube trays, freeze them hard then remove them from the trays into freezer-proof ziptop bags, label and date the bags, and put in the freezer.  Or, you can pour the stock into freezer-type storage containers in any volume you prefer and freeze.

The stock will keep well in the freezer for up to 6 months but, honestly, once you taste this you'll want to use it up sooner.  And that's good because you can always make more.

 Enjoy!


Copyright © 2005-2011, Christine Cooks. All rights reserved

Sunday, November 16, 2008

Blueberry Sauce With Balsamic Vinegar And Thyme

And oh yeah, a chicken breast. But as my friend Susan says, The chicken is just the vehicle. Actually, she says that about the slice of salami that brings the spicy mustard to the lips, but it all means the same thing. The reason for the chicken breast at all is to bring this simple, delicious, oh-so-good-for-you herby purple sauce to your tongue.
These deep blue beauties were organically grown within a figurative stone's throw of my kitchen. Simona called me up the other day and asked if I wanted to buy a share in 30-pounds of blueberries. Well, that was a no-brainer and now 10-pounds of antioxident-rich blueberries are living in my freezer.

We have five blueberry bushes on our property. The berries ripen toward mid-July and finish at about mid-October. There are never enough to freeze for the winter because we go out to the bushes and graze until they're all gone. So having this surplus of blueberries on hand is like winning the lottery. (Hmmm. That may be an overstatement.)

I'm beginning with a simple savory sauce enhanced with balsamic vinegar and thyme which is a delightful embellishment for a sautéed chicken breast but would not be shabby at all atop a perfectly grilled salmon. You should know that already there's a fast-disappearing quart of blueberry ice cream in the freezer, subject for another post.

Christine's Blueberry Sauce with Balsamic Vinegar and Thyme
Christine's original recipe
Makes about 1 cup
Ingredients:
1/2 cup chicken stock
1 heaping cup ripe blueberries (can be frozen)
1 tablespoon aged balsamic vinegar
1 teaspoon dried thyme, crumbled
1 tablespoon cold butter
Pinch kosher salt
Preparation:
You can see how I prepare chicken breasts here. Follow the directions, if you wish, through removing the sautéed breasts from the pan . . .
With the skillet in which you sautéed the chicken breasts still over medium-high heat, pour in the chicken stock and stir the pan to get up all the browned bits.
Add the blueberries, balsamic vinegar and thyme and stir well.
When the berries begin to bubble, mash some of them lightly using a flat spatula. Don't mash all of them.
Turn the heat to medium-low and stir for 1 minute.
Stir in the cold butter until it is incorporated and the sauce has thickened slightly.
Remove from the heat and add a pinch of salt it needed.
Serve immediately over grilled or sautéed chicken or fish.

Weekend Herb Blogging, now under the management of Haalo of Cook (Almost) Anything, is being hosted this week by Heather of Diary of a Fanatic Foodie. Blueberries, being one of the world's healthiest foods, fit right in to this event. Check out Heather's blog late Sunday for the round-up.


Copyright © 2005-2008, Christine Cooks. All rights reserved

Tuesday, October 7, 2008

Ever Spatchcocked A Chicken?

Recently I had the good fortune to be a guest blogger on my friend Paz's blog wherein I demonstrated how to spatchcock then pan-roast a chicken. Intrigued? You can read my post and follow the step-by-step instructions and photos by clicking here. While you're there, check out all the other guest bloggers and their great recipes plus Paz's New York Monday photos and her myriad mouth-watering recipes. You'll be glad you did.

[Ed. note: I finally got around to posting this on my blog. Click here to see it.]
Copyright © 2005-2008, Christine Cooks. All rights reserved

Friday, March 7, 2008

Whole Wheat Pasta With Chicken Sausage And Portobello Tomato Sauce

Here's another recipe that was prepared and enjoyed just prior to the flu making its dastardly visit to chez moi. Top billing is shared by two ingredients in this dish:
the fabulous organic whole durum wheat pasta "snails" produced in Italy by Bionaturae, and the delicious nitrite free California Chicken Sausage made with basil and sun-dried tomatoes by California's own Premiere Meats. Located in Mt. Shasta, this company actually started out here in Humboldt county about 10 miles from my kitchen.
Just look at these cool whole wheat pasta pouches - their little mouths eagerly agape, awaiting the saucy morsels that will tumble in. The ridges on the outside enable the sauce to adhere there as well. Called chiocciole, this organic Italian import may be purchased on line here, but I got mine at our local Co-op and am fairly sure you should be able to find it at most good organic food stores.

Portobello mushrooms, sea salt-packed capers and the usual suspects of garlic, onion, organic fire roasted tomatoes, along with white wine and a goodly portion of parmigiano reggiano give their all to this tasty sauce. You want to dice everything so that it matches or is slightly smaller than your pasta shape. This way, the sauce won't overwhelm the pasta.

Whole Wheat Pasta with Chicken Sausage and Portobello Tomato Sauce
Christine's original recipe
Ingredients:
16 ounces Chiocciole pasta or other whole grain pasta
4 Premier Meats California Chicken sausages, diced
2 portobello mushrooms, gills removed and diced
3 cloves garlic, chopped fine
1 14-ounce can Muir Glen Organic Fire Roasted diced tomatoes (simply the best!)
1 1/2 tablespoons salt packed capers, rinsed and drained
1/4 cup dry white wine
1 1/2 cups parmesan, grated
1 tablespoon fresh parsley, finely chopped
olive oil for the pan
Preparation:
Put on a large pot of water for the pasta over high heat. Add about 1 tablespoon kosher salt to the water and bring to a boil.
Meanwhile, place a small amount of olive oil in a heavy skillet and put over medium high heat.
Add the portobellos and mushrooms and saute until the mushrooms are soft, stirring frequently.
Add the garlic, give a stir and cook 1 to 2 minutes.
Add the tomatoes, capers and white wine. Stir again and simmer about 5 minutes or until the juices thicken slightly and everything is piping hot.
When the pasta is cooked, drain it in a colander, put it back into the cooking pot and drizzle with a small amount of olive oil. Give it a quick stir.
Just before serving, stir the parmesan into the sauce.
Serve on warmed plates, sprinkling each serving with the chopped parsley.


Copyright © 2005-2008, Christine Cooks. All rights reserved

Tuesday, March 4, 2008

Sunday Night Whole Roasted Chicken

I don't know why a roasted chicken makes me think of Sunday night dinners. Maybe Norman Rockwell covers from the Life magazines of my childhood are imprinted deeply in my mind. Maybe I heard the phrase "A chicken in every pot..." too many times as I was growing up. Maybe it's because when I was very, very little my mother raised chickens and we ate a lot of chicken. At any rate, when I get a craving for roasted chicken, it's usually on a Sunday.

I wrote a roasted chicken post way back here and forgot to take a photo. Being a smarter blogger now than I was back then, this time I had my camera ready.

This is about as easy as cooking gets. Everything goes into the pot and into the oven. The herb and smoked paprika coating on this bird lifts an ordinary roasted chicken to new heights. The cooking process results in luscious pan juices and very juicy breast meat. Don't forget to baste toward the end of the cooking time.


Sunday Night Whole Roasted Chicken
Christine's original recipe
Ingredients:
1 whole fryer chicken, 3-4 pounds
1 large Meyer lemon
1 heaping tablespoon Italian herb seasoning
1 tablespoon smoked paprika, I used sweet but if you like it spicy, go for it
1/2 pound crimini mushrooms, sliced
1 large sweet onion, sliced
1 head of garlic, separated into cloves, peeled and left whole
Kosher salt and freshly cracked black pepper
Olive oil
Preparation:
Remove the giblets from the cavity of the chicken. (Reserve the giblets for another use or cook them with the chicken. Or fry 'em up, chop 'em and give 'em to your kitties.)
Wash the chicken thoroughly with cold water then pat dry both inside and out.
Rub olive oil over the entire chicken then rub the Italian herbs and the paprika all over the outside.
Slice the lemon in half and squeeze over the chicken. Put the lemons halves inside the cavity.
Sprinkle the chicken body with kosher salt and black pepper.

Truss the chicken by cutting a slit in each side of the vent, then bring a leg across and push the end through the opposite slit. Repeat with the other leg.
Place the sliced onions in the bottom of a cast iron pot or dutch oven and put the chicken on top of the onions.
Scatter the garlic cloves and the mushrooms around the chicken. Drizzle a little more olive oil over the top of the vegetables, cover with a tight fitting lid and place in a 375-degree oven for 45 minutes.
Remove the lid from the pot and continue roasting the chicken another 15 minutes or so, until done. Baste the chicken with the pan juices several times during these last 15 minutes.
Remove the chicken from the pan and allow to rest for 10 minutes.

To serve, slice the chicken and place on warmed plates. Be generous with the garlic and onions, as well as the delicious pan juices. A medley of roasted winter vegetables makes a well rounded meal.


Cook's Notes:
No potatoes, polenta or pasta accompanied our meal but if I were to serve this to company, oven roasted potatoes, creamy polenta or pappardelle pasta would be a nice touch.


Copyright © 2005-2008, Christine Cooks. All rights reserved

Monday, January 8, 2007

Spicy Peanut Encrusted Jarlsberg And Avocado Stuffed Chicken Breasts

It must have started with Sher's Bok Choi with Peanuts and Cilantro, then was egged on by another food blogger (I think it was Sam) who had a peanut butter ice cream base in her fridge, when last night, faced with yet more chicken breasts to prepare for dinner, I was struck with the idea of peanuts.

All hail the power of suggestion.

Mr. CC and I tossed around a few ideas and came up with this winner of a recipe. If you don't have NapaStyle's Toasted Spice Rub, treating yourself to a container of this time-saving spice medley is worth the shipping cost - promise.

Plate this with a large spoonful of roasty-toasty veggies and you've got a low-carb dinner worthy of company.

Pair it with a deeply black Malbec from Cahors in the southwest of France and you've got a perfect, cozy evening at home with just you and your main squeeze.

Spicy Peanut Encrusted Jarlsburg & Avocado Stuffed Chicken Breasts
Christine's original recipe
Ingredients:
2 boneless, skinless chicken breasts, pounded with a mallet to 1/4-inch thickness (remove tenders)
Kosher salt and peppercorn medley (I used McCormick) for inside the breasts
4 to 6 2-inch long x 1/4-inch thick pieces of Jarlsberg cheese
6 to 8 thin slices of ripe avocado
1 cup pan-roasted, unsalted, skinless peanut pieces
1 tablespoon NapaStyle Toasted Spice Rub
1 teaspoon kosher salt
25 grinds peppercorn medley (about)
1/4 cup egg substitute (or 1 egg, lightly beaten)
Olive oil and butter for the pan

Preparation:
Lay the pounded chicken breasts on a flat surface, insides facing up. Sprinkle with a pinch of kosher salt and a few grindings of the pepper medley.
Lay 2 or 3 pieces of the cheese on each breast (the number of pieces you use will depend on the size of the chicken breast. Overstuffing will only cause the filling to spill out of the rolled up chicken as it's cooking.)
Lay 3 or 4 slices of avocado over the cheese. (Ditto)
Beginning at the larger, rounded end, roll the chicken breast up, jelly-roll fashion, toward the smaller, pointed end and secure with toothpicks. Set aside.

In a food processor, add the cup of peanuts, the toasted spice rub, the salt and peppercorn medley and buzz until the peanuts are fairly finely ground. Be careful to not process too long or it will turn to peanut butter. You want this to be like crumbs.
Place the egg substitute or beaten egg in a bowl large enough to dip each chicken breast in.
Place the peanut mixture in another bowl to do the same.
Heat the oven to 375 degrees.
Heat a heavy skillet to medium high heat and add equal amounts of oil and butter - I guess I used about 1 tablespoon of each, but I don't measure.
Dip a breast in the egg, rolling it around to coat it completely then dredge it in the peanut mixture, coating it well. Repeat with the second breast.
Place in the skillet and brown well on all sides. Some cheese may ooze out of the chicken breasts. Unless you've invited the Queen, or Thomas Keller, to dinner, just serve it along side the chicken when plated. It tastes very good.
When both breasts are browned, place the skillet in the oven to finish cooking the chicken until just done, about 10 minutes.

To serve, first remove the toothpicks from each breast. If you want to be really fancy-schmancy, using a sharp knife, slice each breast into rounds and serve overlapping eachother. If fancy doesn't matter, serve whole or cut into halves.

For the roasty-toasties, I roasted a medley of cauliflower, broccoli, cipollini onions and whole, peeled garlic cloves, drizzled with olive oil, sprinkled with kosher salt, generous grinds of Tellicherry black pepper, and dotted with small pieces of Earth Balance buttery spread or butter, in a large roasting pan, covered with foil, in a 375 oven for about 30 minutes, shaking the pan often. I then removed the foil and let the veggies get golden brown for about 10 minutes more. I've blogged variations on this theme many times. It's foolproof.

And for dessert?


How about home made Peppermint Chocolate Chunk Ice Milk?

Stay tuned.

Monday, December 18, 2006

Green Chili Chicken

Anyone else ready for the Winter Solstice?

Lately it seems that I would have to prepare all my dishes in the morning just to get decent photos that aren't tinged with yellow, that awful indication of fading daylight, or no daylight at all. (That being my disclaimer for this post's pics.) In just a few days from now, we can rejoice in the returning of the light and better photo ops.

Meantime, here's a simple, quick, lowcarb, weeknight dish that's perfect for these short, dark, cold days of winter and the over-indulgence the season can bring. I'm pretty sure I got this recipe many moons ago from the packaging surrounding a Foster Farms whole chicken. I've changed it of course.

Green Chili Chicken
adapted from Foster Farms(?)
Ingredients:
1 4-5 pound young hen (chicken)
olive oil for the pot and the hen
4 teaspoons Fiesta Chili Powder (or other salt-free chili powder)
1 teaspoon salt
1 cup sweet onion, chopped
6 cloves garlic, diced
1 cup canned, whole green chiles, diced
1 cup organic veggie broth (chicken broth works well also)
2 tablespoons white whole wheat flour
2 tablespoons water
1/2 cup non-fat sour cream


Preparation:
Wash and dry the hen, tye the legs closed and drizzle the entire bird with a bit of olive oil.
Combine the chili powder and salt and rub it all over the hen.
In a cast iron dutch oven, heat about 1 tablespoon olive oil over medium-high heat.
When the oil shimmers, add the hen and brown it well on all sides. Remove hen to a plate.
Lower the heat to medium, add the onions to the pot and saute until softened.
Add the diced garlic and chiles and cook about 2 minutes more.
Return the chicken to the pot and add the vegetable broth.
Cover the pot with a heavy lid, turn the heat to simmer and cook for about 45 minutes or until the juices of the chicken run clear when pierced with a knife.
Remove the chicken to a plate to rest, leaving the rest of the ingredients in the pot.
In a small bowl, mix the flour and water with a whisk until no lumps remain.
Over medium heat, whisk the flour mixture into the pot and cook until thickened, about 1 minute.
Remove the pot from the heat and stir in the sour cream, mixing well.
Carve the chicken, place on a warm plate and spoon the sauce over.

I served this with steamed broccoli for a truly low carb meal, but in the past I've added steamed rice to soak up all the yummy sauce.

Cook's Notes:
Unable to sleep a few nights ago, I found myself watching the Food Network and learned a clever way to "tie" chicken legs closed. I'm sure other great cooks already know about this but it was new to me.
Make a small slit, about 3/4-inch long in the thin skin that's below and to each side of the cavity. Grab the leg opposite from a slit, bring it across the cavity and push it through the slit. Grab the other leg and do the same, criss-crossing the already enclosed leg. No strings, no muss, no fuss. Clever!

Wednesday, June 21, 2006

Chicken Enchilada Casserole


Do you ever crave chicken enchiladas but always think about it too late in the day to make for dinner that night? It being somewhat labor-intensive and all? I do.

Don't dispair. Instead of stuffing and rolling each tortilla, try this easy, breezy Chicken Enchilada Casserole instead. Inspired by Clay's "John Wayne Casserole" (now there's another post) and a recipe my niece, Janice, sent me, this dish is easily assembled and baked in about 1 1/2 hours.
Experiment with different kinds of cheeses, including lower fat, and/or add exotic left-overs to the layers. Any way you put this together, it will be delicious.

Chicken Enchilada Casserole
Christine's original recipeIngredients:4 boneless, skinless chicken breasts - tenders removed for another use
2 large cans good enchilada sauce. Find one that's light on the sodium
2-3 cups shredded cheddar cheese, reduced fat if desired
2-3 cups shredded jack cheese, reduced fat if desired
2 small cans chopped olives, drained
1 large can diced green chilies, drained
2 cans seasoned small brown beans, such as S and W Pinquitos, drained
1 package large, whole wheat, low carb tortillas -or-
1 package large corn tortillas

Pre-Assembly:Place chicken breasts in a single layer in a covered glass casserole dish and microwave on high for 5 minutes. Turn the pieces over and microwave another 4 minutes until cooked through. Remove to a plate to allow to cool slightly then shred or cut into bite-sized pieces.
Meanwhile, grate the cheeses and set aside, separately. Remove lids from all the cans and drain any that need draining.

Assembly:Cover the bottom of a large roasting pan with a layer of sauce. Place tortillas over the top of the sauce, covering the entire bottom of the pan, cutting in half to fit if needed. Pour a thin layer of sauce over the top of the tortillas. Begin layering, starting with the beans, then chicken, olives, chilies and cheddar cheese, topped by another layer of tortillas and a thin layer of sauce. Repeat 2 more times, ending with a layer of tortillas, the remainder of the sauce and a thick layer of jack cheese.

Cover with foil and bake in a 375 oven for about 35 minutes or until the cheese has melted and the casserole is hot and bubbling. Remove the foil and bake an additional 5 minutes. Remove from oven and allow to cool 5-7 minutes before cutting.

Serve with your favorite grilled veggies (zucchini, in this photo) and/or a large green salad.