Monday, July 28, 2008

Very Chocolaty Chocolate Ice Cream

Okay, so it's not really ice cream. There's no cream here. But it is creamy and smooth and lovely with a double whammy dose of chocolate that will please your palate and make your toes curl. The first whammy is Scharffen Berger cocoa powder, the second is Godiva chocolate liqueur, which puts this firmly in the adult dessert category.

As I was putting the custard together, the deep chocolaty aromas wafting about seemed to cry out for a little balsamic vinegar. Don't ask me why, it just seemed right. I think it makes the chocolate sparkle. Ditto the Tahitian vanilla. Your nose will love you. And I'm still calling it ice cream.

Christine's Very Chocolaty Chocolate Ice Cream
Ingredients:
3 eggs
1/2 cup sugar
3/4 cup
Scharffen Berger unsweetened cocoa powder
2 1/2 cups whole milk
1 teaspoon
Tahitian vanilla
1 teaspoon balsamic vinegar
3 tablespoons
Godiva Liqueur
Preparation:
Using a hand-held or stand mixer, blend together the sugar, cocoa powder and eggs until smooth. It will thicken during this process.
Meanwhile, bring the milk to a simmer over medium high heat.
With the mixer running, very slowly pour the milk into the chocolate mixture until well blended.
Pour it all back into the saucepan and heat gently over low heat until it has thickened and coats the back of a spoon. This doesn't take very long and you must keep stirring and not allow the mixture to boil or over cook as it will curdle.
Remove from the heat and strain into a clean glass container (a 4-cup measure will work just fine).
Let the custard cool slightly then add in the balsamic vinegar, vanilla and chocolate liqueur, stirring well to blend.
Refrigerate overnight or until very cold. Process in your ice cream maker according to its directions.

Cook's Notes:
You can serve this right out of the ice cream maker. Even though it will be soft set, it has a lot of structure.
Of course, if you are going to be serving this to children, omit the chocolate liqueur. The ice cream won't suffer overly much.
Pack any leftovers into a container with a tight fitting lid. Place waxed paper over the ice cream before snapping the lid on to prevent ice crystals from forming.


Copyright © 2005-2008, Christine Cooks. All rights reserved

Sunday, July 27, 2008

Sher

Isn't anyone just a little bit angry?

I woke up this morning with the full intention of joining the rest of Sher's blogger friends to write a tribute.

Instead, I went to a neglected flower bed and started pulling weeds. As I yanked them from the ground I thought of Sher and of what I could write in tribute to her. Instead I continued to pull weeds. Ever more forcefully, throwing them further and further over my shoulder. With a vengeance I dug out a badly placed rose that I never much liked. It's roots were a tangled mess; no wonder it didn't thrive.

A few times a year Sher and I would have marathon talks on the phone. I delighted in her humor, her story-telling ability, her love of the animals who found her so they could be taken care of, her passion for gardening and cooking. Mostly I cherished the friendship that was forming. It didn't matter to her that we hadn't met face to face. We were friends.

Sher and I feigned jealousy of each other: She of me because blackberries grow rampant on my property; me of her because she lived in the city where I grew up and picked ripe, red tomatoes from her garden by mid-June.

She was looking forward to meeting up with Kalyn and I in San Francisco several weekends ago. This was the year when she thought she would finally be able to make it and she was very excited, as were we, at the prospect of us all finally meeting face to face. And, as we all know, she didn't make it. She died of a heart attack on the morning of the very day she was to meet with us.

Doesn't this make you just a little bit angry?

Before I knew it I'd weeded a 20-foot bed and dispatched with two plants, tossing them on the compost pile without a second thought. Breathing hard, my face, hands and the knees of my jeans streaked with red dirt, I looked back at the flower bed and felt a calm come over me. Yes, she died. Way too soon. And yes, there is a hole in what we call the blogosphere that will never, can never, be filled. And yes, after the shock then grief of losing this wonderful person and friend, I realized that I was really angry at the unfairness of it all.

The lily had been in a too-small pot on the front porch for far too long. I've just put it in the ground where I'll walk by it often on my way to the greenhouse to check on my as-yet unripe tomatoes. Lightly scented, ethereal in color, this is a lily I know Sher would have liked. My way, I guess, of both remembering her and saying good-bye.


Copyright © 2005-2008, Christine Cooks. All rights reserved

Tuesday, July 22, 2008

Vanilla Bean Gelato With Plum Jam Swirl

Now that I've made gelato for the first time, I'm craving another ice cream maker. The kind that makes creamy dreamy gelato with less air and no icy crystals. I do love the one I have and wouldn't hesitate to recommend it to anyone. But to make gelato . . . Santa baby . . .

I found the basics for my gelato in a lovely new magazine called La Cucina Italiana. One look through the pages of stunning photos and recipes and I was hooked. It's been a love affair ever since.

Whole milk, cream and eggs are called for in the gelato, and while I used the eggs, I couldn't help myself and substituted 2% milk, half the cream and less than half the sugar. The finished product was delicious. The swirls of plum jam delightful. I'm still calling it gelato.


Christine's Vanilla Bean Gelato with Plum Jam Swirl
Adapted from La Cucina Italiana
Ingredients:
5 egg yolks, room temperature
1/3 cup sugar
2 3/4 cup 2% milk
1/2 cup heavy cream
a pinch of fine kosher salt
2 tablespoons Marsala
1 whole vanilla bean, split lengthwise
3/4 cup plum jam
Preparation:
Whisk the eggs and sugar together until thick and pale yellow. I used a hand-held mixer.
In a large saucepan over medium heat, combine the milk, cream, vanilla bean and salt and heat until bubbles form around the edges of the pan. Remove from the heat.
Whisk about 1 cup of the milk mixture into the egg-sugar mixture and then whisk the egg mixture back into the milk, whisking it until well combined. Whisk gently so foam doesn't form.
Turn the stove to low and return the saucepan to the heat, stirring constantly until the mixture thickens slightly and reaches 170F degrees. Adjust the heat so the mixture does not reach a simmer or it may curdle.
Immediately remove the pan from the heat and stir in the Marsala.
Remove the vanilla bean and scrape the seeds into the gelato base.
Strain through a fine mesh seive.
You can cool the gelato base in a bowl of ice and water for about 1 hour to hasten the chilling process, then refrigerate at least 6 hours until completely chilled. Overnight is better.
Process in your ice cream maker according to the manufacturer's instructions.
When the gelato has finished processing, remove the freezer bowl to a work surface.
Spoon the plum jam over the gelato and use two knives to cut through in an up and down motion. Don't fold in the jam or it will become too incorporated.
Serve the gelato immediately or freeze in an air tight container for several hours.


Copyright © 2005-2008, Christine Cooks. All rights reserved

Wednesday, July 16, 2008

Ridiculously Simple Balsamic-Kissed Plum Jam

My oldest son Josh has a plum tree in his Sacramento back yard and has been making jam for a number of weeks. Being the intrepid sort that he is, at first he plunged in knowing very little about fruit pectin, sugar, etc., and after some trial and error asked if I had a recipe of my own or my mother's. I had neither.

Josh's grandmother, who made all sorts of jams from the fruits of her garden in Davis, never used a recipe. I, sadly, did not inherit her jam jeans genes and until last night had never attempted to make fruit jam - a sad state of affairs to be sure, but ameliorated by those genes having jumped a generation, landing squarely on my son's backside. (Genes - get it?)

In my quest to find a recipe to send to him, the thought of spreading home made plum jam on a piece of toast wiggled its way into my head and stayed there. And even though I never found a recipe that didn't use so much sugar you could just choke, when plums began to make their appearance at the farmers market and our local co-op, I bought some. And then when I saw this incredible photo, I had to make that tart so, naturally, I had to make jam.

The tiny ones above, no bigger than a bing cherry, were picked from ancient plum trees in SoHum. Their yellow flesh is sweetly tart, the skins so delicate they fairly disappear on your tongue. The young woman selling them at the farmers market didn't know what their name was and neither do I. Suggestions welcome.

The larger, deep red Santa Rosas were so sweet and juicy that I was hard-pressed to keep from eating them as I prepared them for jam.

Being the maverick cook that I am, all I did to the plums was wash them, cut the pits out and drop them into a large pot, skins intact. What can I say? I like my food toothsome. Then not a glut, but a reasonable amount of sugar and a serendipitous spoonful of balsamic vinegar which, it turns out was a fabulous idea for which you can thank me if you make this, made up the rest of the ingredients. Told you it was ridiculously simple.


Christine's Ridiculously Simple Balsamic-Kissed Plum Jam
Makes about 2 cups
Ingredients:
9-ounces small mystery plums
1-pound 6-ounces Santa Rosa plums (see Cook's Notes)
1/2 cup sugar, more or less depending on tartness of your plums
1 teaspoon balsamic vinegar


Preparation:
Wash the fruits. Working over a large pot so you don't lose the juices, cut the plums in half and remove the pits, dropping the flesh into the pot.
Add the sugar, starting with the lower amount, and the balsamic vinegar, stir to dissolve the sugar and let the mixture sit for about 5 minutes as juice forms. Taste the juice and add more sugar if you wish, depending on the tartness of your plums. I stayed with the 1/2 cup and it worked perfectly.
Using a heat diffuser over medium-low heat, cook the plums until they reach a simmer and begin to fall apart. At this point I used a potato masher to break up the skins, which worked well.
Keep cooking over low heat, stirring often, until the mixture reduces and thickens up enough so that it holds its shape when spooned onto a cold plate (see Cook's Notes). This took the better part of an hour.
Ladle the jam into clean glass jars or glasses, cover with lids (or plastic wrap and a rubber band) and keep in the fridge. Use within one or two months.

Cook's Notes:
>
The combined weight of the plums was just shy of 2 pounds, so for this recipe I would use that (2 pounds) as your measure. It yielded 4 cups of pitted fruit.
> Leave a small plate in the freezer for about 10 minutes before doing the gel test.
> Because of the low sugar content, I wouldn't recommend storing this jam outside the fridge.
> And Josh kept on making jam until it came out just the way he wanted it. Whatta guy!


Copyright © 2005-2008, Christine Cooks. All rights reserved

Tuesday, July 15, 2008

Sautéed Kale With Garlic And Grilled Sweet Onions

Is your garden overflowing with kale like mine is? Although it was quite some time ago that the tiny kale starts were planted, and it seemed like forever would happen before we could start harvesting,

if it weren't for the Cabbage and Sulphur butterfly worms taking their share I wouldn't be able to keep up, it's growing so fast.
I know it's hard to tell, but this is a very, very large bowl of two kinds of kale: green curly , very simply named, and a beautiful dark green, upright variety that has far too many names, among them lacinato, dinosaur, Tuscan, Italian Black Kale and cavolo nero. Kale is easy to grow in both cool and hot climates. Here on the north coast of California it will grow year-round, loving a kiss of frost in the winter. In hotter climes it's better as a fall through spring crop.

So far as I know, kale's only predators are the said beasties shown above. A sprinkling of diatomaceaous earth on the leaves will keep them at bay, at least long enough for you to get your share. Or, you can just plant enough kale so everyone's happy.

Kale is a member of the brassica family which includes cabbage, brussels sprouts, broccoli and more and is a highly nutritious vegetable. Grow it in your garden or buy it at your farmers market or organic produce store. As shown in the recipe below - a little garlic, some grilled sweet onions, a sprinking of balsamic vinegar, a poached egg and voilà. . . a light and lovely summer meal.

So let's start with the onions. To get caramelized sweetness out of a Walla Walla onion, grill it.

Here's a fun way: Cut off the stem and peel back the soft outer layer of the bulb. Cut the onion in half through the root end, leaving roots on each half to hold themselves together. Using a sharp knife, cut the onion halves into wedges, not cutting through the root end.

Rub each onion half with olive oil and grill both sides on medium heat until golden brown, slightly charred at some of the ends, and very soft - looking quite like something other than an onion: A peony, a mop head, a sea anemone, an extra-terrestrial, a muppet, are a few we came up with. Use tongs at the root end to move the onions around the grill. When you're ready to use the onions, simply snip out the root end using kitchen shears. The wedges will plop gently to your cutting board, ready to be cut and warmed in the pan.


Christine's Garden Fresh Sautéed Kale with Garlic and Sweet Onions
Ingredients:
Several large bunches of kale, curly and "lacinato"
4 large cloves fresh garlic, peeled and finely chopped

1 tablespoon good olive oil, divided
1 tablespoon balsamic vinegar
kosher salt and freshly ground pepper to taste
grilled Walla Walla or other sweet onion prepared as above

Preparation:
Wash the kale in cold water. Tear the leaves into pieces, discarding the larger, tougher stalks at the bottom of each leaf. You can cut these into small pieces and saute them with the garlic and onions if you wish, but I didn't.
Put one half of the olive oil into a large pot and heat it over medium high until it shimmers. Toss in the kale (it will spatter a bit because of the water on the leaves) and sauté, sprinkling with a pinch of two of kosher salt, turning with tongs, until wilted and tender but still bright green.
Meanwhile, using the rest of the olive oil in a skillet, sauté the grilled onion pieces and garlic until the garlic is golden brown and tender.
When the kale is ready, sprinkle with the balsamic vinegar and toss with the onion garlic mixture. Season to taste with salt and pepper.
For a bit of protein, poach or gently fry an egg to put on top. Let the runny yolk dribble down over the kale. Eat it up while it's hot.


Copyright © 2005-2008, Christine Cooks. All rights reserved

Sunday, July 13, 2008

Just For Fun...

There is yet another cherry clafoutis coming (tis the season, after all), but I'm so intrigued with settings on my camera that I didn't know existed and playing in PhotoShop, that I can't help but post these in the meantime.

Black and white. My little camera. Who knew?


Copyright © 2005-2008, Christine Cooks. All rights reserved

Saturday, July 12, 2008

Warm Green Beans With Creamy Bacon Dressing

Looks like green beans with bits of bacon, doesn't it?

Of course that is what they are, but it's the what else on this plate that makes these beans so tasty.

Bacon fat. . . cream. . . cider vinegar. . . a pinch of sugar. . . toasted almonds. . . there I go drooling on the keyboard again.

Mr CC and I had these last night by serendipitous means. He was going to cook dinner, I was working in my office. When I thought dinner should be ready, I wandered over to the house. No dinner. The zucchs were just being prepped for the grill, the green beans were still in the fridge. Hmpf.

Mr CC began cutting up the bacon then prepping the beans for the steamer. I poured a glass of wine and stood around watching him, nibbling on a piece of cracker to stave off hunger. The zucchini went on the grill. I sipped my wine. I asked if he would like some help.

Well, duh.

Now, I'm not saying that I pulled a rabbit out of my hat. I love it when my husband cooks and dinner would have been just fine had he gone ahead and finished it himself. But even he admits he would not have thought of a warm dressing for the beans, the way his grandmother would have made it. Or mine for that matter. Surely DNA played a significant part here. I mean, have I ever used bacon fat and cream in one recipe on this blog? No. I was channeling, pure and simple.

Go ahead. Treat yourself. Once in a great while. Don't overdo it - gotta be thinking about those arteries. The bacon fat and cream, I mean. Eat your green beans all season long, children. They don't have to be swimming in bacon fat to be good.


Christine's Warm Green Beans with Creamy Bacon Dressing
Ingredients:
1 pound haricot vert (slim French filet beans), organic and local if possible, home grown even better
4 slices really good bacon, such as Niman Ranch smoked applewood
1 tablespoon cider vinegar
pinch sugar (optional)
2 tablespoons organic heavy half 'n half
kosher salt and freshly ground black pepper to taste
1 tablespoon toasted, slivered almonds
Preparation:
Wash and pinch the stem ends from the green beans and steam them until tender crisp and bright green.
Stack the bacon slices one atop the other and cut crosswise into 1/4-inch pieces. Cook in a hot skillet, stirring occasionally, until crisp but not burned. Do not let the pan get so hot that the bacon grease smokes.
Remove the bacon bits to a paper towel to drain and turn the heat under the pan to low.
Stir in the vinegar and scrape up any browned bacon bits from the bottom of the pan. Taste and adjust with a pinch of sugar if needed.
Stir in the half 'n half, whisking until blended. Season to taste with kosher salt and back pepper if desired.
Put the greens into a large bowl and pour the dressing over them, tossing with tongs to distribute the dressing.
Using warm plates, put a pile of green beans on each plate, scooping up the dressing to drizzle over the top. Sprinkle with the bacon bits and toasted almonds.
Serve. Listen to the sounds of satisfaction emanating from the mouths of your loved ones.
Life is good.

Cook's Notes:
> Did you know that there is a plug of real cream at the top of the little glass bottles of Strauss Family Creamery's Half 'n Half? Yes there is. And boy was it good whisked into the bacon dressing.
> The beans in the far back box in the above photo are the haricot vert.


Copyright © 2005-2008, Christine Cooks. All rights reserved

Thursday, July 10, 2008

Barley Pilaf Salad With Three Basils Pesto


First I made this.

Then I made this.

The combination of which resulted in this.
Personally, I think the first two photos are prettier but sometimes uglier is tastier and, in my humble opinion, this is one of those times.

Basil is one of my all-time favorite herbs and I've got three types growing in the greenhouse: Genova, Opal and Cinnamon. Combined with a nutty and delicious aged Italian cheese, they made a healthy, knock-out pesto and are the reason I'm submitting this post to Weekend Herb Blogging. WHB began over 3 years ago when my blogger buddy Kalyn... well, read here for the delightful and serendipitous explanation. WHB is being hosted this week by dear friend and neighbor Simona of Briciole. Check out her round-up this coming Sunday or Monday. If you'd like to join in the fun, read here about how to go about it. Then send Simona your link by Sunday, 3PM Utah time. You will be part of a multi-national group of food bloggers who post their fabulous recipes each week.


Basil holds a prideful place as one of the World's Healthiest Foods . And rightfully so. Not only is fresh basil packed with vitamins, it has so many healthful properties, among them anti-inflammatory, anti-oxident and anti-bacterial, that for me to write about them all would take so much time I wouldn't get to the recipe. So click here to read about what this humble easy to grow herb can do for your health, then come on back for a recipe that's not only packed with healthful goodness, I'm proud to say that all the ingredients are organic and come from within 50 miles of my kitchen.


Christine's Barley Pilaf Salad with Three Basils Pesto
Click here to print recipe
To make the Pesto:
Using a food processor, pulse 4 cloves of peeled garlic with 1/2 teaspoon coarse kosher salt until the garlic is finely chopped. Next, place 2 cups fresh basil plus 1/4 cup toasted pine nuts into the processor bowl and pulse until coarsely chopped. With the processor running, slowly drizzle 1/4 cup good olive oil through the feed tube until a paste forms and the pesto leaves the sides of the bowl. Stop there. Scrape the pesto into a bowl and fold in 1/3 cup finely grated Piave Vecchio cheese. Set the pesto aside until the pilaf is assembled.


To make the Pilaf:
1 cup hulless red winter barley
2 1/2 cups water
golden cherry tomatoes, cut in halves
6 small radishes of different colors, thinly sliced
1 Armenian cucumber, thinly sliced
1 cup blanched corn kernels, cut from 2 cobs
1/2 fennel bulb, cut in half again and thinly sliced
Preparation:
The barley needs to be prepared the day before assembling the pilaf.
Put the uncooked barley into a large metal pot and cover with cold water. Give it a stir and skim off any hulls that float to the top. (Even though it's called hulless, but there will be a few strays.)
Let the barley soak for about 8 hours then rinse well.
Return barley to the rinsed pot, cover with 2 1/2 cups of water and bring to a boil on high heat.
Reduce the heat to a simmer and cook, stirring occasionally, until the water has been absorbed and the barley is just tender and chewy, about 50 minutes. Remove from the heat, stir to separate the grains and pour into a ceramic bowl or casserole dish to cool. Refrigerate overnight.
Several hours before serving, add the tomatoes, cucumber, radishes, corn and fennel to the cooked barley and toss well. Gently stir in the pesto until fully combined.

This pilaf may be served chilled or at room temperature, on the back deck or down on the beach, and would be a healthy side dish to grilled fish or stuffed chicken breasts. Bon appétit!


Copyright © 2005-2008, Christine Cooks. All rights reserved

Wednesday, July 9, 2008

Meyer Lemon Drop Sorbet

This is a very adult sorbet, meant to be served as an after dinner treat at an over twenty-one table. The unmistakable Meyer lemon flavor explodes from each tiny ice crystal. Crystals so fine that they ensure a smooth and creamy mouth feel with every bite. It will also make your mouth pucker, your tongue do a happy dance and your head spin.

Since the day I read on David's blog that alcohol will keep ice cream from turning into a brick in the freezer, my mind has been spinning on its own with the idea of cocktails as sorbet. And I just happened to have had a few cubes of Meyer lemon juice left in my freezer . . .

Yesterday I took a look in my ice cream book, the one not written by David (sorry) and there was a recipe for Lemon Drop Sorbet - already taken. Drat! Well, I'd already figured out my recipe, so I stole the egg white idea, thinking they must know something I didn't, and went ahead anyway.

Here you go: My version of Lemon Drop Sorbet. Don't say I didn't warn you.


Christine's Meyer Lemon Drop Sorbet
with an egg white from The Ultimate Ice Cream Book
Ingredients:
2 cups water
1/2 cup plus 1 tablespoon Splenda sugar blend (or 1 cup plus 2 tablespoons sugar if preferred)

1 egg white
3/4 cup Meyer lemon juice
2 tablespoons Triple Sec
1/2 cup vodka
Preparation:
In a medium saucepan, bring the water and sugar to a boil, whisking to dissolve the sugar. Allow to boil for about 1 minute, then remove from the heat and cool for about 6 minutes.
In a separate bowl, beat the egg white until it's quite foamy. I used a hand-held mixer.
With the mixer on, slowly pour the sugar water into the egg white and beat until it is all combined.
Add the Meyer lemon juice and the Triple Sec and whisk until blended.
Pour into a glass container and put in the fridge until it becomes very, very cold.
Just before processing in your ice cream maker, stir the vodka into the mixture until completely blended.
When processed according to your machine's directions, spoon the sorbet into a container with a tightly fitting lid and freeze for several hours before serving in demi-tasse cups or tiny liqueur glasses.

Cook's Notes:
> Note to self: Of an evening, when you make a sorbet that has 1/2 cup of vodka in it, to say nothing of the shot of Triple Sec, do not eat the subject after the photo shoot the next morning. Put the sorbet back into its container and wait for dinnertime. Dummy!
> If you don't have Meyer lemon juice, you can use regular but may have to use a bit more sugar.
> This sorbet was very tart, the way I like it, but more sugar may be added to soften the acidity.
> As I mentioned above, the use of 1/2 cup of vodka in the recipe is to keep the sorbet from freezing rock hard. You could cut the amount to 1/4 cup, in keeping with a lemon drop cocktail taste, and the sorbet will get a bit harder but your head won't spin quite so much.


Copyright © 2005-2008, Christine Cooks. All rights reserved

Tuesday, July 8, 2008

Corn And Crab Chowder


Simple, fresh, satisfying.

There's something about the summers up here: One day a little warm and sunny, another day foggy and cool, yet another warm in the sun, cold in the shade. It's chowder weather.

The last of December's crab catch combined with fresh, local vegetables and this gentle corn stock make a very satisfying meal-in-a-bowl. If you don't happen to have crab on hand, use scallops or a thick white fish such as halibut or cod. I think catfish would work as well.
If you're vegetarian, skip the fish business entirely. Vegans can be assured that this chowder will still be wonderful without the dairy.

The important thing is to use the freshest ingredients you can find. Enjoy!


Christine's Corn and Crab Chowder
Ingredients:
1 quart corn stock
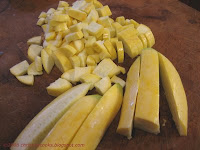
2 yellow summer squash, cut into 1/2-inch pieces
2 carrots, peeled and cut into 1/2-inch pieces
1/2 fennel bulb, cut in half again and cut into 1/2-inch pieces
8-10 yellow cherry tomatoes, cut into halves
corn kernels and corn milk cut from 4 ears of corn (save the cobs for your next stock)
1 teaspoon dried thyme, heaping, crushed
1/2 cup half 'n half
1/2 cup heavy cream
1 pound crab meat (fresh is best, freshly frozen is a good substitute)


Preparation:
Bring the stock to a simmer in a large pot.
Add the carrots and fennel and cook for about 7 minutes or until they are just tender.
Add the summer squash, corn and tomatoes and cook for 5-6 minutes more.
Add the crushed thyme and crab and cook until the crab is heated through.
Season to taste with kosher salt and freshly cracked black pepper.
Gently stir in the cream and half 'n half and your chowder is ready to serve.

Cook's Notes:
Use whatever summer vegetables you have available for this chowder but avoid broccoli, cauliflower, cabbage and others of that nature as they will overpower the stock.
The addition of a little dry white wine wouldn't be a bad thing at all.


Copyright © 2005-2008, Christine Cooks. All rights reserved

Monday, July 7, 2008

Corn Cob Stock

I know. It's just a corn cob. No kernels. Doesn't look like much. But I promise you if you make this stock your eyebrows will disappear into your hairline and you will be magically transported to a gentle place where soft breezes bring the tantalizing aromas of a corn field on a warm summer's day to your nostrils. Or something very close.

It's for this very reason that I save and freeze corn cobs. As should you. Not for too long though. Do it now while corn is in season and use them for stock by fall.

Delicate and slightly sweet, this stock can be used in so many ways, from chowders to soufflés, from risotto to ice cream. Yes, ice cream. But that will be for another post.

Fresh farmers market ingredients went into the making of this elixir with a Neukom Farms Walla Walla onion adding a sweet top note. Freshly picked thyme sprigs deepened the flavors and of course the corn cobs made it all positively, deliciously corny.

This is it. Like the corn cob above, it doesn't look like much but just wait 'til you taste it. One more thing - freshly picked corn is always best but the reason I have corn cobs in the freezer is because I've already used the kernels in other recipes. But I'm sure you knew that already...

Christine's Corn Cob Stock
Ingredients:
8 corn cobs (sweet white corn, please), kernels removed (see preparation below)
1 large Walla Walla onion, peeled and coarsely chopped
2 carrots, pared and coarsely chopped
6-8 fresh thyme sprigs
2 bay leaves
8 whole peppercorns
water to cover cobs, approx. 4 quarts
2 tablespoons (approx) kosher salt, or to taste
Preparation:
If you haven't already, cut the corn kernels from the cob like this: Place a cob upright in a deep bowl, large end resting on the bottom of the bowl. With a sharp knife, gently cut the kernels off by cutting straight down the cob, taking care to not cut too deeply as you will want to use the "milk" that is just beneath the kernels for other corny things in your repertoire.
Rotate the cob and continue to cut the kernels into the bowl. Repeat with the other cobs. The kernels will keep in a zip top bag in the fridge for about a day, so plan to use them, and the corn milk, right away (like in the corn chowder that's coming up.)
Place the cobs in a large stock pot with the chopped onions, carrots, thyme, bay and peppercorns. Cover with water, and bring to a gentle boil.
As soon as the water boils, lower the heat, add 1 tablespoon of kosher salt and simmer for about 40 minutes to extract all the flavors. This is a delicate stock and should not be simmered for a long period of time.
Carefully strain the stock into another large pot, add more salt, or not, to your taste and let it cool to room temperature.

Cook's Notes:
This recipe yielded 3 quarts and 2 cups of stock. When the stock had cooled, I poured it, almost to the top, into several large, clean yogurt containers, placed plastic wrap directly onto the liquid, then snapped on lids and put them in the freezer.
This stock will keep in the fridge, tightly covered, for several days. For fresh taste, plan to use the frozen stock within 4 months of making it.
To milk the corn cobs, run the back of a chef's knife up the cob from the large end up, rotating the cob to extract the milk all the way around. Save the milk separately from the corn kernels and use within a day or two.


Copyright © 2005-2008, Christine Cooks. All rights reserved

Wednesday, July 2, 2008

Minimalist 'Adult' Fresh Peach Ice Cream

This probably should be called ice milk as there is very little cream in it. Consequently the texture is a bit less creamy and smooth than ice cream but it's also kinder to your waistline. A big plus is that you don't make a custard that then has to be cooled; two hours or less in the fridge is plenty. The flavors are pure peach with a bit of an orange nip. Perfect for a hot summer day. Or a Fourth of July dessert.

The "adult" in the title comes from the fact that there's alcohol in the mix to keep it from freezing into a brick in your freezer. I added the orange liqueur because I thought it would compliment the peaches. It does. Of course, if children are to be eating this please omit all the alcohol from the ingredients list. Your ice cream will be very tasty. Especially if you use the ripest, perfumiest organic peaches. Mine came from the Neukom Family Farm at our local farmers market.

Christine's Minimalist Adult Fresh Peach Ice Cream
Ingredients:
5 large very ripe peaches (mine were an early variety called 'Sungold')
1/8 cup Splenda sugar blend (or 1/4 cup sugar)
1 teaspoon vanilla
2 tablespoons vodka
1 1/2 tablespoons Triple Sec
1 cup 2% milk
1/2 cup half & half

Preparation:
Working over a bowl so you don't lose any of the juices, slice the peaches in half and remove the pits.
Leaving the skins on, coarsely chop the peaches into the bowl then transfer, juice and all, to a food processor and blend until smooth.
Add the rest of the ingredients and blend again until thoroughly combined. There will be flecks of peach skin throughout the liquid which you can either strain out now or leave in as I did, which gives the finished ice cream an interesting texture. I found it interesting, anyway.
Pour the mixture into a container, cover and refrigerate for about 2 hours or until very cold.
Process in an ice cream maker according to the manufacturer's directions.
When finished, the ice cream may be served soft right out of the maker or you can pack it into a freezer-proof covered container and freeze for several hours. Be sure to let it thaw for about 10 minutes before scooping it into serving bowls.
Keep ice crystals from forming on the surface of any ice cream remaining that is stored in the fridge by covering first with plastic wrap then snapping a lid on tight.


Copyright © 2005-2008, Christine Cooks. All rights reserved