Friday, October 27, 2006

Poached Halibut

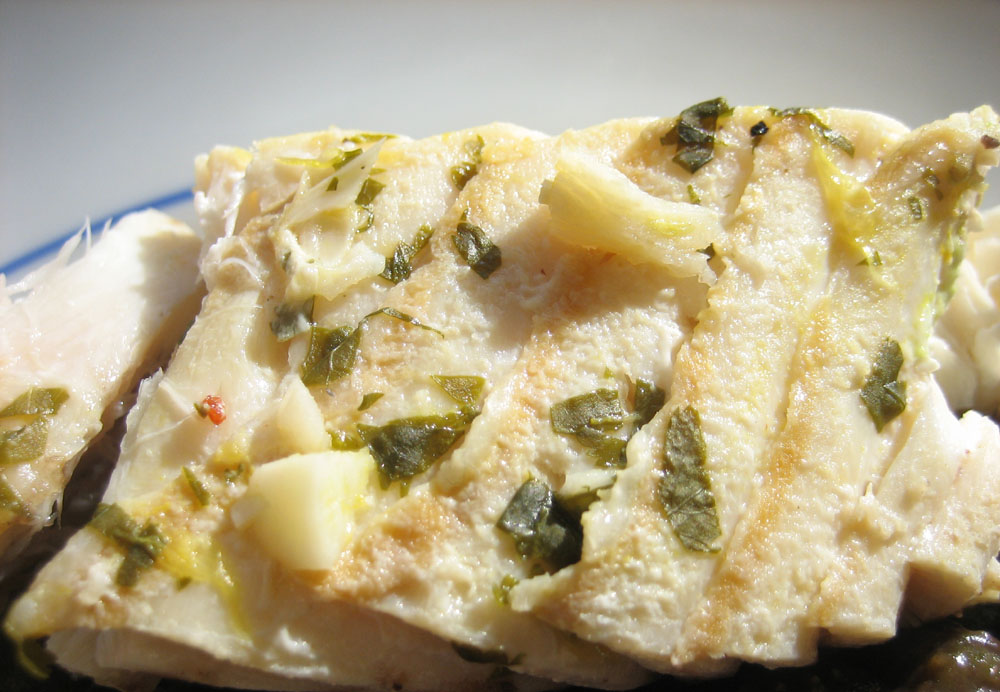
The large piece of halibut that Kalyn grilled the other day reminded my that I had a similar sized piece in the freezer. In fact, the use of cilantro in her recipe of Grilled Halibut with Garlic-Cilantro Sauce probably sub-consciously inspired the way I prepared this dish. Let's face it, good cooks often "channel" each other, so it should come as no surprise that many of us will come up with variations on a theme from time to time.

I've been poaching fish in this manner ever since I saw a recipe in Sunset Magazine more than 12 years ago. So long ago that I could not tell you the specific issue to save my life. Over the years I've changed it, using different ingredients that will enhance not only the poaching object, but will compliment the side dishes. This method is perfect for a fish like halibut that tends to dry out in the cooking process. The trick is to remove the pan from the heat and let it sit to "finish".

Poached Halibut
Inspired by Sunset Magazine with cilantro channeling from Kalyn Denny
Ingredients:
1 large halibut filet cut into 4 serving-sized pieces
4 cloves garlic, chopped fine
3 cups chicken broth
1 cup chardonnay
juice from 2 oranges
juice from 1 lemon
1/4 teaspoon coarsely ground pepper
1/2 teaspoon chipotle pepper flakes
1/3 cup chopped cilantro
3 tablespoons cold butter, separated

Preparation:
In a skillet large enough to hold the halibut steaks, combine all of the ingredients, except the halibut and the butter, and bring to a boil.
When the liquid is boiling, carefully add the halibut steaks, lowering the heat to maintain a very low boil. Cover and let cook until the fish is just opaque inside but still springy to the touch, 4-5 minutes. You may have to gently turn the steaks if your poaching liquid does not cover the fish.
Immediately remove pan from the heat and let sit an additional 2 minutes or until the fish is cooked through but not dry. Remove the fish with a slotted spatula and keep warm.
Bring the poaching liquid to a high, rolling boil and reduce by 1/2 or more, 5 or so minutes. Remove from heat and whisk in 3 tablespoons butter, one piece at a time, until fully incorporated and the sauce has thickened.
Spoon some of the sauce over each piece of fish and serve.

I acompanied the fish with a spoonful of my recipe for Best Black Beans. The similarity of flavors used to prepare both these dishes are a great compliment to each other. So good and so good for you!

Thursday, October 26, 2006

Best Black Beans

When I and my put-upon children were vegetarians several lifetimes ago, I bought Molly Katzen's Moosewood Cookbook, followed by the Enchanted Broccoli Forest and for a time, cooked from them almost exclusively. Although now I'm quite omnivorous (as are 2 out of 3 of my children), I still return to Molly's original books on occasion, her skillet cornbread (a future post, for sure) being one of my favorite recipes from that long ago era.
This black bean dish is one of Molly's that I've continued to make, especially when the days grow shorter and the nights cooler. I used to follow it to the letter but over the years I've tweaked it, shortened it, made it simpler. It's still delicious, nutritious, high in fiber and wholly satisfying. Pairing it with tender, poached halibut was an epiphany.

Best Black Beans
Inspired by Moosewood Cookbook by Molly Katzen
Ingredients:

1 pound (about 2 1/2 cups) small black beans
water to cover
6-7 cups good chicken broth (I use no-fat, low-sodium*. You can also use vegetable broth or water or a combination of both)
1 tablespoon olive oil
1 tablespoon unsalted butter
3 celery ribs, cut into small dice

3 carrots, peeled, cut into small dice
1 medium onion, chopped fine
3 garlic cloves, chopped fine
2 heaping teaspoons cumin
1 heaping teaspoon corriander
3/4 teaspoon cinnamon
1/4-1/2 teaspoon chipotle pepper flakes
1/2 teaspoon freshly ground black pepper
juice of 1 whole orange
juice of 1 whole lime
1/4 cup chicken broth or sherry or ruby port
kosher salt (to taste)

Preparation:

Pick over the dried beans, removing rocks, other foreign objects and discolored beans.
Wash beans thoroughly in a colander under running water.
Using a large soup pot, cover the beans with several inches of fresh water and let sit, covered, overnight.
Drain the beans, rinse again in a colander and return to the empty, rinsed pot.
Pour the broth over the beans and place over high heat to bring to a boil.
When the broth begins to boil, reduce the heat to keep beans at a low boil and cook until tender.
Do not cover, allowing much of the liquid to evaporate.
Meanwhile, prepare the vegetables:
Slice the ribs of celery lengthwise in half or thirds and chop into small dice (1/4-inch pieces) crosswise.
Slice the carrots lengthwise into fourths and chop crosswise like the celery.
Peel and chop the onion and garlic as stated above.
Melt the oil and butter in a heavy skillet over medium heat and add the onions and carrots. Saute slowly until both are soft, covering with a lid if necessary.
Add the celery and garlic and saute a bit more taking care to not let the veggies burn.
When the veggies are done, add the cumin, corriander, cinnamon, pepper flakes and black pepper and stir, cooking until the spicy aromas come up, about 1 minute.
Deglaze the pan with the citrus juices and the chicken broth or wine and remove from heat.
When the beans are done, you should have less than half the broth you started out with. This isn't supposed to be soup or stew. If it's too brothy, boil it a bit more to reduce the liquid.
Add the vegetable-spice saute to the beans and mix thoroughly.
Taste and adjust seasonings, adding salt now if needed.
This makes a lot of beans (6 cups or more) and is a great potluck dish. Leftovers may be frozen for a later use.

*Do not add salt to the liquid used to cook the beans as this will keep the beans from fully cooking and make them hard.

Wednesday, October 25, 2006

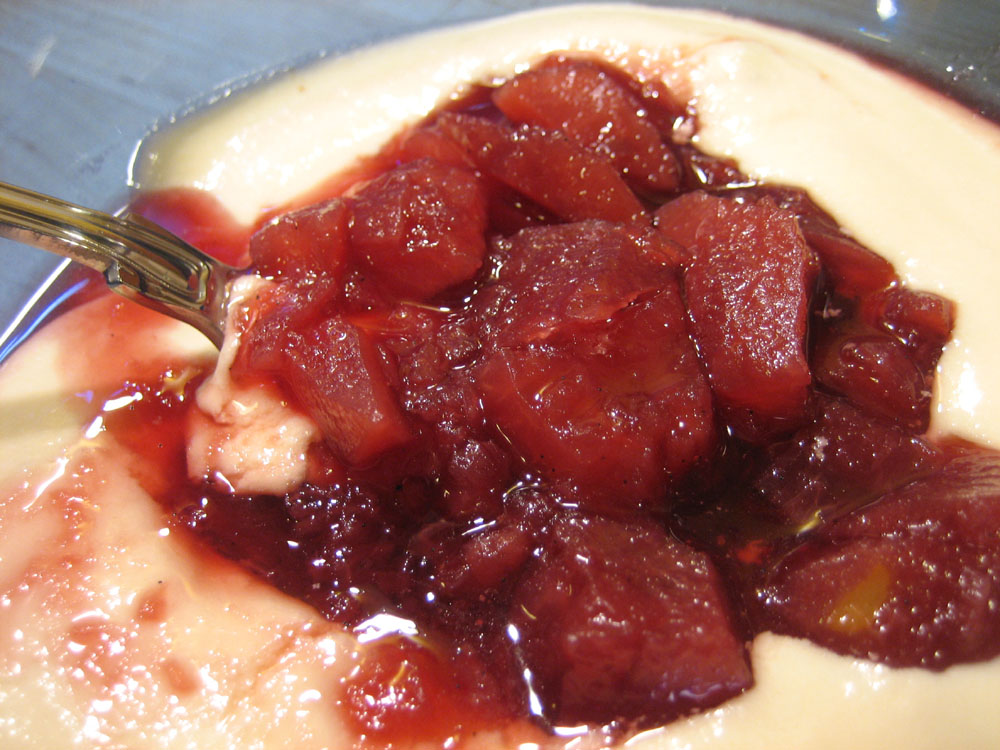
Quince In Merlot With Vanilla Cream

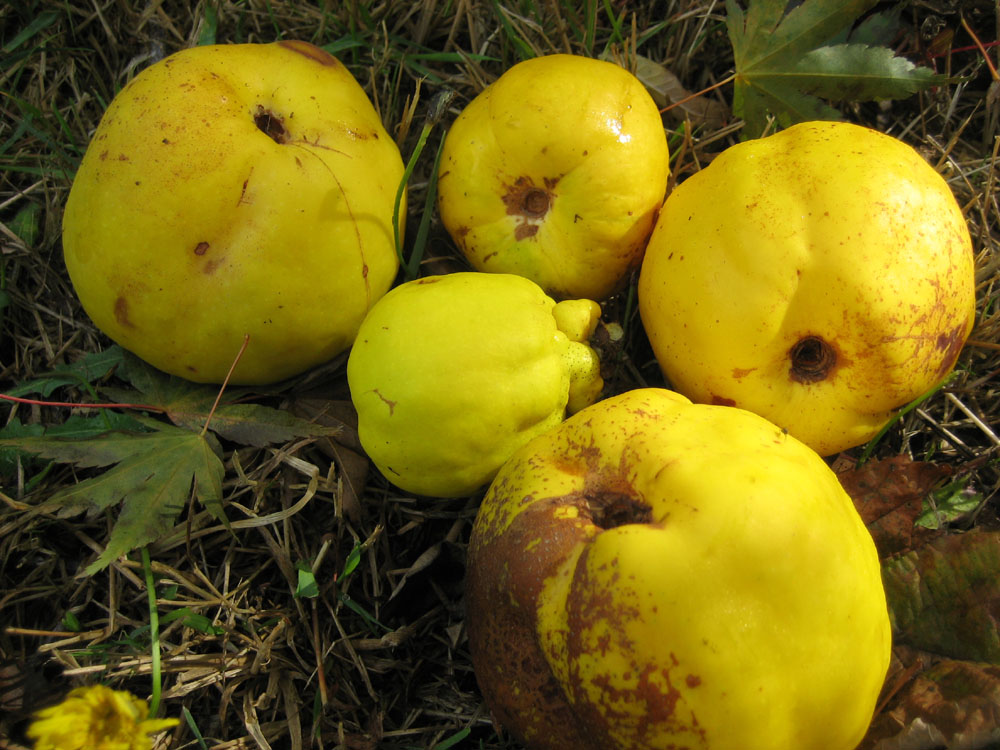
Although I've made a quince tarte tatin before, and a simple quince sauce for spooning over ice cream (when I didn't have a clue what to do with this beautiful, rare fruit), stewing or poaching quince in sweetened merlot enhanced with a vanilla bean is my favorite way to prepare it. Serve it over a soft vanilla cream pudding and you've got an elegant dessert that takes almost no time to prepare.

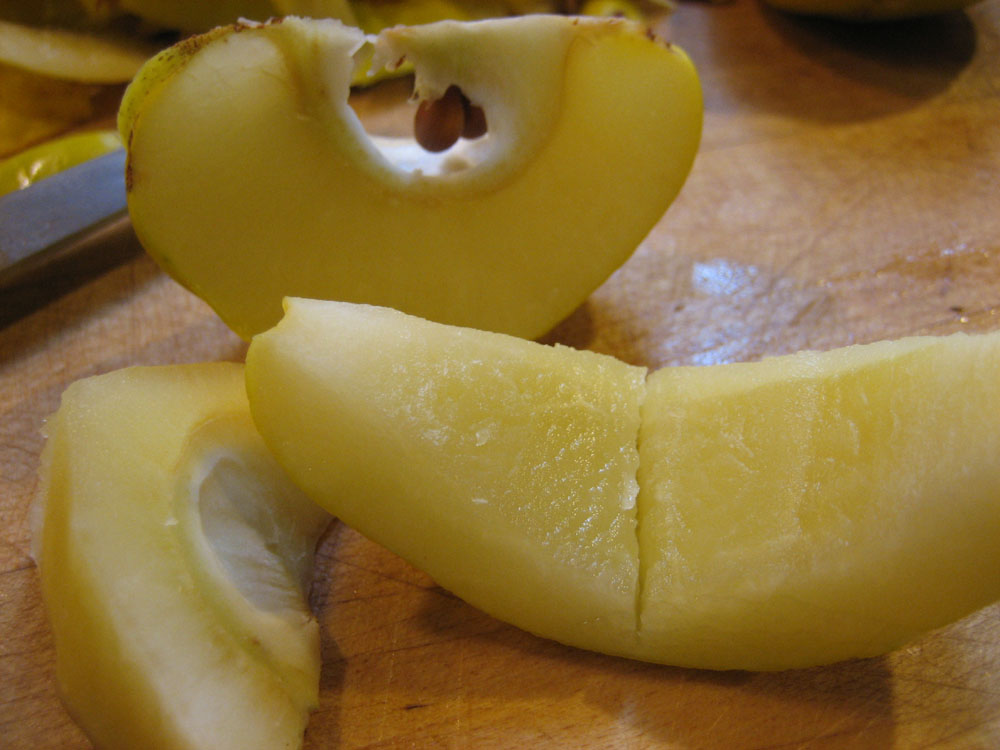
Well, there's quite a bit of time involved in the peeling, coring and cutting of the fruit, but once you've got that job done, the rest goes easily.

Quinces, in their natural state, are rock-hard fruits with a skin that does not easily separate from the body. The flesh of the raw fruit is very tart and acerbic, much like chewing on a non-chewable vitamin C tablet. Cook these fruits down in a sweetened liquid, however, and you've got something to blog about. And to delight your dinner guests with.

Quince Stewed in Merlot
Ingredients:
4-5 quince fruits, peeled, cored and sliced, about 3 cups
juice of 1 lemon
enough water to submerge the quince pieces
2 cups good merlot
3/4 cup Splenda-Sugar Blend or 1 1/2 cups granulated sugar
1 whole vanilla bean, split lengthwise

Preparation:
Start this early in the day, or even the night before. The quince needs to soak in the merlot for a number of hours before cooking.
Make acidulated water by combining the water and lemon juice in a bowl.
As you peel and slice the fruits, place the slices in the water to prevent them from browning.
When all the fruit is ready, pour into a colander and rinse under running water.
Pour the merlot into a glass dish large enough to hold the fruit.
Add the Splenda-sugar blend or regular sugar and stir to dissolve.
Add the split vanilla bean and the quince pieces, stir, cover and refrigerate for 8-10 hours or overnight, stirring occasionally.
When ready to cook, place the quince and the merlot liquid into a sauce pan over medium heat.
Bring to a slow boil, stirring occasionally, then reduce heat so the mixture simmers.
Simmer in this manner until the fruits have just softened to an edible consistency, about 20 minutes.
You must now check for sweetness by tasting a piece of the fruit. Tasting the liquid will not help you to determine if the fruit is of an edible sweetness. At this point you can add more sugar, if necessary, and continue cooking until the fruit is soft enough to serve. I like my stewed quince to maintain some tartness as the vanilla cream will mellow it out a bit.
When the fruit is cooked through, remove from heat and let cool to room temperature, do not drain. If not serving within a few hours, it can be refrigerated but I would let it sit at room temp for a bit before serving to take the chill out.

Vanilla Cream
This is a recipe I've been making for many, many years. It's adapted from my first cookbook, Betty Crocker's Cook Book.
Ingredients:
2 tablespoons cornstarch
1/4 cup Splenda-Sugar Blend
2 cups fat-free 1/2 & 1/2
1/2 cup egg substitute such as Lucerne's Best of the Egg
2 teaspoons good vanilla
2 tablespoons Smart Balance Buttery Spread (not "light") or unsalted butter

Preparation:

In a medium saucepan, stir together the cornstarch, sugar blend and salt until well blended. In a glass measuring cup, whisk together the 1/2 & 1/2 and the egg substitute. Slowly whisk the liquid into the dry ingredients in the saucepan, until they are full incorporated. Over medium heat, whisking constantly until the mixture thickens and just comes to a boil. Stir for about 1 minute, allowing the mixture to cook at a low boil. Remove from the heat and stir in the butter and vanilla. Cool to room temperature with a piece of plastic wrap laid right on top of the cream. This will keep a rubbery skin from forming.

To serve: Spoon vanilla cream into bowls. With a slotted spoon, place some of the stewed quince on top of each serving.

Monday, October 23, 2006

Butternut Squash Bisque With Maple Syrup And Sage

I know I'm a bit late in jumping on the butternut/winter squash bandwagon. So many great food bloggers have already been making and posting variations of this wonderful ode to Fall. Me? I've been under the weather, as they say. Whacked by a flu bug that attached itself to me somewhere between the east and west coasts as we returned from our recent vacation. Well, I'm getting back to my old self now, feeling better, and had to catch up with my blogger friends and get some soup on the table.

I received maple syrup inspiration for this soup from a delicious bowl of pumpkin-maple syrup soup that I had at the Simon Pearce restaurant in Quechee (prounounced Kwee-chee), Vermont recently. And while the restaurant's version was thicker, sweeter and more pumpkin pie filling-like, I've made mine on the savory side, showcasing the sage and squash with just a hint of sweetness from the maple syrup. Try it. I think you'll like it.

Christine's Butternut Squash Bisque
Ingredients:
1 tablespoon good olive oil
1 tablespoon butter or Smart Balance Buttery Spread (not "light")
1 medium onion, peeled and roughly chopped

2 cloves garlic, peeled and roughly chopped
1 tablespoon finely chopped fresh sage (4-5 leaves)
1/4 cup 100% maple syrup
1 large butternut squash, seeded, peeled and cut into 1-inch cubes
1 gala or braeburn apple, peeled, cored and coarsely chopped
2 teaspoons kosher salt
1 teaspoon freshly ground pepper
3/4 teaspoon ground cinnamon
32 ounces good vegetable stock or broth
heavy cream or fat free 1/2 & 1/2 to drizzle over the top (optional)
toasted, slivered almonds as garnish (optional)

Preparation:
In a large pot over medium heat, saute the onions in the oil and butter until the onions have softened but not browned.
Add the garlic, apples, salt, pepper, cinnamon and maple syrup, continuing to saute until the garlic and apples soften. Take care to adjust the heat so nothing burns or over-browns. You don't want to have browned veggies changing the color of the dish.
Add the squash and sage, rubbing the sage between your fingers as you drop it into the pot, releasing more of its essential oils. Sautee a bit longer until the squash begins to soften.
Add the vegetable stock, stir, cover the pot and let simmer until the squash is cooked through.
Now is the time to taste and adjust your seasonings if necessary. I added a pinch more salt at this point to bring up the flavors.
Off the heat, I used my immersion blender to turn the soup into a smooth, velvety puree. You can also achieve this by pureeing in batches in a food processor. Be careful not to puree too much at one time as the hot liquid can expand quickly and escape from the food processor, causing severe burns.

That's it! So easy. Ladle soup into bowls and drizzle a bit of cream or fat free 1/2 & 1/2 on top for a beautiful, easy presentation. Creme Fraiche would be good here, topped with a few toasted, slivered almonds. Fried sage leaves would be awesome and I plan to try them soon.

I'm so happy to be "back in the saddle", so to speak, cooking and blogging again. The sage, fresh from my garden, makes this recipe a good contribution to this week's Weekend Herb Blogging, an event begun by my friend Kalyn over at Kalyn's Kitchen. Now over a year old, WHB is hosted each week by different food bloggers from around the world. The guest host for this week's event is Fiber of 28 Cooks. Be sure to visit her beautiful site for great recipes and to see the WHB round-up next Monday. Click here to read about WHB. If you'd like to join in the fun, email your link to CLBritto AT LancasterGeneral DOT org by Sunday, 3 PM Mountain Time.

Saturday, October 21, 2006

Mac N Cheese

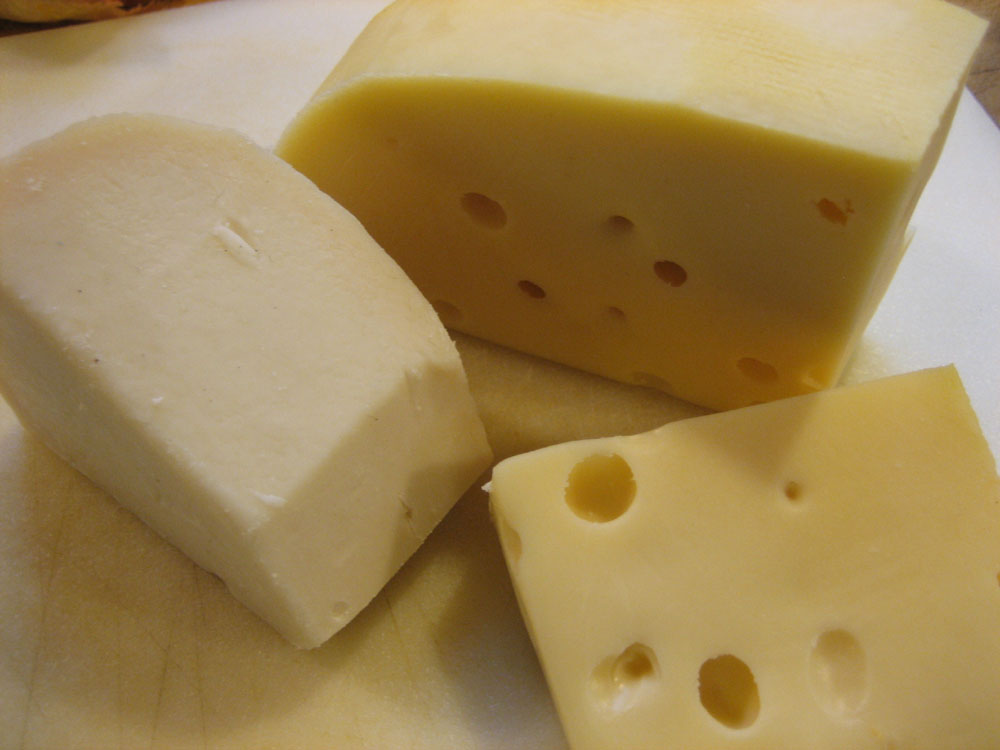
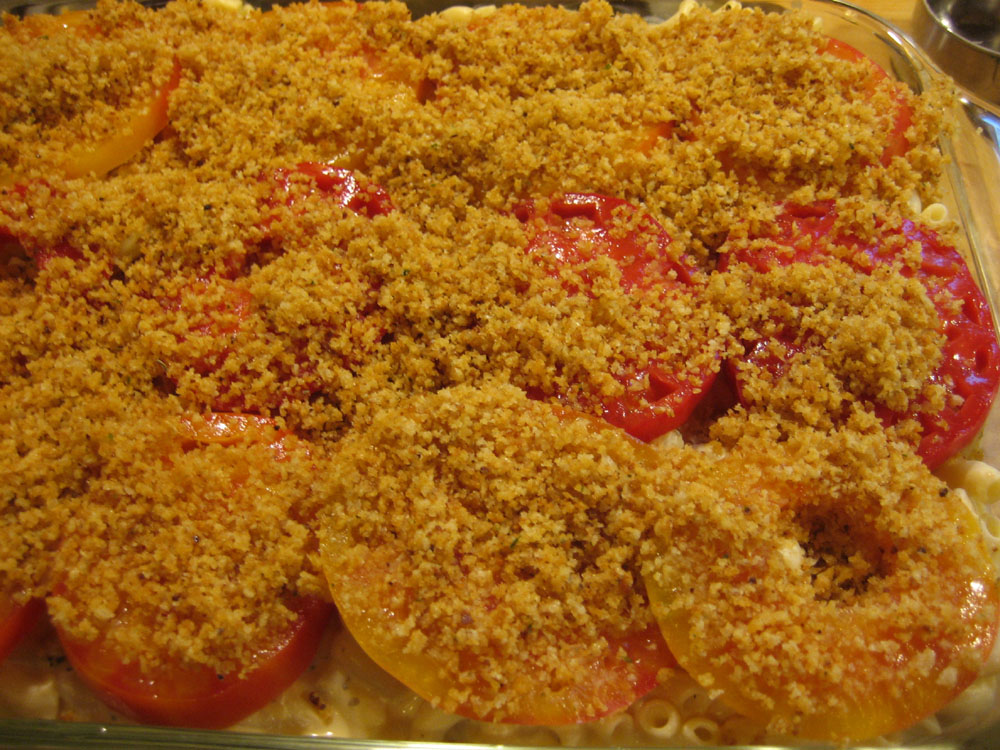
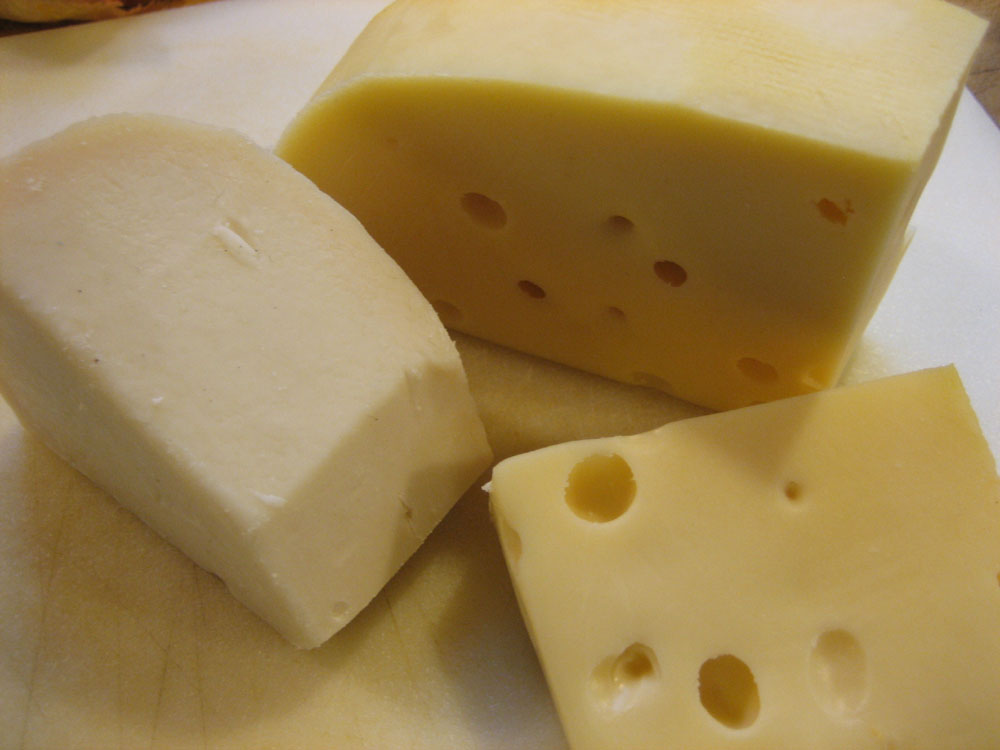
Two things will precipitate a fall from my low-carb wagon faster than my little dog Jack can wag his stumpy tail: good artisan bread and macaroni & cheese. Like the kind I made last night to take to a potluck. This is no ordinary mac 'n cheese. Certainly not the blue box kind. Inspired by Ina Garten's recipe, Mac and Cheese, in the Barefoot Contessa Family Style cookbook, the cheeses used in this dish are a fabulous combination of French Madrigal (which I found at the Nugget Market in Davis), our locally produced Cypress Grove Midnight Moon, and a Wisconsin extra-sharp cheddar.

Topping the dish with slices of last-of-the-season heirloom tomatoes sprinkled with butter soaked Brio breadcrumbs was perfection itself. I could have used a higher fiber, healthier pasta, such as Dreamfields, but I wanted this dish to look like the blue box kind, with surprising and delightful differences. Plain elbow macaroni was the only way to go. Judging from the comments I received last night, I was right. Luckily for me, most of it was readily consumed, leaving just a bit for leftovers today. First thing tomorrow I'll climb back on that low carb wagon...

Macaroni and Cheese
Inspired by Ina Garten's Mac and Cheese, from The Barefoot Contessa Family Style cookbook
Ingredients:
1 pound elbow macaroni
2 tablespoons olive oil
1 tablespoon kosher salt
1 quart fat free 1/2 & 1/2, or 2 cups milk and 2 cups regular 1/2 & 1/2
6 tablespoons unsalted butter
1/2 cup flour
8 oz. French Madrigal (baby Swiss) cheese, grated
8 oz. Wisconsin extra-sharp cheddar, grated
1 tablespoon dried marjoram
1/2 teaspoon freshly ground black pepper
1 teaspoon kosher salt, or to taste
1/2 teaspoon freshly grated nutmeg
3 medium heirloom tomatoes, sliced
1 cup ground Brio croutons
2 tablespoons unsalted butter, melted
Preparation:
Set oven at 375 degrees.
Fill a large pot with water, add salt and olive oil and bring to a boil. Add the macaroni and cook until just tender. Drain in a colander and set aside. Reserve pot.
In a saucepan, heat the 1/2 & 1/2 just to a simmer (small bubbles will form around the sides of the pot). Set aside, off heat.
In the pot used to cook the macaroni, melt 6 tablespoons of butter. Add the flour, whisking constantly and cook for about 2 minutes, incorporating all the flour into the butter, creating a smooth paste (this is called a roux).
Add the warm milk to the roux, again whisking constantly, until a thick, smooth white sauce has formed. Add the marjoram and cook for 2 minutes more.
Remove the sauce from the heat and add the cheeses, salt, pepper and nutmeg, stirring with a wooden spoon until the cheeses are melted.
Stir the cooked macaroni into the cheese sauce and pour into an oblong, 3 quart glass baking dish, smoothing the surface.
Arrange the sliced tomatoes atop the mac & cheese and sprinkle with the buttered breadcrumbs (recipe below).
Bake in the oven, uncovered, for about 40 minutes. When done, the cheese sauce will be bubbly, the top will be a golden brown and your first bite will transport you to mac n cheese heaven.
To make the breadcrumbs for this dish, place about 2 cups of your favorite seasoned croutons (mine are from Brio Breadworks in Arcata) in a food processor and pulse until you've made fine crumbs. Measure 1 cup of crumbs and place in a bowl. Drizzle the 2 tablespoons of melted butter over the crumbs and mix with your fingers until the butter is fully incorporated. Leftover crumbs can be place in a freezer bag and stored in your freezer for a future use.

Thursday, October 19, 2006

New England, Part One

10/19/06 - Below is my one attempt at blogging while on our recent New England trip. What with slow and sporadic Internet connections, I soon gave up any thoughts of trying to post. Plus, there was just so much to see and do that I found myself in a constant state of visual overwhelm. I'll be sharing our adventures in future posts. Much as I loved our trip, the most exciting thing right now is that I'M HOME!!

October 4th
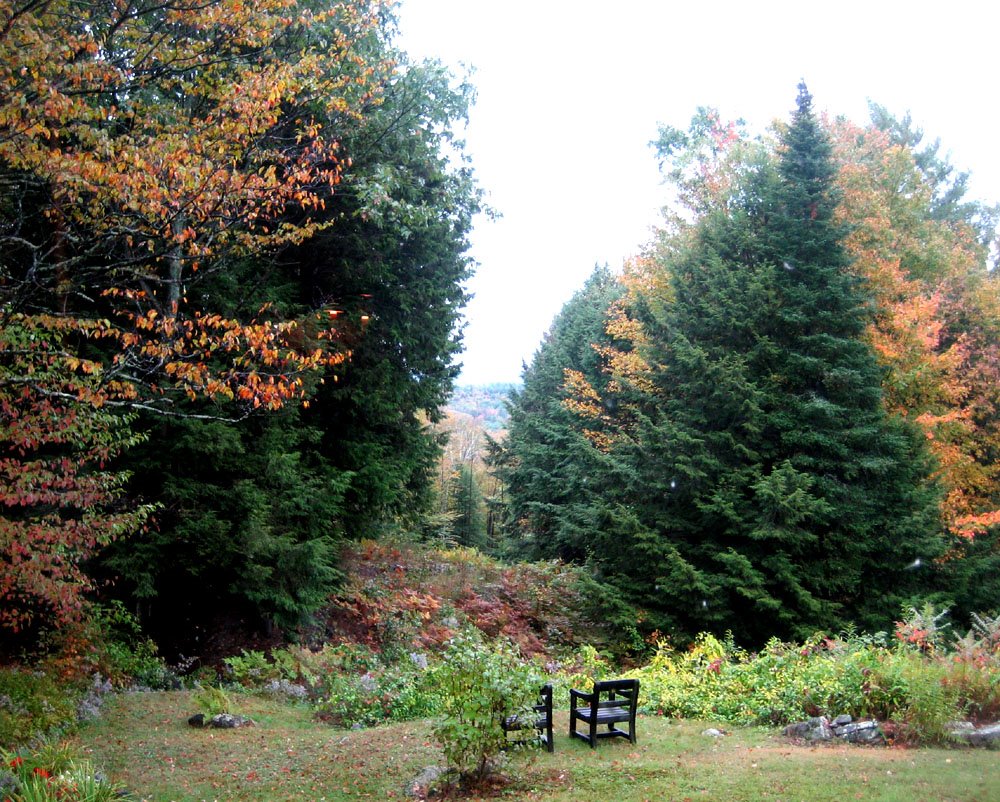
As I type this, I'm gazing out the living room window of my friend Erika's family vacation home in the middle of the New Hampshire woods with the glory of fall colors casting hues of gold, flaming red, orange, yellow and rust on the varied hardwoods, punctuated by deep greens from Hemlock and Spruce. It's breathtaking. And from what I'm told, it's just beginning. I can't imagine it being more spectacular than right now, but I'm assured that more is yet to come.

Trees are not the only things showing off vibrant colors now. Fungi, in multiple forms, shapes and colors are pushing up through the blanket of leaves that cover the ground as we walk through the woods. Bright pink, orange, yellow, and the more common shades of brown and gray are everywhere one looks, creating a delightful obstacle course in our paths, as one has to stop to marvel at everything.

Saturday, October 7, 2006

I'm Still Here...!

Well, actually I'm there - travelling the backroads of New Hampshire. I wish that darn RV wasn't in the photo, but I can't have everything. And no, the RV is not ours. Some interloper. Blogging has proved to be a challenge on this trip. We're often working with a 56K Internet connection or none at all. Thankfully for the moment we've got a fast wireless connection, enabling me to post this.

We arrived on the Atlantic seacoast yesterday and are in a little bed and breakfast in Portsmouth, NH called The Inn at Strawberry Banke. A very old house full of narrow stairs, sagging floors and charm. (I'll have photos to show and stories to tell when I return home.) Today we'll explore Portsmouth and then head off for Ipswich, Mass, makng our way out to the coast to Rockport and then on to Salem, where I swear my witchy roots are. I'll find out.

I just had to let you know that I'm still here, or rather there...