Monday, February 26, 2007

Vegan Stuffed Baked Potatoes

No, they're not stuffed with vegans.

I'm having a hard time convincing myself that I'm actually "cooking" vegan. It's more that I'm using vegan convenience foods and putting them together. No matter. Jeffrey likes it and that's good enough for me.

Yikes! Is that really a baked potato in the photo? On this blog?

Horrors!

Because my vegan son is here, laying tile and painting the walls of our house, we're all eating vegan (I mean, who wants to cook both ways for just three people?) and most of the time I either have intense cravings for meat and cheese or my stomach's growling with hunger.

So I baked some large russet (the very worst kind for a low-carber!) potatoes, stuffed them with a saute of sausage patty-flavored TVP, portobello mushrooms and sweet onions and ... well, I ate one.

I was hungry. I won't do it again.

The low-carb police are just going to have to deal with my fall from grace.

Vegan Stuffed Baked Potatoes
Christine's original recipe
Ingredients:
4 medium-size russet potatoes
2 cups sausage-flavored textured vegetable protein (found in bulk in many natural food stores)
1 cup organic vegetable broth
1/2 sweet onion, cut into small dice
2 portobello mushrooms, stems and gills removed, cut into small dice
olive oil and Earth Balance Buttery Spread or Buttery Sticks for the skillet

Preparation:
Bake the potatoes in a 375 degree oven until done, about 1 hour.
When done, remove from the oven and keep in a warm place until ready to stuff.
Place the vegetable broth in a medium saucepan and bring to just under a boil.
Pour in the sausage-flavored TVP and stir to moisten all the pieces.
Remove sauce from the heat, cover and allow to sit until the liquid is absorbed. It's OK if a little liquid remains.
In a skillet over medium heat, place 1-2 teaspoons each olive oil and Earth Balance.
When these have melted, add the diced onions and saute gently until softened and slightly golden.
Add the diced portobellos and continue to saute until the mushrooms are cooked and softened.
Add the TVP, plus any liquid that may remain in the saucepan, and stir well. Cover and keep in a warm place.
Take a potato and cut a slit lengthwise in the top. With your fingers, push the ends of the potato toward each other, creating a steaming, fluffy-white eruption of the starchy inards.
Immediately slather with Earth Balance Buttery Spread, then spoon on generous scoops of the TVP saute.
Sprinkle with snipped fresh chives and minced fresh parsley and serve hot.

Cook's Notes:
Because the sausage-flavored TVP is highly seasoned, I didn't need to add any other condiments to the saute.
You may notice that I've got a copyright clause both in the sidebar of my blogs and in the post template as well. It may be overkill, but I've been 'scraped' and I don't like it.

Copyright 2005-2007, Christine Cooks. All rights reserved.
No content from this site, including text and photos, may be copied, in full or in part, re-located or otherwise reproduced without the express permission of this blog's administrator/owner.

Saturday, February 24, 2007

TVP: A Vegan Stir Fry

Our son Jeffrey is here for several weeks painting our walls and trim and laying tile in the kitchen and bath. In deference to his eating lifestyle, I'm cooking vegan while he's here, a realm of cooking about which I know very little.

Take TVP, or textured vegetable protein. TVP is made from de-fatted soy flour, a by-product of the process of making soybean oil. It's used in place of meat to add needed protein to an otherwise protein-slim diet for vegans and vegetarians.

According to Health Recipes DOT com, a 43-gram serving of TVP contains 120 calories and 21 grams of protein and hardly any fat (less than 1 gram). Compare that to tofu which has 10 grams of protein, 5 grams of fat and 90 calories per 85-gram serving.

Although I just had to jump in, go for it, fly-by-the-seat-of-my-pants-because-I-really-didn't-know-what-I-was-doing, Jeffrey liked what I did with this.

TVP Stir Fry Over Steamed Rice Medley
Christine's orginal recipe
Ingredients:
2 heaping cups TVP strips
3/4 cup organic vegetable broth
1/2 of a medium sweet onion, finely chopped
5 cloves garlic, minced
2-inch piece fresh ginger, peeled and minced
1 red bell pepper, seeded and finely chopped
1 teaspoon (heaping) dried thyme, crushed between your fingers
1/2 teaspoon 10-yr old balsamic vinegar
1 teaspoon (about) Meyer lemon juice
olive oil
Earth Balance
kosher salt
freshly ground tellicherry peppercorns, or other good black peppercorns

Preparation:
Bring the vegetable broth to just under a boil then add the TVP and stir to moisten.

Remove from the heat, cover with a lid and allow to sit until the TVP has absorbed all the liquid, is fluffy and very moist. Set aside.
In a skillet over medium heat, saute the onion in a combination of olive oil and Earth Balance, about 1-2 teaspoons each, until the onion is soft.
Add the ginger and stir for 1-2 minutes.
Add the bell pepper and stir 2 minutes more.
Add the minced garlic, thyme, and vinegar and stir until the garlic is softly cooked and aromatic.
Add the TVP along with any small amount of liquid remaining in the pan and heat gently, stirring until the TVP is hot and fully incorporated into the saute.
Remove the pan from the heat and stir in the lemon juice.
Adjust the taste with kosher salt and generous grindings of good black peppercorns such as Tellicherry.

My use of TVP, which comes from soy, which is a plant, qualifies this post for Weekend Herb Blogging. WHB began when Kalyn... well, you can read the entire story here. This is one of the longest running food blogging events I know of. Food bloggers from all over the planet join in each week, posting about their favorite herb, vegetable, plant or derivatives thereof. This week WHB is being hosted by Anna of Anna's Cool Finds. Check it out on Monday morning!

Cook's Notes:
Along with the rice medley, which I get at Trader Joe's, I roasted an organic butternut squash and made a green salad with roasted red beets to serve along side. Pretty darned healthy, and pretty darned good, even for this avowed meat-eater.
Because the TVP is a very bland product, you may find you need to add up to a teaspoon of kosher salt to bring out the flavors.
Please forgive the pinkish-yellow closeup photo. I took it last night in low light.

Wednesday, February 21, 2007

Vegan Black Bean Nachos And . . .

Happy Second Blogaversary to me!!

On February 19th!

And I missed it!

Happily, the reason I missed posting that day, and since, is that my son Jeffrey arrived and is here for 2 weeks to lay the kitchen and bathroom tile and finish up painting the rest of the downstairs rooms.

This is a wonderful thing. Not only to have him here for all this time, which is the BEST thing a mom could want, but to get the tile and painting projects done by his professional self, which is the second best thing a mom could want.

And because Jeffrey is vegan, I'll be bringing my very limited repertoire of vegan recipes to this blog to share with you. I'm already learning so much from him. Like TVP, or textured vegetable protein. Who knew this could taste (almost) like meat? I certainly didn't. I'll be trying it out in a stuffed portobello mushroom dish this week as well as in a rich tomato sauce over polenta. Tips and recipes welcome!

Beginning at the most elemental level, I made vegan nachos last night, using Follow Your Heart Nacho Cheese. Heated on the stove with a small amount of soy milk added, this cheese substitute melted reasonably well into a pourable nacho sauce. Very impressive!

I'm going to give you the recipe as I made it, but please read the Cook's Notes at the bottom of this post for some tips on how I'd do it over again.

Vegan Black Bean Nachos
Christine's original recipe with tips from Jeffrey
Ingredients:
1 large bag white corn tortilla chips (you may not need all of them for this)
1 can organic black beans, drained
1 small can diced green chiles
2 10-ounce packages
Follow Your Heart vegan nacho cheese alternative
3 tablespoons
VitaSoy Original Soy Milk (see Cook's Notes)
2
Baked Tofu Vegi Patties, crumbled (made fresh daily right here in Humboldt county!)
1 small can sliced black olives
4 small ripe tomatoes, diced
1/2 of a ripe avocado, diced small
4 green onions (scallions), thinly sliced

Preparation:
Prheat oven to 350 degrees.Spray a 9x11-inch rimmed baking sheet with a non-stick spray. Set aside.
Break the vegan cheese into small pieces, or cut into small cubes, and place in a medium saucepan over medium heat.
Add the soy milk (see my notes below) and stir until cheese is completely melted and of a pourable consistency.
Place a layer of tortilla chips on the baking sheet and cover them with 1/2 of the black beans.
Sprinkle 1/2 of the diced green chiles over the beans.
Pour 1/2 of the cheese sauce over this layer.
Repeat with the rest of the tortilla chips, beans and chiles then top with the crumbled vegi patties and the remainder of the cheese sauce.
Sprinkle the sliced olives over the top and bake in the oven until piping hot.
Remove from the oven and cut into serving portions.
Plate each serving with tomatoes, green onions and avocados sprinkled over the top.

Cook's Notes:
What I would do if I made this again: leave out the soy milk and use a tablespoon of
Earth Balance or olive oil. I think the soy milk thinned the cheese a bit too much, resulting in a few soggy but very tasty tortilla chips.

Tuesday, February 13, 2007

After Dinner Treats... Better Than Chocolate?


Nightly, after the dinner dishes have been cleared and a wee small nap is in order, this is where you'll find Mr CC and Lily. Between the two of them, it's hard to tell who's loving it the most. Want to see what Mr CC likes to do? Go over to Raven Ridge Gardens to check it out.

Cook's Notes:
I know I've been absent a lot. I'm not looking for nor do I want sympathy here, but I've had one of the nastiest cold/flu illnesses I've ever experienced. Days on end of doing nothing, feeling like doing nothing and accomplishing zilch. It hasn't been fun. And I've been missing you a lot. Today I'm feeling somewhat human and am trying to get ramped up and blogging (read cooking) again. My sis and her husband are coming today for the weekend. Yay! We're having grilled, bacon-wrapped, locally line-caught albacore tonight. You WILL see it here.

Monday, February 12, 2007

Organic, Homemade Refried Beans

When at home, Mr. CC has organic steel-cut oats with cut up apples for breakfast and black bean tacos for lunch. Dinner of course is a whole other thing but, day in and day out, what he has for breafast and lunch is pretty constant.

He's also disgustingly healthy: all his "numbers" are so normal they make me grumble. Where I have to watch everything I put in my mouth lest it goes directly to my hips (except for what's deposited in my arteries), the 5 extra pounds he carries on his 6-foot frame is wholly due to what I cook up at dinner time. As in, if I didn't cook, he'd weigh the same he's weighed for the past 25 years and not an ounce more.

I attribute all that healthiness to his regimen of cooked oats and black bean tacos with, I'm sure, a goodly dose of non-fat, low-cholesterol genes.

Here's what goes in his tacos: locally produced Bien Padre corn tortillas, Monterey jack cheese, organic canned refried black beans, avocado slices, and Pico Pica hot sauce. Variations on the theme might be the addition of leftover fish or chicken from the night before. But those four ingredients are pretty much his staples.

I bought these dried organic beans at our local farmers market this past fall and finally brought them out of the cupboard last night to use in a stew I'm making this evening (post coming soon).

Thinking I would remember the name of these beauties, I failed to write it on the tag and now of course can't come up with it. I even went on-line to Rancho Gordo but didn't find them there. And by the way, if you want the best organic beans on the local market, Napa, California's Rancho Gordo's are hard to beat.

This morning after draining the beans from their soaking water, I had way too many for the stew so decided to make Mr. CC some refried beans. Well, they're not actually re-fried per se, because all I did was add ingredients to the beans then mash them all together - no re-frying occured. They turned out so good I'm going to share the recipe regardless of what they should be called, a recipe which is about as simple as a recipe gets. If you, as Mr CC does, like your beans organic, mashed, and daily, give this alternative-to-canned a try.

Mr. CC's Refried Beans
Christine's Original Recipe
Makes 2 cups

Ingredients:
1 1/2 cups cooked organic dry beans
2 tablespoons good olive oil, divided
2 teaspoons Frontier brand Fiesta Chili Powder
1 teaspoon kosher salt, divided
1 tablespoon Meyer lemon juice, divided
1 teaspoon organic dried oregano

Preparation:
In a large bowl, roughly mash the beans with a fork.
Add 1 tablespoon of the oil and mash until incorporated.
Add the chili powder, 1/2 teaspoon salt, and the oregano and mash until incorporated.
Stir in the remaining tablespoon of olive oil until blended. (Depending on the dryness of the beans, you may need more olive oil than I've stated.)
Stir in the lemon juice, a small amount at a time, tasting until it has the flavor you like.
Adjust the salt if needed.
Store in a sealed container in the fridge for up to 1 week.

Cook's Notes:
Mr CC didn't just like these, he LOVED them. I consider him a connoisseur of re-fried beans and take high praise in his assessment of mine.

Please note the use of Meyer lemon juice in this recipe. I've been using my Meyer lemons every day since receiving them from Bill and Erika and am having a love affair with their heavenly, gentle lemon-tangerine scent and flavor. If you use regular lemon juice in this recipe, it may turn out well but it will not be the same.

2/13/07: After doing some further Google research, I found the name of the beans and a link: They're called Orca and you can see and buy them here. I also found a bean called Vaquero at Rancho Gordo that looks very similar to the Orca.

Friday, February 9, 2007

Eggplant Caponata

My father-in-law, Ralph Johnson, was an artist and art teacher. He was one of the very early faculty members of the art department at UC Davis , teaching there from 1957 until his retirement in 1988.

Besides being a wonderfully whimsical painter and sculptor, he was an excellent cook. One of the many dear things about him that cemented our relationship early on, I'm sure.

The first time I met him, he had invited Clay and his "new girlfriend" (that would be me) over for dinner and served us steaming bowls of succulent crab cioppino accompanied by hot, crusty French bread. Not only did I fall in love then and there with both the man and his cooking, my culinary bar was raised a number of notches.

We delighted in cooking and sharing meals, talking over glasses and bottles of wine and I am glad for the years I spent in his company.

One evening he prepared a Sicilian caponata (an eggplant based anti-pasto dish) which delighted my taste buds so much, I begged to have the recipe. He copied it from the cookbook on his kitchen counter (I cannot remember which cookbook it was) and to this day I have it tucked away in my old yellow plastic recipe box, hand written on yellow lined paper, sporting a tomato stain.

Ralph passed away a number of years ago so please don't think this is a eulogy to recent loss. It's just that when I found the beautiful eggplants at my grocers I remembered that I had his caponata recipe and decided to finally give it a try. All these years and I hadn't made it once.

I suppose you could say I followed the recipe, in that I used eggplant, onions, tomatoes, golden raisins and capers, but there the similarity stops. Given my whimsy and what was on hand in the cupboards, the end product is a very different yet tasty beast, as was confirmed by the "beach nighters" who gobbled it up this evening.


Eggplant Caponata

Christine's original recipe* (with inspiration from and with loving memories of Ralph)
Ingredients:
2 pounds of whole eggplants, cut into 3/4-inch cubes
1 head of garlic, cloves peeled and left whole
Kosher salt
Extra virgin olive oil for the pan
1 cup coarsely chopped sweet onions
14 1/2 ounce can diced tomatoes - I used Muir Glen Organic Fire Roasted
12 of Kalyn's Slow Roasted tomatoes, skins removed and coarsely chopped (or use sundried tomatoes, about 1/3 cup chopped)
2 heaping tablespoons golden raisins
2 tablespoons capers, drained
2 heaping tablespoons coarsely chopped toasted almonds (I was out of pine nuts, which is traditional)
1 packet Splenda sweetener or 1 tablespoon sugar
1/4 teaspoon ground allspice
Zest of a Meyer lemon
Juice from the above Meyer lemon - about 2 tablespoons

Preparation:
Preheat oven to 375 degrees.
Drizzle a large roasting pan with olive oil to coat the bottom.
Add the eggplant cubes and the whole garlic cloves and sprinkle with kosher salt.
Using your hands, mix well, adding more olive oil if the eggplant seem dry. Eggplant drinks olive oil and then releases some of it later in cooking so don't go overboard on this step. About 1/4 cup total should be sufficient.
Cover the pan with foil and roast in the oven for about 20 minutes or until the eggplant is soft.
Remove the foil and continue roasting until the eggplant is golden brown and tender to the bite. Don't allow it to burn or stick to the pan. Frequent shaking of the pan may be necessary.
Remove the eggplant from the oven and allow to cool.
Meanwhile, add a bit of olive oil to a large heavy pot set over medium heat.
Add the chopped onions and saute gently until softened but not browned.
Add the diced tomatoes, the slow roasted or sundried tomatoes, the raisins, capers, sugar or Splenda and the allspice and stir to blend.
Add the eggplant mixture to the pot, stir again and cook gently for about 15 minutes until the caponata is soft, aromatic and thickened.

Remove from the heat and stir in the nuts, lemon zest and juice. Adjust the seasonings if necessary, but I don't think you'll have to.


Eggplant Caponata is my offering for Weekend Herb Blogging, hosted this week by its founder Kalyn Denny of Kalyn's Kitchen. Kalyn will be posting her roundup on Monday. Read how to join in the fun here.

Cook's Notes:
This is best served at room temperature with good whole wheat crackers or crusty artisan bread. If you have to refrigerate it, bring it out early enough before serving so it can warm up a bit.

Thanks to Bill and Erika for the inspiration to use Meyer lemon juice instead of the more traditional red wine vinegar. It was one of those "Ah-ha's" that truly makes this dish sparkle.

Edited on 2-11-07: *I've struck out the word 'original' here because, on thinking it over, I did not invent caponata, I simply made a different version of it. For more information on the dish and its origins, please click on these links.

Tuesday, February 6, 2007

Oh! Oh! Oh! Meyer Lemons!

The plain brown box addressed to me was waiting on the porch steps when I arrived home this evening. It being too dark to see who it was from, I just brought it in and started to open it without looking closely. It was heavy and dense; giving it a shake yielded no clues.

As I opened the top, however, the delightfully unmistakable scent of Meyer lemons tickled my nose and thrilled my inner chef.

Visions of lemon curd, preserved lemons - both sweet and salty, sorbet, lightly lemon-scented fish, steamed and lemon-scented winter greens swam before my eyes. The possibilities are endless.

These lemons come from the Winters back yard of my friend Bill. He and my pal Erika picked them, carefully packed them and shipped them up to me.

Not one, but two layers of beautifully packed lemons.

Thank you SO MUCH dear friends. You will be rewarded!


Cook's Notes:
After just one day at the new job that I started last week, I got a horrible cold/flu and spent the rest of the week and weekend in bed. This week I re-start my job in earnest, working outside my home for the first time since the beginning of last summer. I welcome the busyness, but know that cooking and blogging every day will slow down to probably a few days a week. I'm just letting you know.

I generally try to put a photo on my garden blog daily. So if there's no food in my kitchen when you come by (and how sad is that?), go on over to Raven Ridge Gardens and feast your eyes on what Nature has to offer.

Something in a lemon on its way soon...

Sunday, February 4, 2007

Dungeness Crab: Worth Its Weight In Gold Plus a Recipe for Golden Balsamic Vinaigrette

A quick Internet search for current prices of mail order Dungeness crab (for those who don't live on the west coast of the United States between San Francisco and Alaska), found that one company sells it for $14.95 per pound, another offers a cooked whole 1.5 to 2-pound crab for $37.99, and Gorton's offers a 2 to 2.5-pound whole cook crab for $39.99. All of these do not include the shipping costs.

You do the math. Anyway you pencil it out, it's darned expensive.

Here in the tiny fishing port village of Trinidad, California, we can buy crab from some local fishermen at the beginning of the season (this year it started just before Christmas) for $5.00 each. That's right, you read correctly: $5.00 each.

At an average weight of 2 pounds per crab, that's $2.50 per pound. (You can't see me but I'm doing a smug little Snoopy dance right now.)

Of course you have to know who to call and when to call, and you have to be on time to pick up your order or the crabs just might be gone when you get there. All part of the fun, excitement and tension of waiting for the season to begin and the crabs to come in.

We had our fill of crab over the holidays, mostly freshly cooked, cracked and slurped down with a glass of champagne. Sometimes in salads like the one pictured here. Dressed with a golden balsamic (recipe below) or champagne vinaigrette, you can't go wrong.

Sated for the time being, it was January before I remembered I wanted to have some crab meat put away in the freezer so I could make crab cakes whenever I wanted to.

And that brings me to the reason for this post: from six large crabs in their shells to 1-pound packages of lovely lump meat, I'd like to show you the process and the yield. If you like crab like I do, I think you'll agree they're worth their weight in gold.

Six crabs, cooked whole with shell intact, weighed a total of 10 pounds. That's an average of 1.67 pounds per crab. Some were lighter, some were heavier. After removing the backs of the shells and cleaning the bodies, the crabs weighed in at 8 pounds total. I don't have photos of the "backing" and cleaning process. It takes both hands and it's not a very pretty sight.

Shelling crabs is time consuming. It took me a little over two hours to pick six crabs.

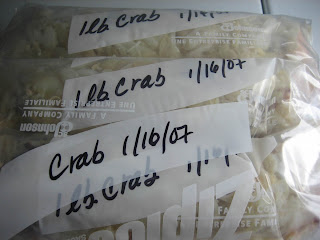
After all the picking was done I had a total of 3 pounds, 10 ounces of crab meat. I bagged three 1-pound packages to put in the freezer and kept the remaining 10 ounces to use right away in crab salad.

From start to finish it took me about 3 1/2 hours to clean, pick and bag six crabs. For each package I used two zip-lock freezer bags, double bagging and forcing out as much air as possible. Then I put them all together in another freezer bag for good measure. After all that work, you don't want freezer burned crab meat.

What will I get for my labors? I figure each pound of crab meat will yield about 16 dinner-size crab cakes.
Recipe coming...

For now, here's my golden balsamic vinaigrette recipe:
Golden Balsamic Salad Dressing
Christine's original recipe
Makes 1 cup
Ingredients:
1 heaping tablespoon dijon mustard (I use Maille)
1/4 teaspoon sugar or Splenda granular
pinch kosher salt
several grinds black pepper
3 ounces extra-virgin olive oil
Preparation:
In a measuring cup, pour in the vinegar, mustard, sugar, salt and pepper. Whisk until combined.
Whisking constantly, slowly drizzle in the walnut oil then the olive oil.
Keep whisking until the mixture has thickened and is fully emulsified.
Taste and adjust seasonings.

Friday, February 2, 2007

Roasted Celeriac And D'Anjou Pear Soup

Gnarled celeriac, golden winter pears, deep green and pristine white leeks, saucer shaped cipolini onions, fresh fragrant thyme. These were the character players which when combined, made up a stellar ensemble cast that gave a performance fit for an Oscar. (Okay, the Academy Awards are coming up and I admit to looking forward to watching every minute of them.)

Readily available during our winter months, celeriac and juicy D'Anjou pears, while an unseemly couple to the eye, are actually perfect for each other.

Roasted, sauteed and blended into a rustic soup, this will please the most discerning palate. Oh, how I do go on!

Plus, in deference to son Jeff and daughter-in-law Amy, who painted my living room and utility room for my birthday, it's vegan.

Give it a try, I think you'll like it.

Roasted Celeriac and D'Anjou Pear Soup
Christine's Original Recipe
Ingredients:
1 very large or several medium celeriac, peeled and cut into 1-inch pieces
3 cipollini onions, peeled and cut into chunks
3 large leeks, cleaned and coarsely chopped
3 D'Anjou pears, cored and cut into slices about 1/4-inch thick
1/2 teaspoon peeled and minced fresh ginger
1 teaspoon fresh thyme
1 cup dry white wine (I used a New Zealand Sauvignon Blanc)
1 quart Vita Soy Classic Original soy milk
Olive oil
Earth Balance Natural Margarine (trans-fat free, vegan)
Kosher salt and freshly ground black pepper*

Preparation:
Pre-heat oven to 375 degrees.
In a large roasting pan, combine the onions and celeriac pieces. Drizzle with olive oil and season with kosher salt and several grindings of pepper.
Cover with foil and roast for about 30 minutes. Remove the foil and continue roasting for another 15 minutes or until the vegetables attain a golden brown color and are slightly caramelized.
Remove the vegetables to a large pot.
Place the roasting pan on a stove top burner set on medium high heat and deglaze with 1/4 cup of the white wine, scraping up all the caramelized bits. Pour this into the pot.
In a saute pan, heat a small amount of olive oil and about 2 teaspoons of Earth Balance (not the whipped kind) over medium heat.
Add the chopped leeks and saute until soft. Don't allow them to brown.
Add the sliced pears, ginger and thyme and continue to saute until the pears are softened and the whole thing is wonderfully fragrant. Pour this into the pot.
Deglaze the saute pan with the remaining white wine and pour into the pot.
Turn the heat on under the now full pot to medium and bring the contents to a simmer.
As it heats up, it will thicken.
Slowly stir in the soy milk and bring the mixture back to a simmer. It will thicken as you do this. Keep on stirring so nothing sticks to the bottom of the pot.
Remove the pot from the heat and allow the soup to cool for about 20 minutes.
Using a blender, blend in small batches, leaving about a cup of the soup unblended to give it a rustic quality.
Adjust the seasonings if necessary and serve.

Cook's Notes:
* Freshly ground white peppercorns may be used instead of black pepper.
Butter, cream, and/or 1/2 and 1/2 may be used if preferred.
A light dusting of freshly grated nutmeg wouldn't hurt either.