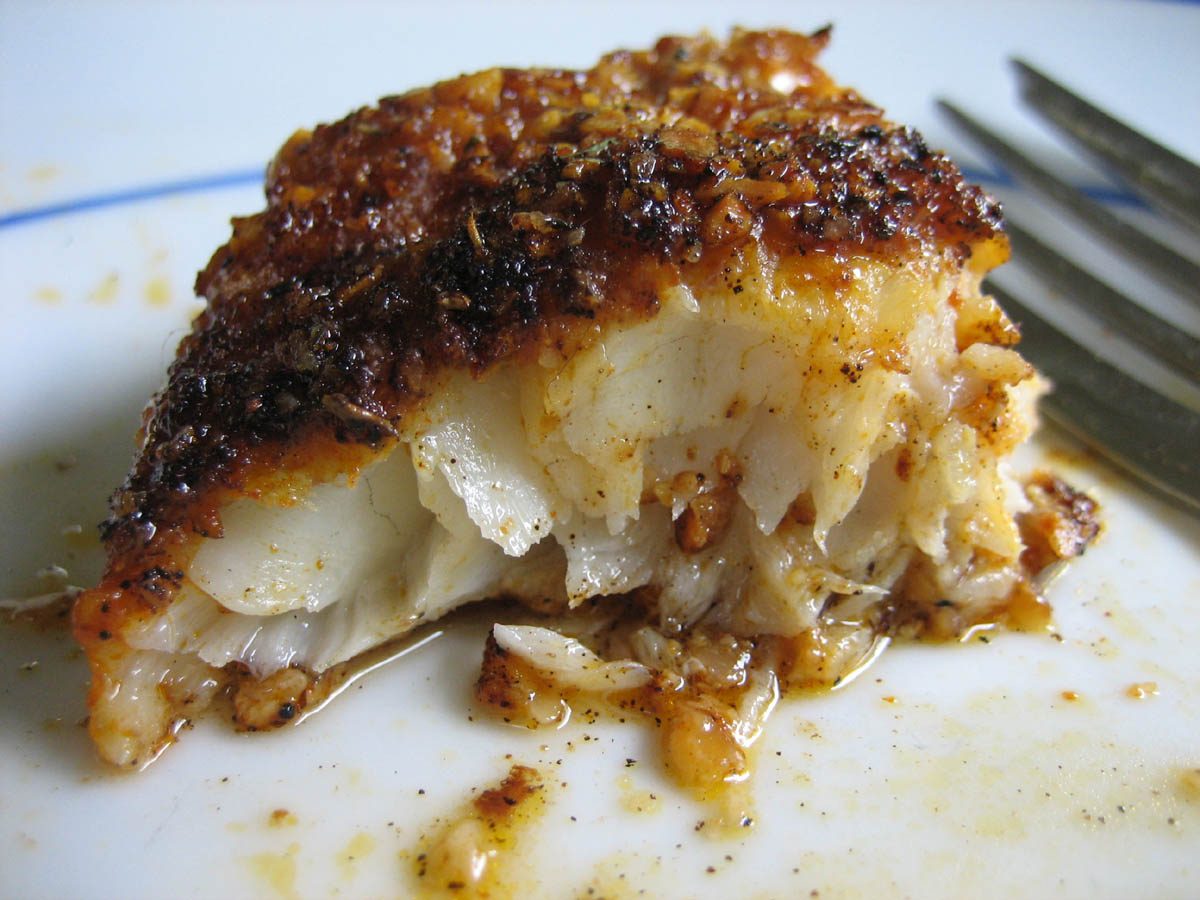
Fully intending to cook catfish for dinner last night, I'd set the frozen fillets on the counter to defrost as I left the house to do some grocery shopping. Life being what it sometimes is, I didn't get home until way after dark - not due to anything dire, just out in the "shopping zone" where one path can lead to another - and, needless to say, the fish didn't get cooked. Because even though we're both guilty of eating dinner as late as 10 PM, I couldn't bring myself to start cooking at 10:30 so back into the fridge they went. At noon today, there they were, all defrosted and ready to go and I'm sure unable to withstand another day uncooked. Thinking outside the "catfish is for dinner" box, I cooked them up for a quick, protein-rich lunch, guided by organic, dry-roasted, salt-free peanuts and George Stella's Blackening Spice. Yum. So very good and it took just 15 minutes to make. Spicy Peanut-encrusted Catfish Ingredients: 3 catfish fillets 1 cup dry-roasted, salt-free peanuts, chopped fine 2 tablespoons blackening spice 2 tablespoons olive oil or peanut oil 2 eggs, lightly beaten Preparation: Pre-heat oven to 400-degrees and have a baking sheet ready. Blot fillets with paper towels until thoroughly dry. Set aside. With a chef's knife, chop the peanuts until they're in very fine pieces. You could use a small food processor but I like to chop such a small amount with my knife, avoiding the possibility of turning them into peanut butter. Combine the chopped peanuts and the blackening spice and place on a flat plate. Pour the beaten eggs into a wide bowl. Heat a cast iron skillet to medium and add the oil. The oil should just shimmer in the pan, not smoke, or you could burn the peanuts (hmmm, how do I know that...?). Dip a fillet into the eggs to coat, then into the peanut mixture, coating both sides and pressing lightly to make the peanut pieces adhere. Repeat with the remaining fillets. Place in the hot skillet and, keeping them from crowding each other, saute for about 5 minutes on one side then flip and saute the other side for another 5 minutes. Remove fillets to a baking sheet and place in a 400 degree oven to finish - about 5 minutes more. The fish was warmly spicy with a delicious peanut crunch on the outside and meltingly tender and juicy on the inside. For a perfect low-carb meal, pair this with a tomato and cucumber salad for lunch and add a vegetable or two if you're making it for dinner. And for good measure, because herbs are used in the blackening spice (even though they're dried and not summer fresh as they should be this time of year), this will be my entry for Kalyn's Weekend Herb Blogging #39. Do pay a visit to her blog for delicious, beautifully photographed, low carb recipes, gardening delights, blogging information and informative writing.
Well, I promised a post about Clay's John Wayne Casserole so I made it this afternoon for our weekly Beach Night outing. Because of its rather unusual moniker, people who are lucky enough to partake want to know why it's called John Wayne Casserole. This evening was no different. And because this is Clay's recipe, I should let him tell the story, pretty much like he told our group tonight. "Many, many years ago, before I knew Christine, when I was living up here in my yurt, I was invited to a potluck gathering of friends. Now back then I really didn't have a clue what to bring to a potluck, so I just got out my cast iron pot and started layering in the foods that I liked to eat - mainly tortillas, beans, cheese, salsa and spinach. After I'd filled the pot, I put the lid on, carried it over to the gathering and stuck it at the edge of the fire they had going."Well, I got to talking to people, drinking a few beers and turning the pot every once in a while, then I kinda lost track of it in the crowd. Pretty soon it was time to eat and when I got up to where the food was being served, I saw that someone had thankfully taken my cast iron pot out of the fire and set it up with the rest of the food. To my surprise, there was just a spoonful left and people were exclaiming about how good it was and asking me what I called it. Well, I didn't know what I called it, but it being cooked in a cast iron pot over an open fire, it seemed like a cowboy kind of thing so I said John Wayne Casserole." Of such things are legends made. Clay has made his casserole many times since, receives accolades every time and is inevitably asked for the backstory, which he loves to tell. And even though I'm the one who had the time to put it together today, I had to ask him several times for instructions - which I'm sure pleased him no end. John Wayne Casserole Ingredients: 3 large corn tortillas 2 cans seasoned beans (drained), or refried beans 1 red onion, chopped fine 1 - 24 ounce jar of your favorite salsa (I used Pace Picante because that's what was on hand) 1 - 16 ounce jar of chipotle salsa (my addition, ditto Pace) 2 cups grated cheddar cheese 1 cup grated jack cheese 1 - 12 ounce bag fresh spinach meat from 1 cooked, boneless, skinless chicken breast, shredded
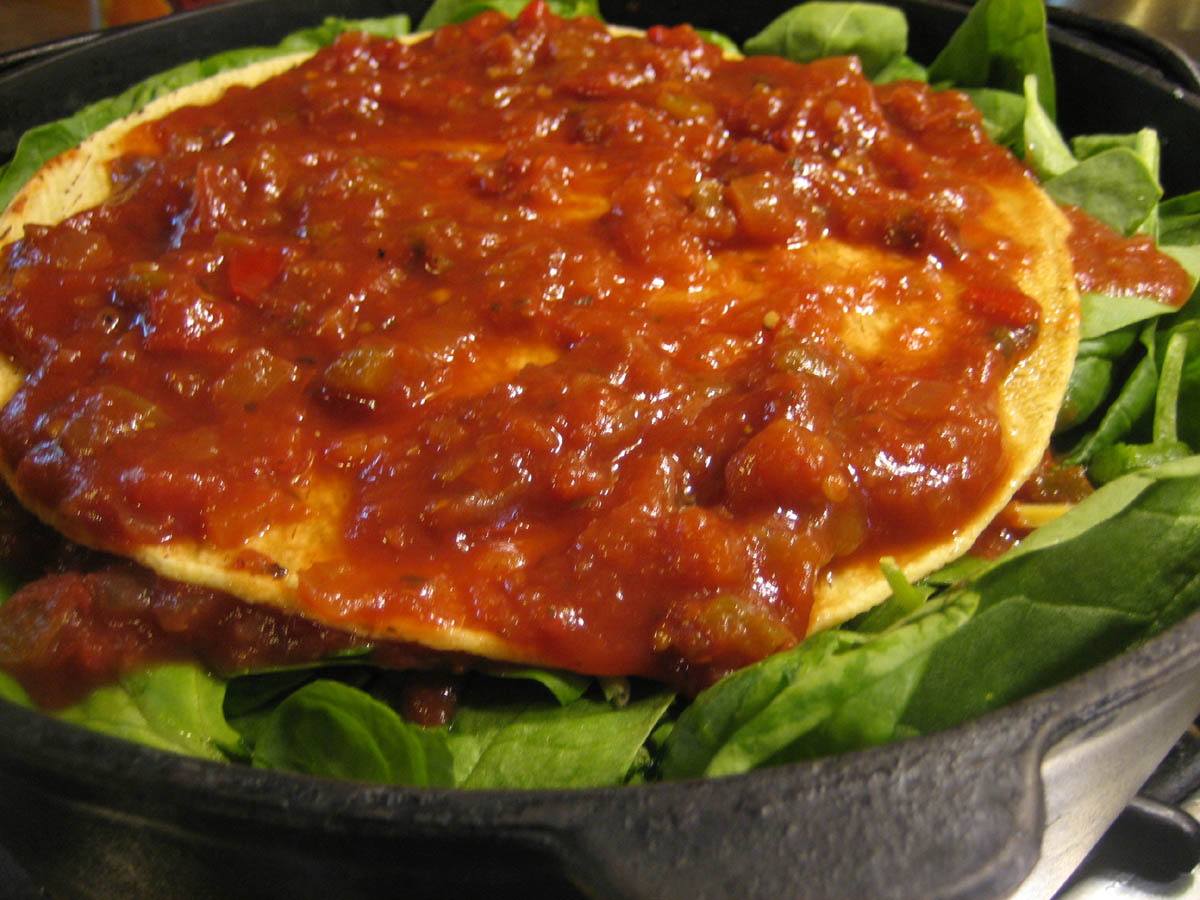
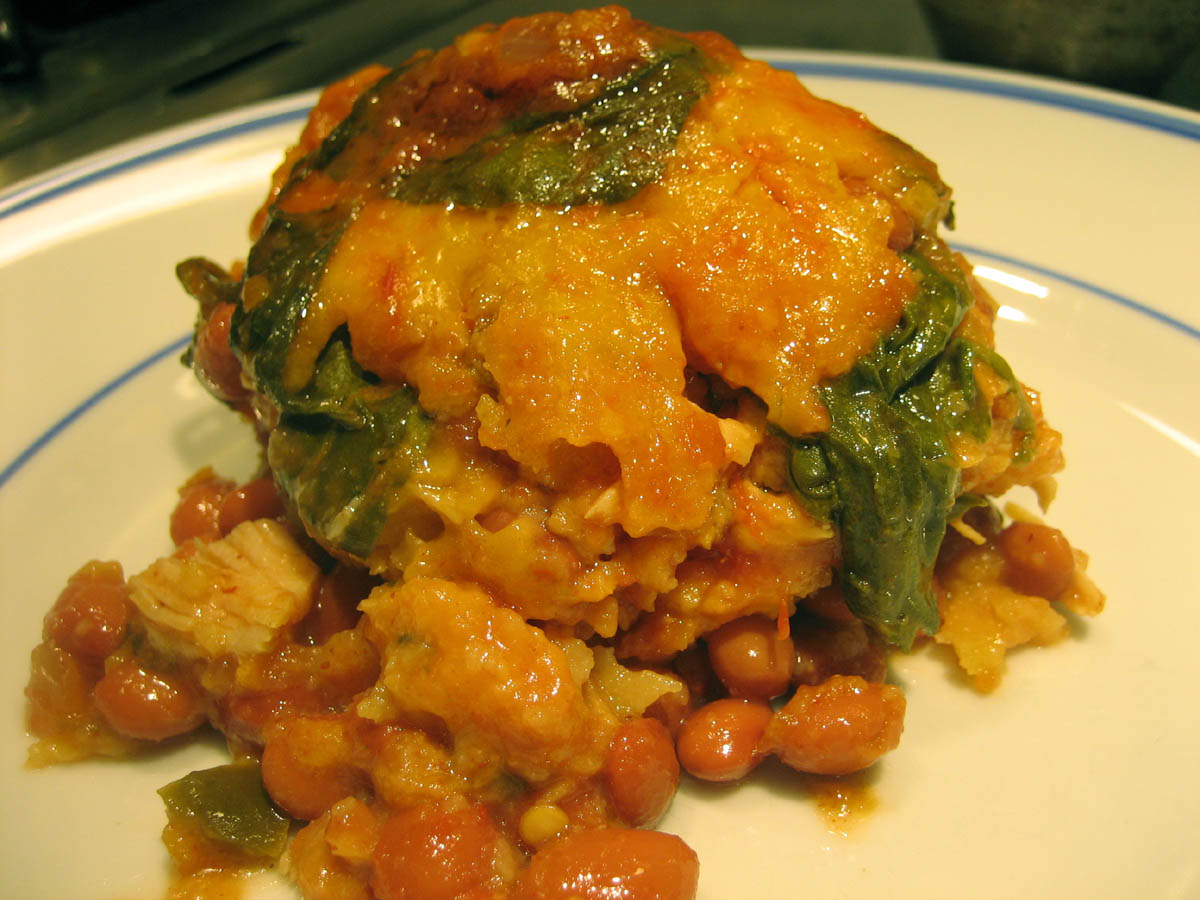
Preparation: In a cast iron Dutch oven, spread a layer of salsa over the bottom of the pot. Lay down one large corn tortilla, centering it in the pot. Pour all the beans from one can over the tortilla. Sprinkle 1/2 of the red onion over the beans, then 1/2 of the shredded chicken, then a cup of the cheddar cheese, then 1/2 of the spinach and some more salsa. Place another tortilla over all of this and press down to compress. Repeat this layering one more time, ending with a third tortilla on top of it all. The spinach will make it seem rather impossible to contain the whole thing in the pot, but, as you can see from the top photo, it will cook down.
To finish the layering, spread the chipotle salsa over the final tortilla, and top with the jack cheese. If you don't happen to have a campfire handy, with the lid on top (you could use foil if you don't have a lid), place the pot in a 400 degree oven for about 40 minutes or until it's hot and bubbly. If you do have a campfire (we're so lucky up here), place your lidded pot either directly in the hot coals or on a grill over hot coals and, turning it occasionally so it won't burn, cook as above.
You could, of course, take creative license and do all sorts of things to gussy-up this dish. But do keep in mind its rustic, cowboy-like beginnings, and don't stray too far from the herd.
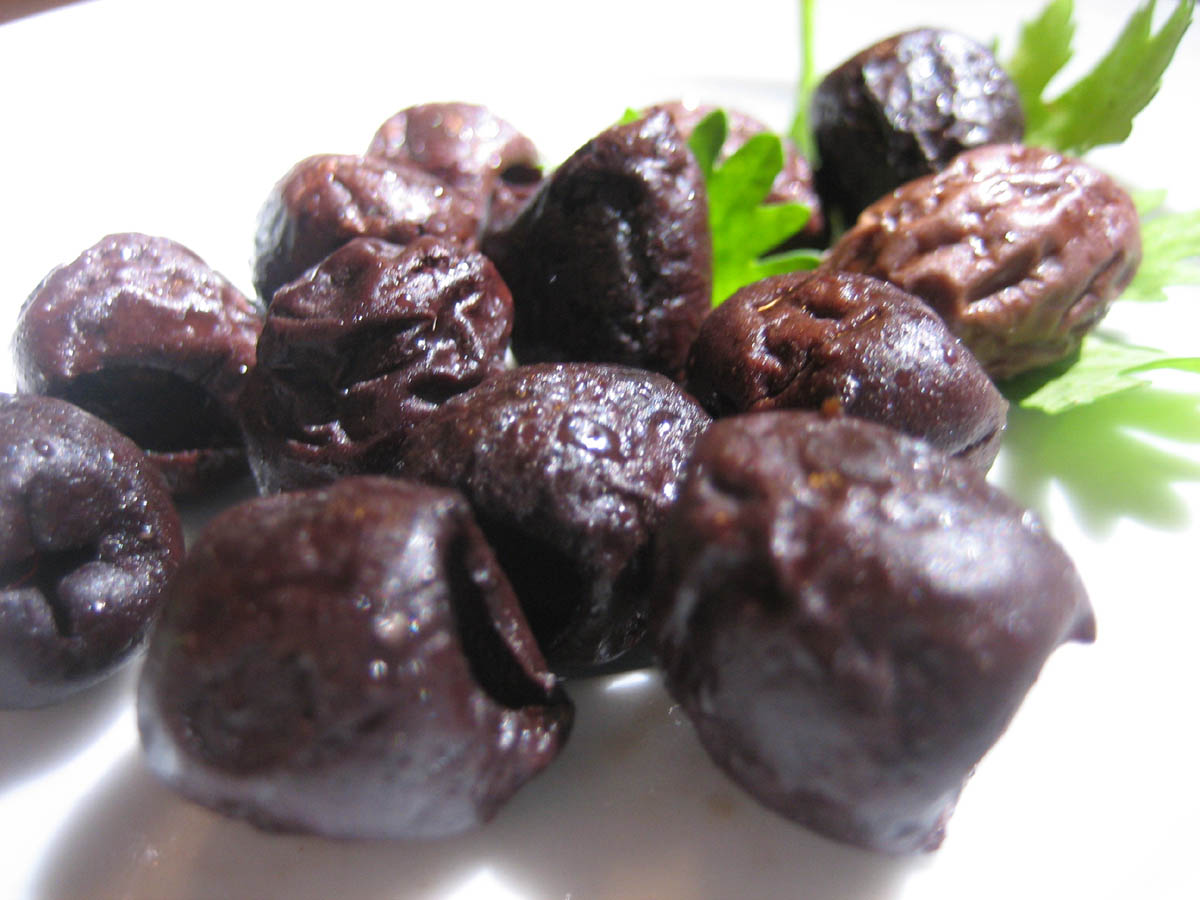
Sometimes I feel so out of the culinary mainstream I could cry. On our recent trip to the east coast I had my first taste ever of roasted kalamata olives. Damn they were good. Thinking I'd made a new discovery, I made myself a note to Google them when I returned home. In doing so I found that chefs have been roasting olives for quite some time. Michael Chiarello prepares Lucca-style roasted olives in a recipe from 2 years ago. Food and Wine Mag has one that goes back to 2003. There's a low carb recipe with feta cheese that dates to 2004. And here's another from What's Cooking America dot Com. Where have I been, under a rock?
When we arrived home from our trip, I didn't do the Googling right away. Instead, Ms. Smarty-pants put some kalamata and nicoise olives on a baking sheet and placed them in a 400 degree oven for about 45 minutes, stirring occasionally until they seemed to be the "right" consistency. Which was fairly dry and crinkled, like one of those dogs that have impossibly wrinkled faces. Despite their appearance, they were quite delicious - dry with very concentrated salt - and were eagerly consumed at our last beach night. Now that I've got that out of my system, I'll give those other recipes a try. Anyone heard of roasting olives so dry that you can grind them to a powder? If you have, I'd like to know.
Well, this worked out nicely. Yesterday I made a dressing/marinade/sauce that I brushed on some boneless chicken breasts that had been stuffed with feta cheese. Now I'm going to tell you what really happened.
The chicken breasts were originally stuffed with Cypress Grove chevre , one of my all time favorite goat cheeses which has the added distinction of being made here in Humboldt county, and which had been mixed with finely chopped cinnamon basil and equally finely chopped leaves from my curry plant. My nose led me to believe that these ingredients would all blend very well with one another, thus making a delicious cheese stuffing for the breasts.
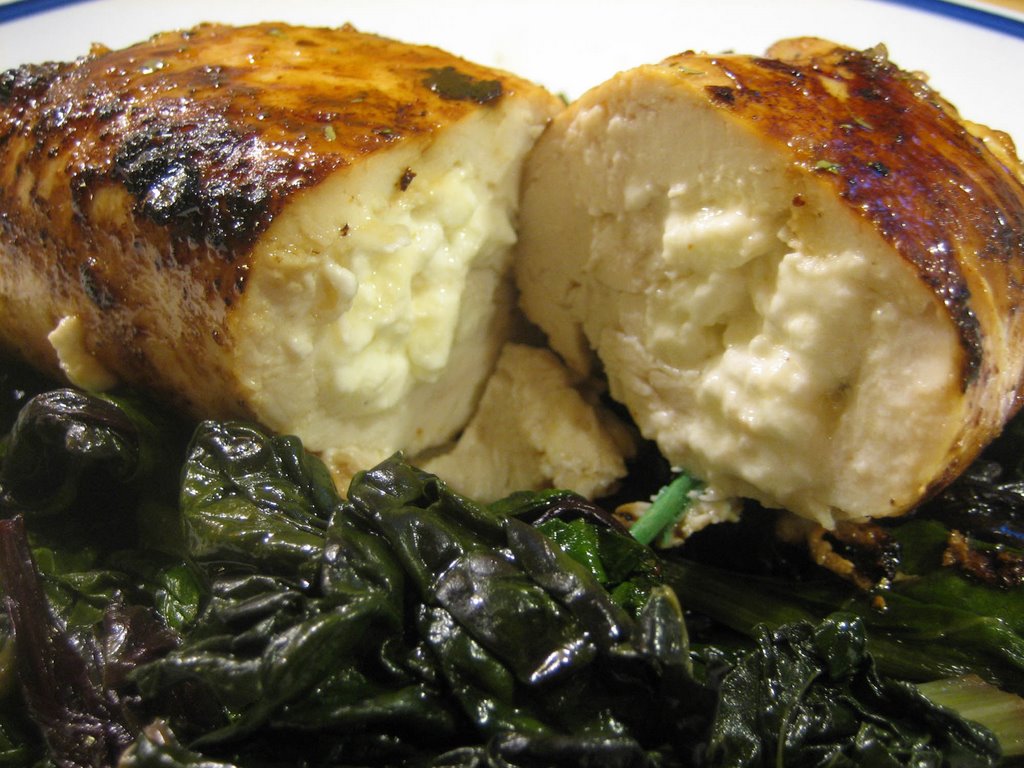
That was before I tasted a bit of the leftover chevre/herb mixture and after I had already stuffed and rolled the chicken breasts. Something wasn't quite right. I kept on tidying up the kitchen anyway, glancing at the rolled breasts now and then. Was I hoping they would speak to me? Evidently they did, because on tasting the chevre mixture again, there it was: a rather astringent, metallic flavor that was decidedly off-putting. Tasting one more time did the trick. I unrolled the breasts, extracted the chevre filling and, with reverent apologies to Cypress Grove, dumped the mixture into the compost. A search through the fridge found some crumbled feta cheese. Stuffing as much feta into each breast as I could, I re-rolled and secured them with toothpicks. Whew! Dinner saved. Feta Cheese Stuffed Chicken Breasts Preparation: Pound 2 boneless, skinless chicken breasts to a uniform 1/4-inch thickness. At the rounded end, place a log-shaped mound of crumbled feta cheese across the breast, leaving 1/2 inch on either side. Roll the chicken breast up, tucking in the sides so the cheese cannot escape. Secure each roll with one or two toothpicks.
Brush each rolled chicken breast with this Spicy Asian Sauce, rolling them to coat completely. Refrigerate, covered, for 1 to 2 hours. Place a cast iron skillet over medium-high heat, adding 1 tablespoon olive oil and 1 teaspoon butter. When the pan is hot, add the chicken rolls and sear on all sides until golden brown. Remove from heat and place in a 400 degree oven for about 12 minutes, or until cooked through. Plate on a bed of braised garden greens and drizzle a bit more sauce over each breast.
To prepare the greens, first heat 3 tablespoons good olive oil in a small sauce pan and add 2 finely chopped garlic cloves. When the garlic is just golden, add 1/4 teaspoon red pepper flakes, remove from heat and set aside.
Wash thoroughly a rather large amount (2 arms full?) of greens such as kale, chard, beet greens, etc. and place in a large pot over medium heat, leaving some water on the leaves to aid in the cooking process. When the greens are just wilted, add the garlic-red pepper oil and toss thoroughly. Season with coarse kosher salt to taste.
Cook's Notes: The rolled chicken breasts needed no dipping in egg or breading or flour, making this a great dish for low-carbers. The sauce gives a tasty caramelized coating to the meat and the feta cheese becomes meltingly smooth without running all over the place. Nice.
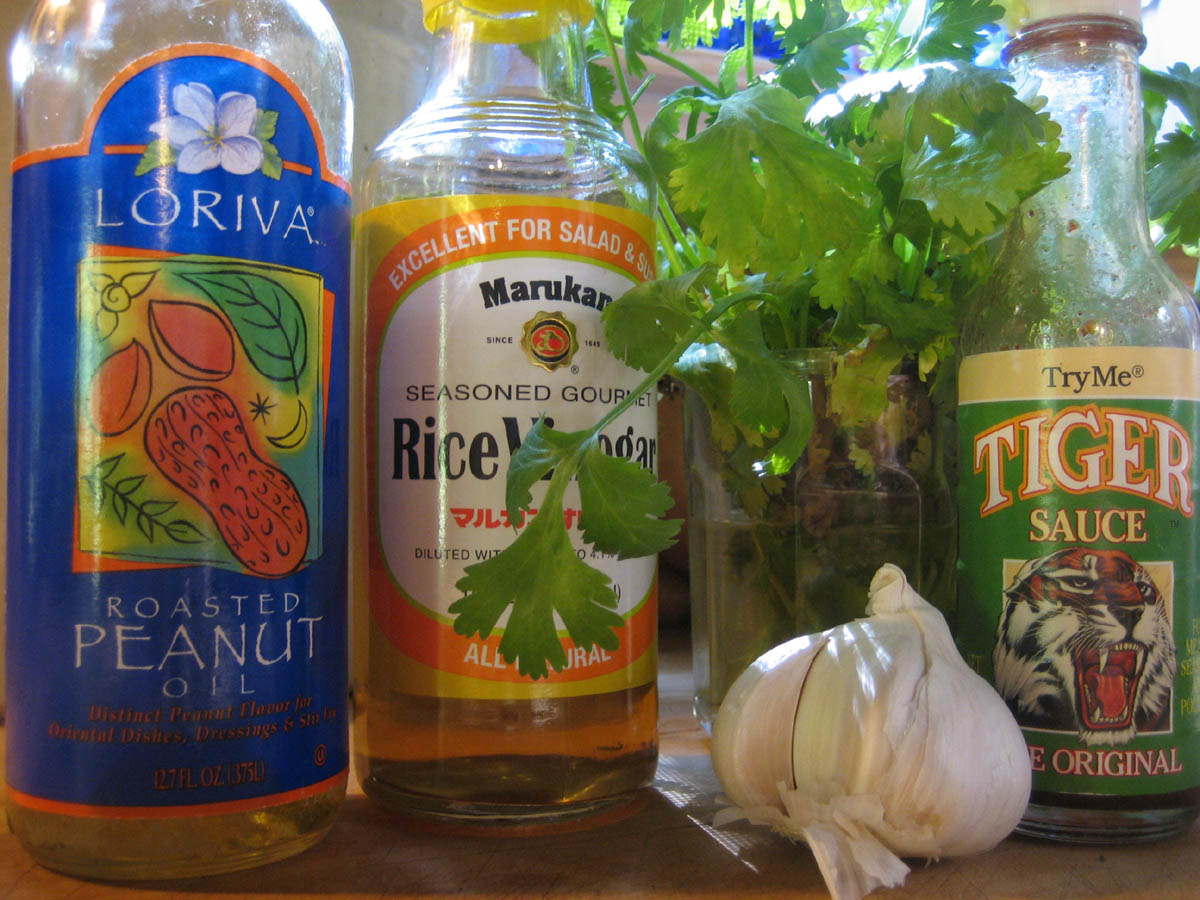
I've always liked the spicy dressing that's served with the cole slaw at one of our local eateries, Kahish's Catch Cafe. It's an oil and vinegar concoction with lots of spice and a slightly Asian flavor. The only downside to this dressing is that it's very sweet. Cloyingly so.
I love Kahish's grilled chicken thighs on a bed of spicy slaw all stuffed into a pita pocket. But after tasting all that sugar yet again, I decided to try to approximate the flavors at home leaving most of the sugar behind. Here's my first attempt. It's not half bad for a simple, uncomplicated dressing that could also be a sauce or a marinade.
Today I've brushed it on feta-stuffed chicken breasts that are now marinating in the fridge for tonight's dinner. My other suggestions are: Make a slaw with shredded purple and green cabbages, shredded carrots and radishes and toss with enough dressing to coat; make deviled eggs and use this sauce (judiciously) instead of mayonnaise - something I'll try in the next few days; use as a marinade for prawns (shells left intact) then grill. There are lot's of possibilities. If the stuffed chicken rolls turn out like I think they will, I'll post them here tomorrow.
Directions: Peel the garlic and chop fine. Sprinkle a few grains of coarse salt over and, using the side of a chef's knife, mash the garlic into a paste. Transfer to a glass measuring cup, add the vinegar, tiger sauce and cilantro and whisk until combined. Whisk in the peanut oil until just combined. You don't want this to be completely emulsified. Adjust the flavors if needed and enjoy.
Do you ever crave chicken enchiladas but always think about it too late in the day to make for dinner that night? It being somewhat labor-intensive and all? I do.
Don't dispair. Instead of stuffing and rolling each tortilla, try this easy, breezy Chicken Enchilada Casserole instead. Inspired by Clay's "John Wayne Casserole" (now there'sanother post) and a recipe my niece, Janice, sent me, this dish is easily assembled and baked in about 1 1/2 hours. Experiment with different kinds of cheeses, including lower fat, and/or add exotic left-overs to the layers. Any way you put this together, it will be delicious. Chicken Enchilada Casserole Christine's original recipeIngredients:4 boneless, skinless chicken breasts - tenders removed for another use 2 large cans good enchilada sauce. Find one that's light on the sodium 2-3 cups shredded cheddar cheese, reduced fat if desired 2-3 cups shredded jack cheese, reduced fat if desired 2 small cans chopped olives, drained 1 large can diced green chilies, drained 2 cans seasoned small brown beans, such as S and W Pinquitos, drained 1 package large, whole wheat, low carb tortillas -or- 1 package large corn tortillas
Pre-Assembly:Place chicken breasts in a single layer in a covered glass casserole dish and microwave on high for 5 minutes. Turn the pieces over and microwave another 4 minutes until cooked through. Remove to a plate to allow to cool slightly then shred or cut into bite-sized pieces. Meanwhile, grate the cheeses and set aside, separately. Remove lids from all the cans and drain any that need draining.
Assembly:Cover the bottom of a large roasting pan with a layer of sauce. Place tortillas over the top of the sauce, covering the entire bottom of the pan, cutting in half to fit if needed. Pour a thin layer of sauce over the top of the tortillas. Begin layering, starting with the beans, then chicken, olives, chilies and cheddar cheese, topped by another layer of tortillas and a thin layer of sauce. Repeat 2 more times, ending with a layer of tortillas, the remainder of the sauce and a thick layer of jack cheese.
Cover with foil and bake in a 375 oven for about 35 minutes or until the cheese has melted and the casserole is hot and bubbling. Remove the foil and bake an additional 5 minutes. Remove from oven and allow to cool 5-7 minutes before cutting.
Serve with your favorite grilled veggies (zucchini, in this photo) and/or a large green salad.
After being delayed a day due to thunder storms in Denver, we finally arrived home Monday morning, tired but very happy to be here. In our absence the garden grew into a jungle of huge proportion and the "lawn", for lack of a better word, now looks like a prairie in full bloom. It's beautiful but hard to walk through without getting totally wet from the grasses that are now mid-thigh high. I'll be showing garden photos here soon.
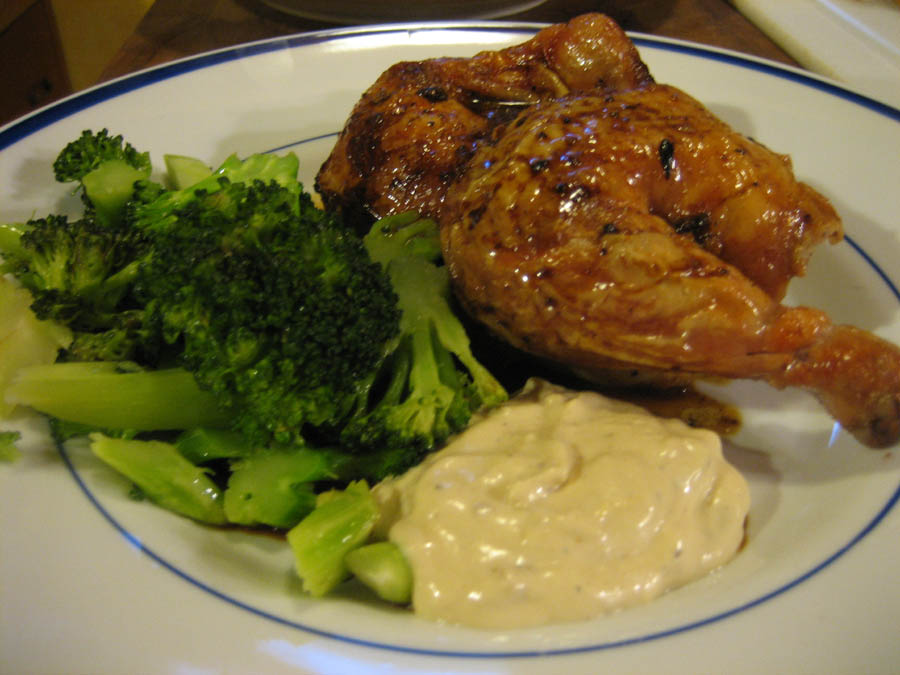
For now, here's an offering straight out of the June 2006 issue of Gourmet Magazine. Please click on the link for the recipe. I put this together in less than an hour last night. It's rustic and simple. Just the way a tired cook likes it. The aioli is a treat in and of itself and could be used in a number of other ways, such as a dip for fresh veggies or a sauce for grilled fish. I recommend rubbing the hens with olive oil before seasoning them and placing them in the oven. I also squeezed fresh lemon juice over them after they'd been roasting about 5 minutes. This added a nice flavor to the birds and complemented the aioli. A saute of fresh broccoli rounded out the meal.
Please forgive my horrible photo - I'm still recovering from airplane-itis (I really hate flying) and my balance is a bit off. The roasted hen really is bigger than the seemingly huge mound of aioli.

 Fully intending to cook catfish for dinner last night, I'd set the frozen fillets on the counter to defrost as I left the house to do some grocery shopping. Life being what it sometimes is, I didn't get home until way after dark - not due to anything dire, just out in the "shopping zone" where one path can lead to another - and, needless to say, the fish didn't get cooked. Because even though we're both guilty of eating dinner as late as 10 PM, I couldn't bring myself to start cooking at 10:30 so back into the fridge they went.
 Spicy Peanut-encrusted Catfish
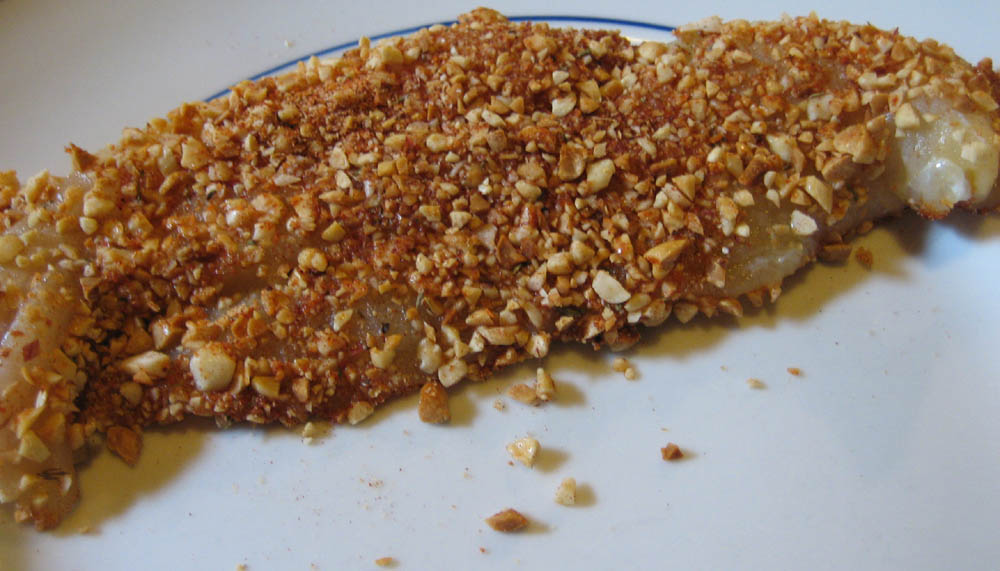 Dip a fillet into the eggs to coat, then into the peanut mixture, coating both sides and pressing lightly to make the peanut pieces adhere. Repeat with the remaining fillets.
 Place in the hot skillet and, keeping them from crowding each other, saute for about 5 minutes on one side then flip and saute the other side for another 5 minutes.
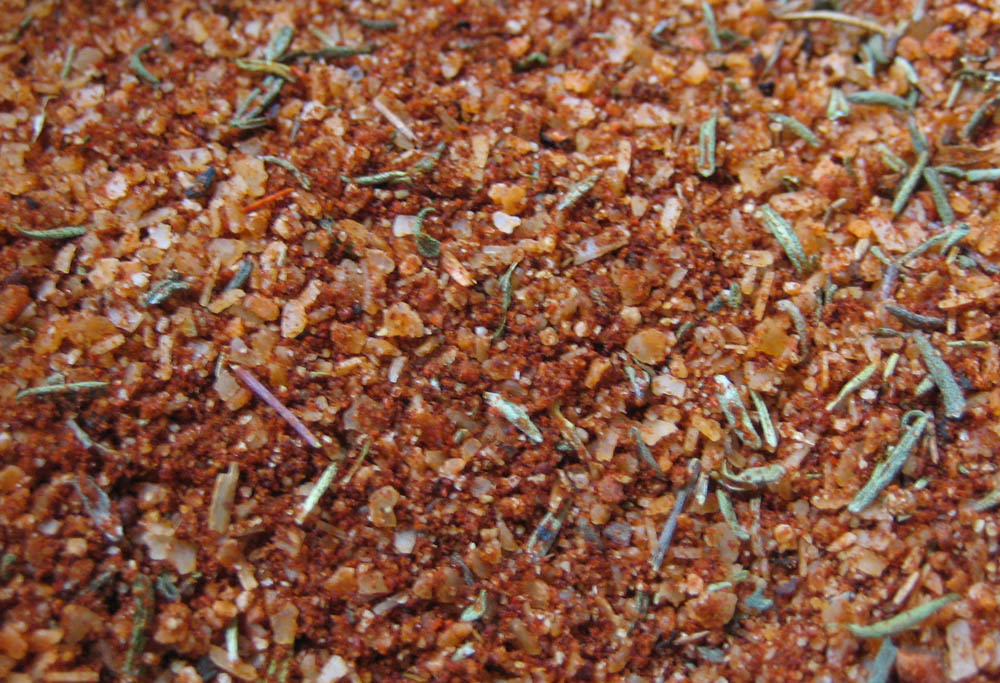 And for good measure, because herbs are used in the blackening spice (even though they're dried and not summer fresh as they should be this time of year), this will be my entry for Kalyn's Weekend Herb Blogging #39. Do pay a visit to her blog for delicious, beautifully photographed, low carb recipes, gardening delights, blogging information and informative writing.


